In this help article I’m going to quickly explain the best way to print a calendar from Overture. This method is the same whether you are an Artist, Booking Agent or Artist Manager.
The first thing to bear in mind is that printing directly from the Overture app isn’t going to work very well, the Overture calendar is not designed for printing it’s designed for on screen use. You will therefore need a separate calendar app to add the Overture feed into.
This is preferable anyway because your artists may already use a calendar and it allows them to keep with the software that they are familiar with.
Grab the .ics feed link from Overture
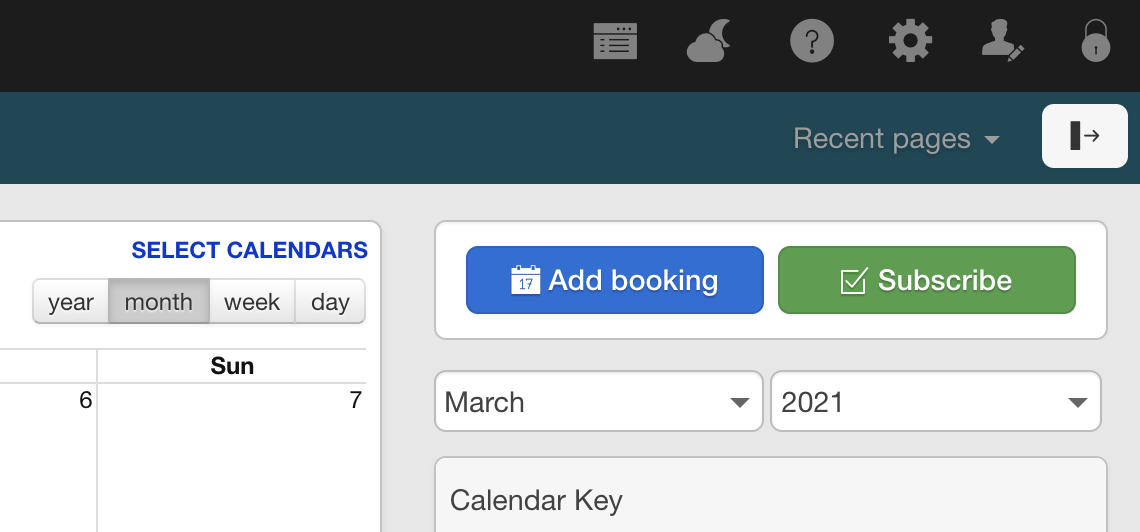
Step 1 is to find the .ics feed link in Overture and copy it. The way you do this will depend on the type of account you have. Generally this is obtained from the Calendar screen in Overture with the green Subscribe button.
Please remember to ALWAYS ask your artists to log into their External Overture account to get the feed themselves so that the feed does not contain any information that you don’t want them to view.
Before you click the button remember to decide which Statuses you would like to appear in the feed because you can add or remove them if you don’t want to see certain bookings.
When you click the subscribe button you will be able to grab the feed link.
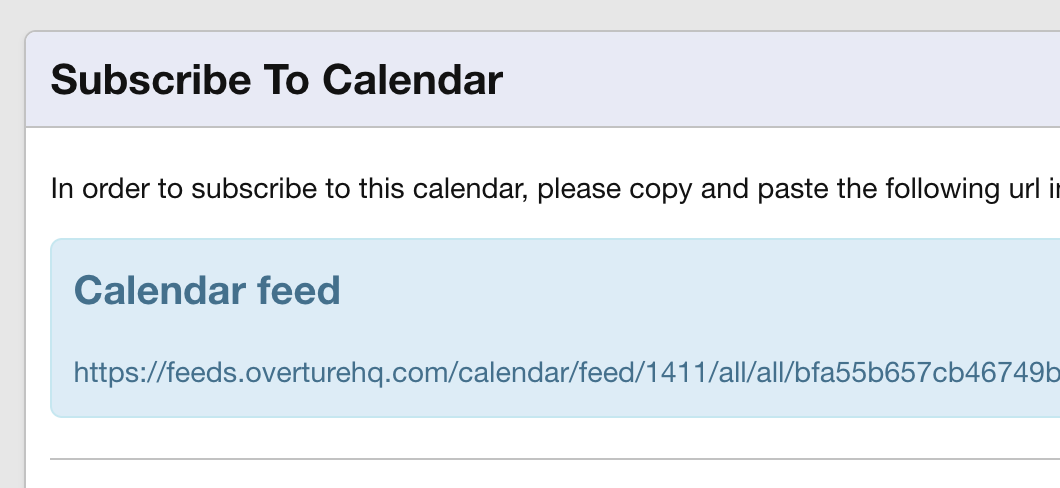
For any Calendar other than Google grab the link in the blue box.
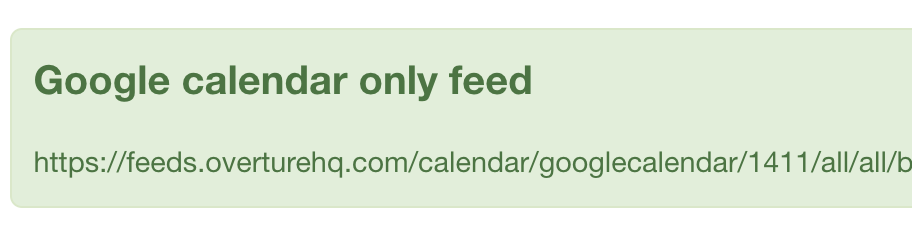
For Google because it tries to change timezones depending on where you are grab the link in the green box. This isn’t always 100% correct and you need to make sure that all the timezones match up and that in Google you sometimes need to tell it to ignore the timezone of this calendar.
One you have the feed head over to your chosen calendar app.
In this example I’m using Apple Calendar but the setup is the same for all calendars you are looking to ‘import a feed’ or ‘subscribe to a feed’.
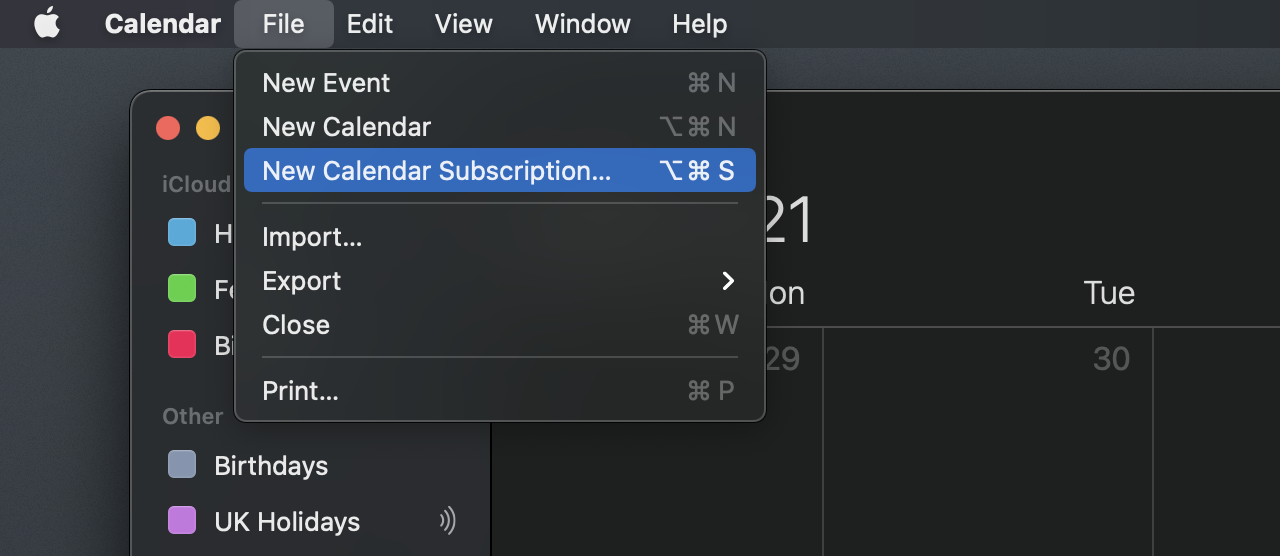
For Apple Calendar I click File > New Calendar Subscription
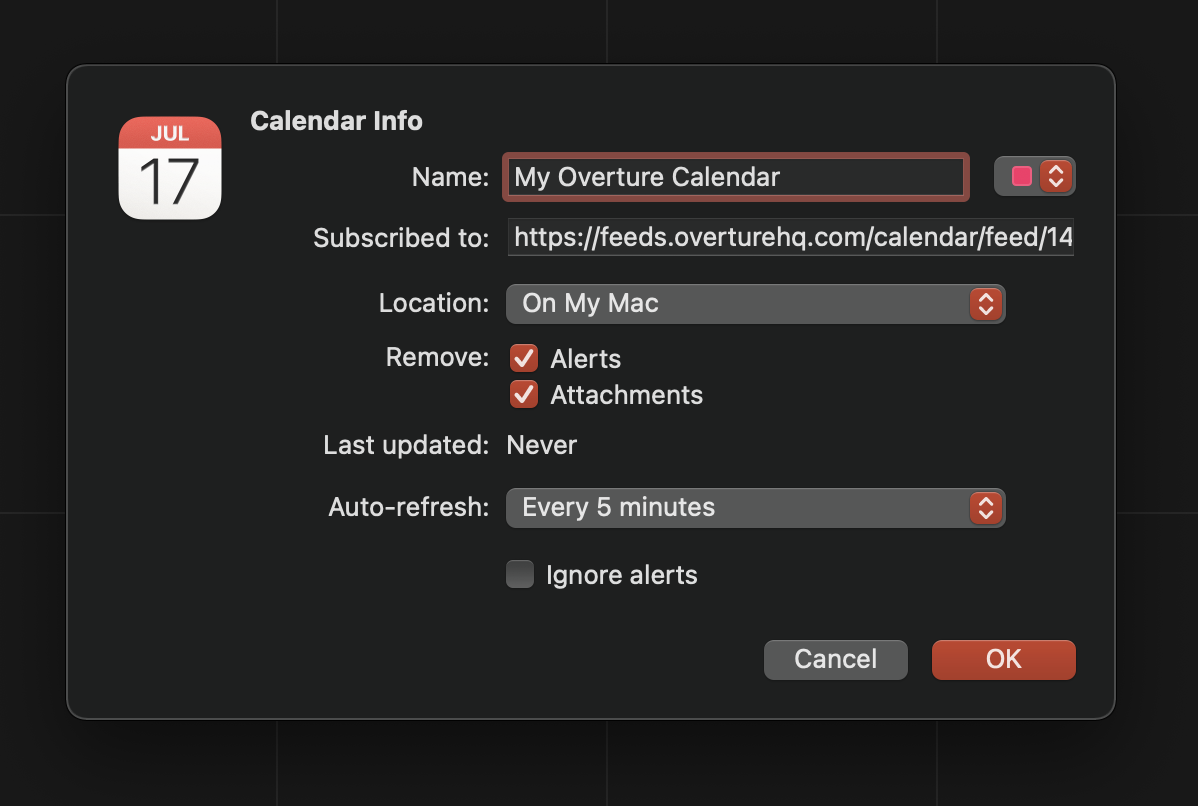
I then paste the feed link I copied from Overture. I can choose a name for my calendar and decide if I want it to post to icloud (useful if you want to share it on all your devices) and then most importantly choose to refresh every 5/15 minutes or every hour it’s up to you but this is a nice feature because it keeps the calendar up to date.
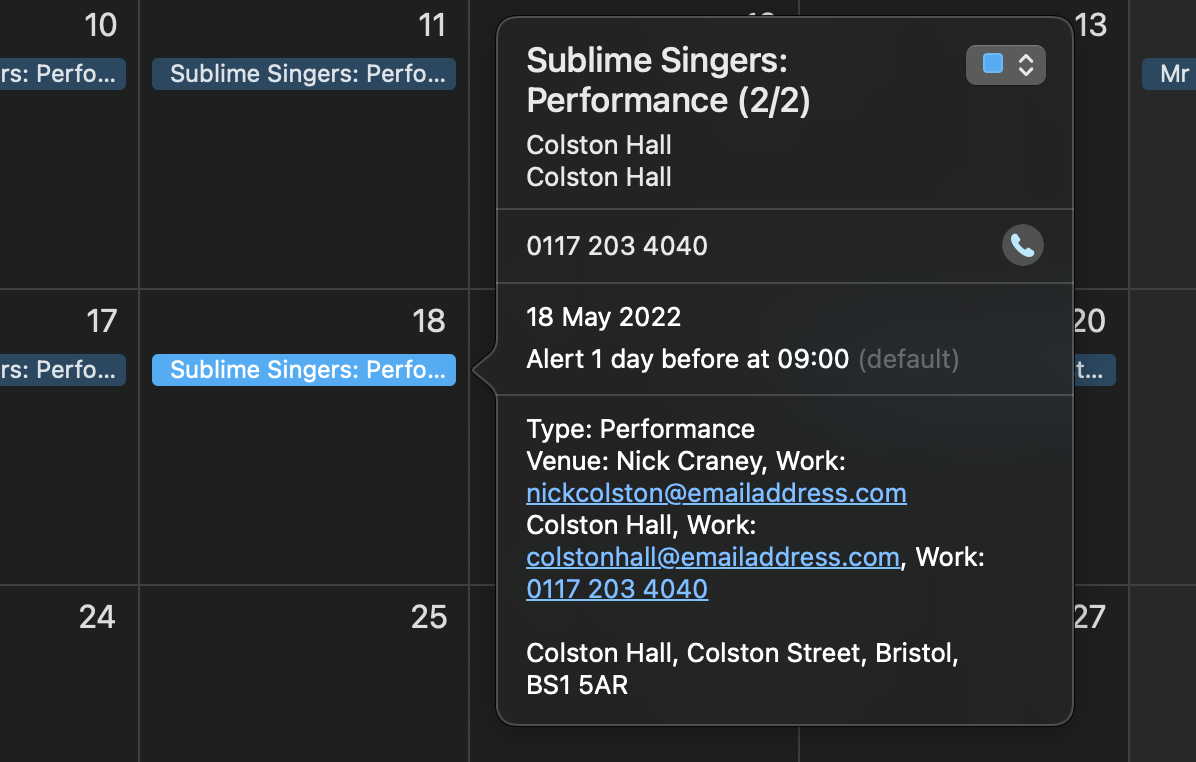
Now you can see all the bookings and events populating from Overture in your calendar. You can click on them and see all of the information on these events is also present.
Printing the calendar
Now you are ready to print. Head up to the menu in the top and click File > Print. This provides you with a nice window where you can choose the settings, for example the number of months.
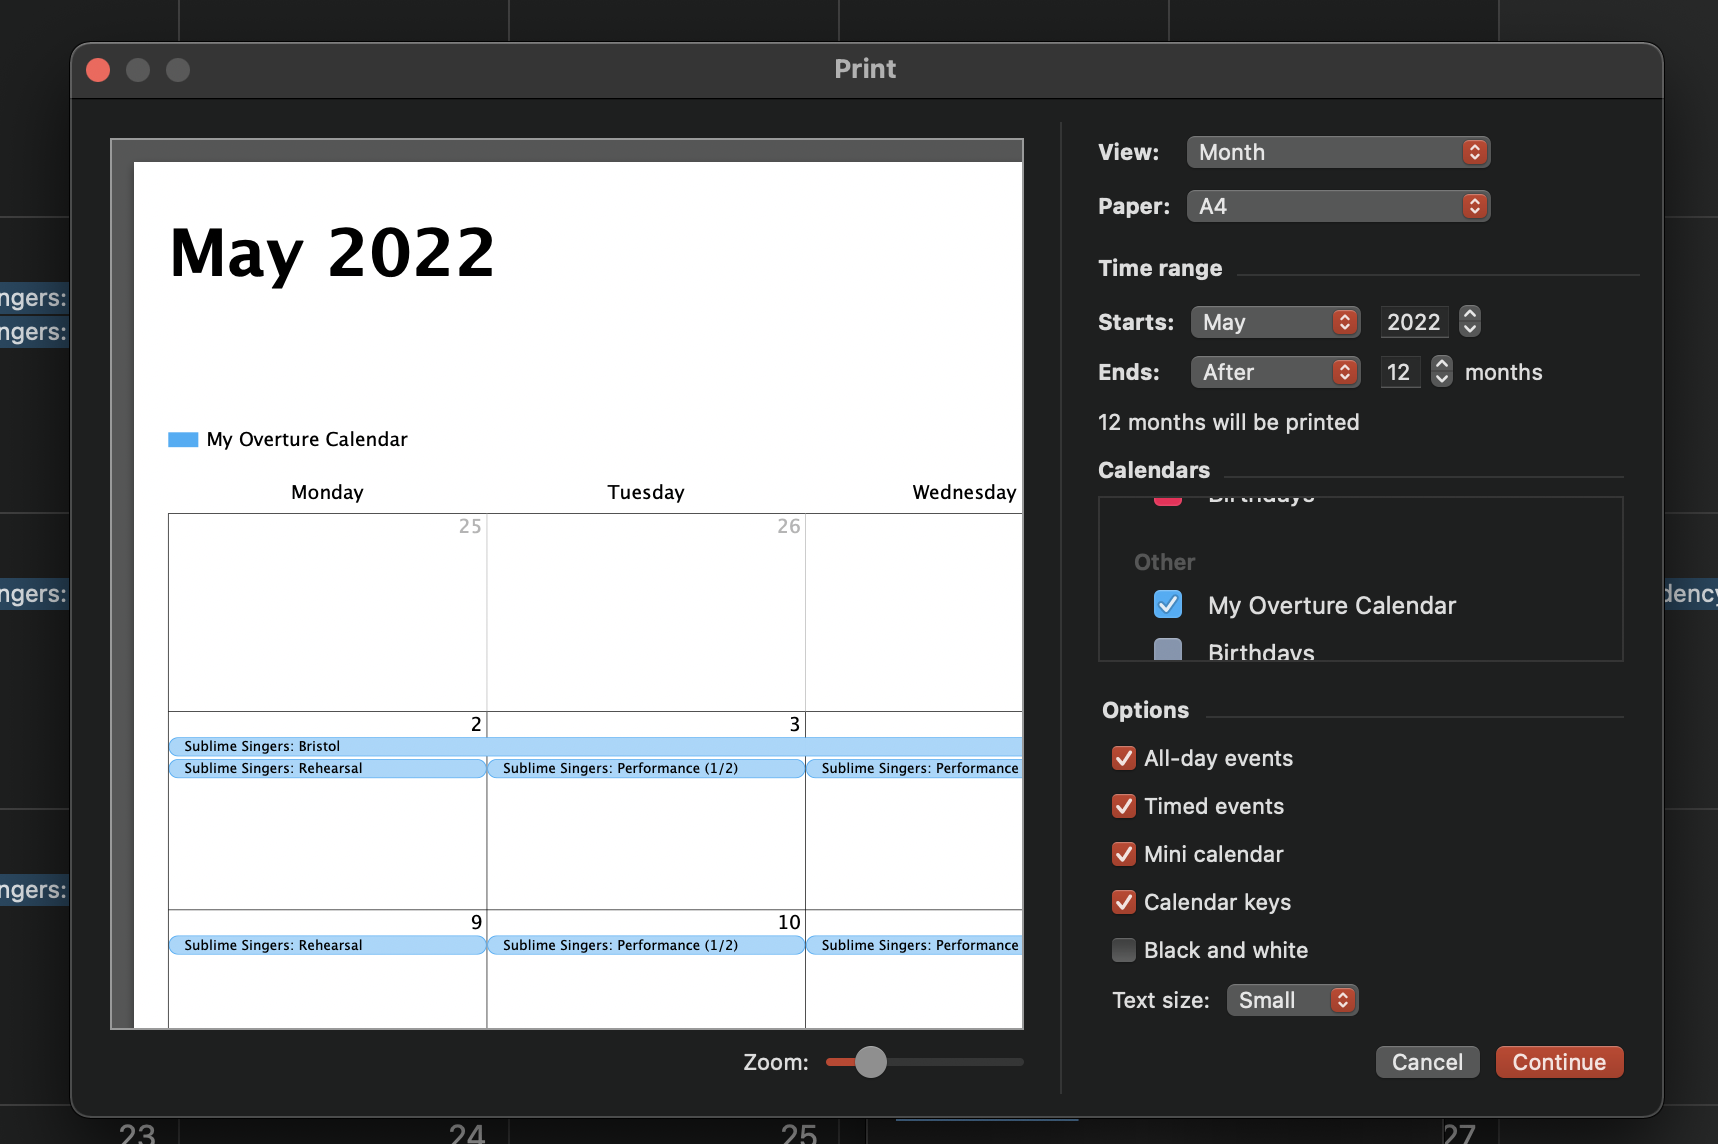
Click continue and you will print out the calendar according to the settings you have chosen.
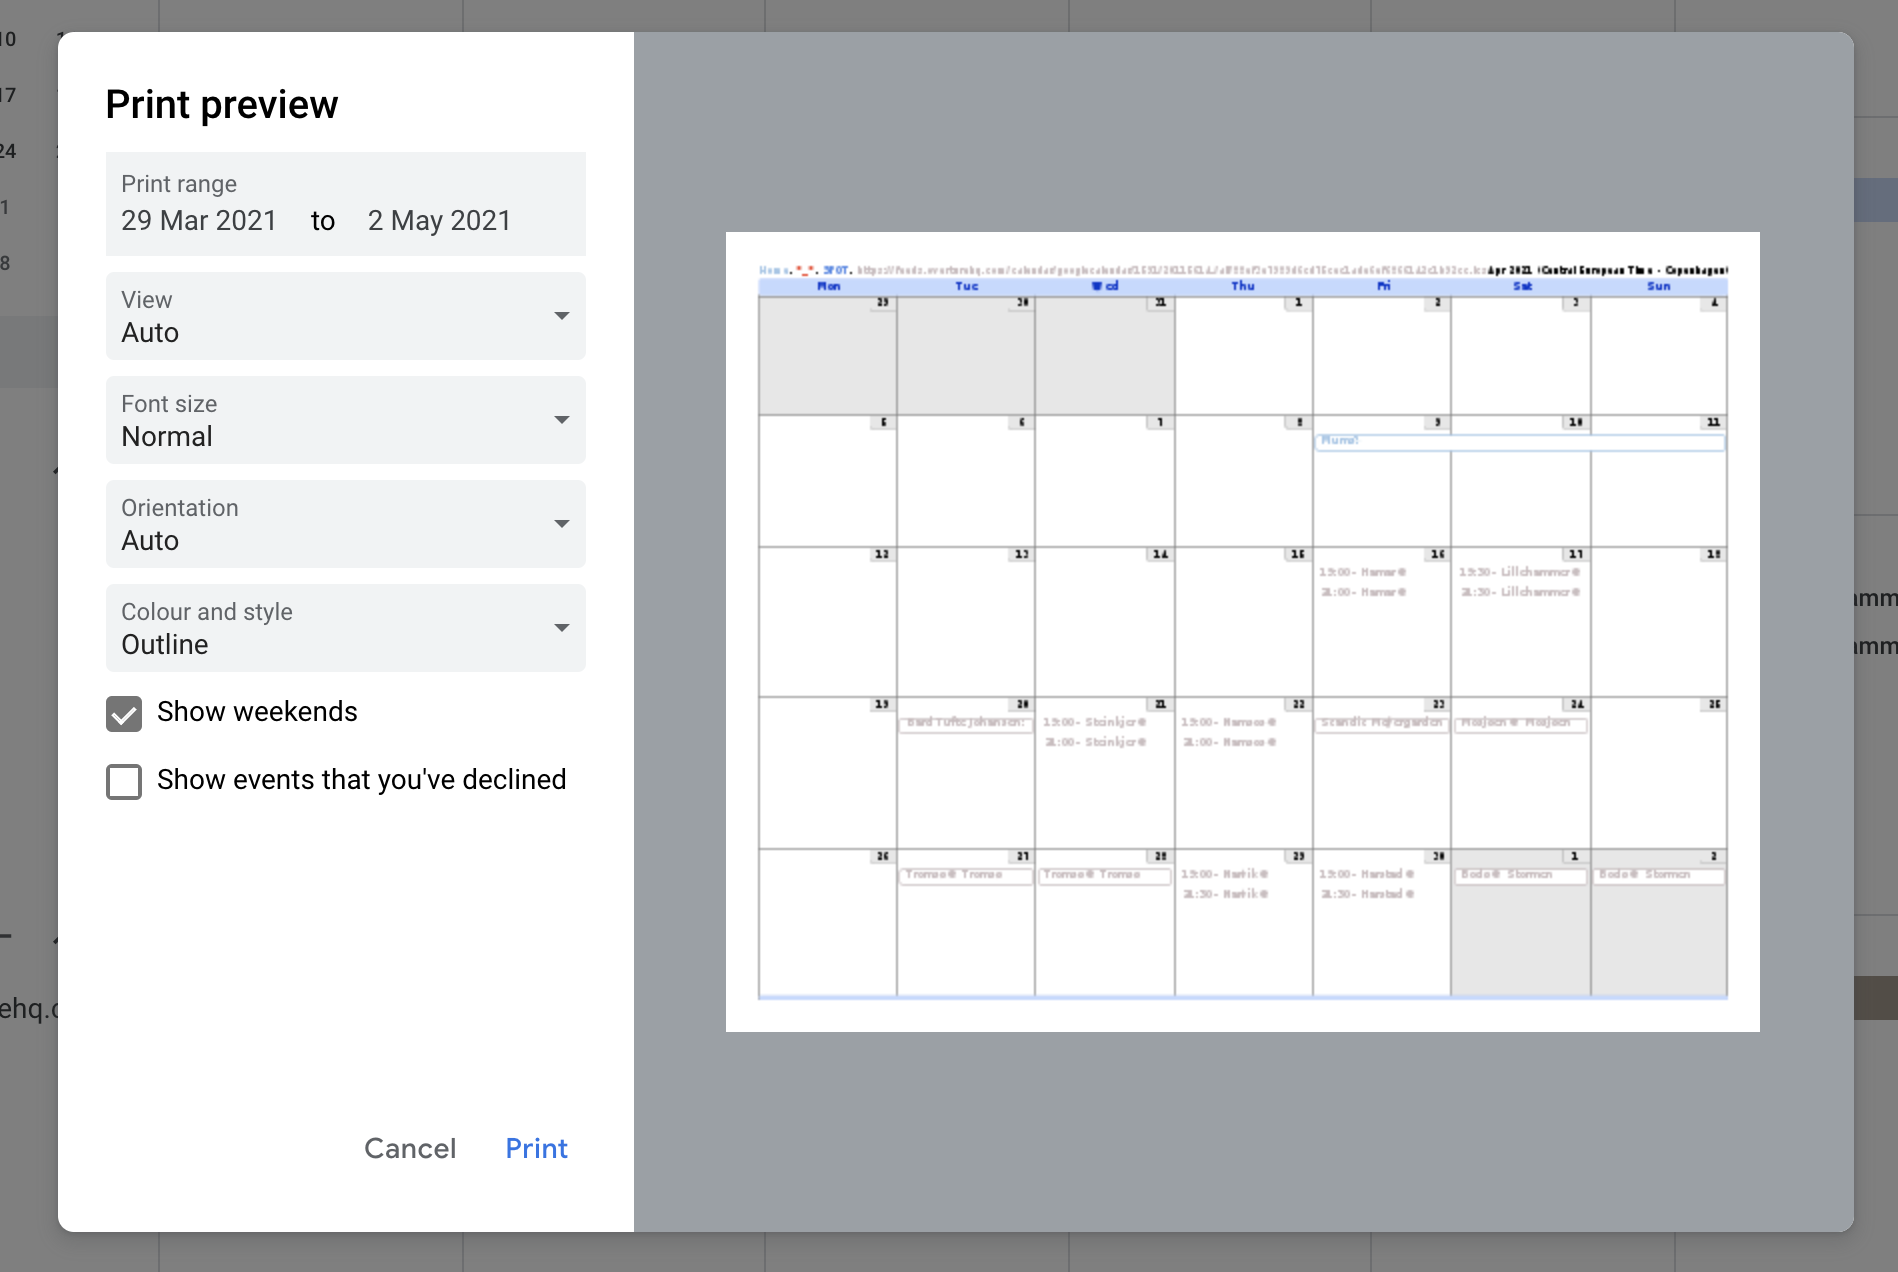
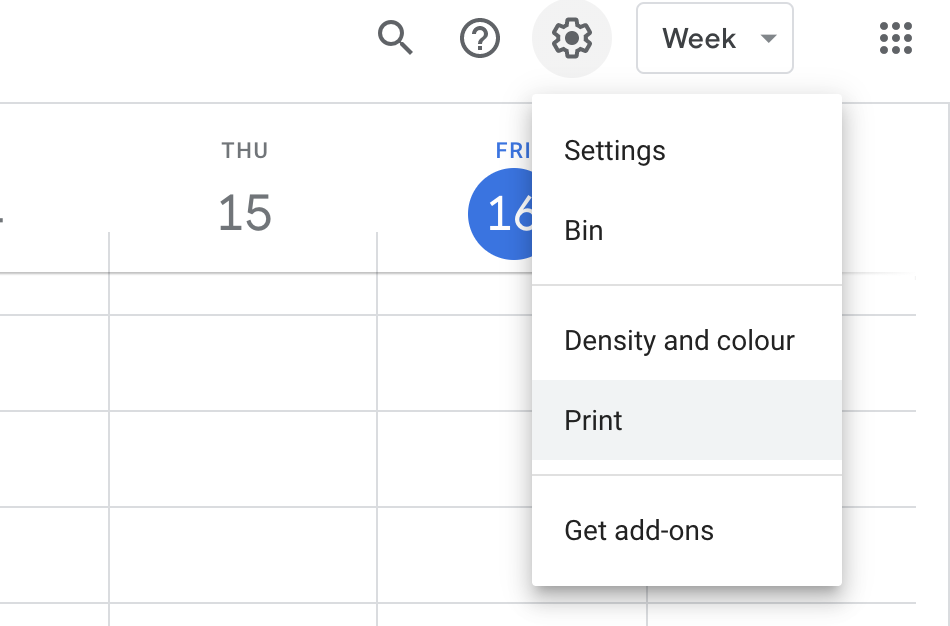
For Google the steps are pretty much the same. You can select the print option from the Settings Cog menu item.
Then you can choose the options for the date range that you want to print out.