Collaborating with external users, such as artists or managers, is simple in Overture. This guide will walk you through the steps to add an external user to your Overture account while ensuring they have the appropriate permissions.
Step 1: Create a Person Contact Record
If the person you are wanting to create an external login for is not yet a contact in your Overture address booking, please go ahead and add them as a new ‘person’ contact. If you’re not sure how to do this, here is a comprehensive guide on adding contacts. See ‘Adding a Person’:
Step 2: Add an External User
Once you have a person contact record for the external user, you can proceed to add them to your Overture account by following these steps:
- Click on the Settings tab in the navigation menu.
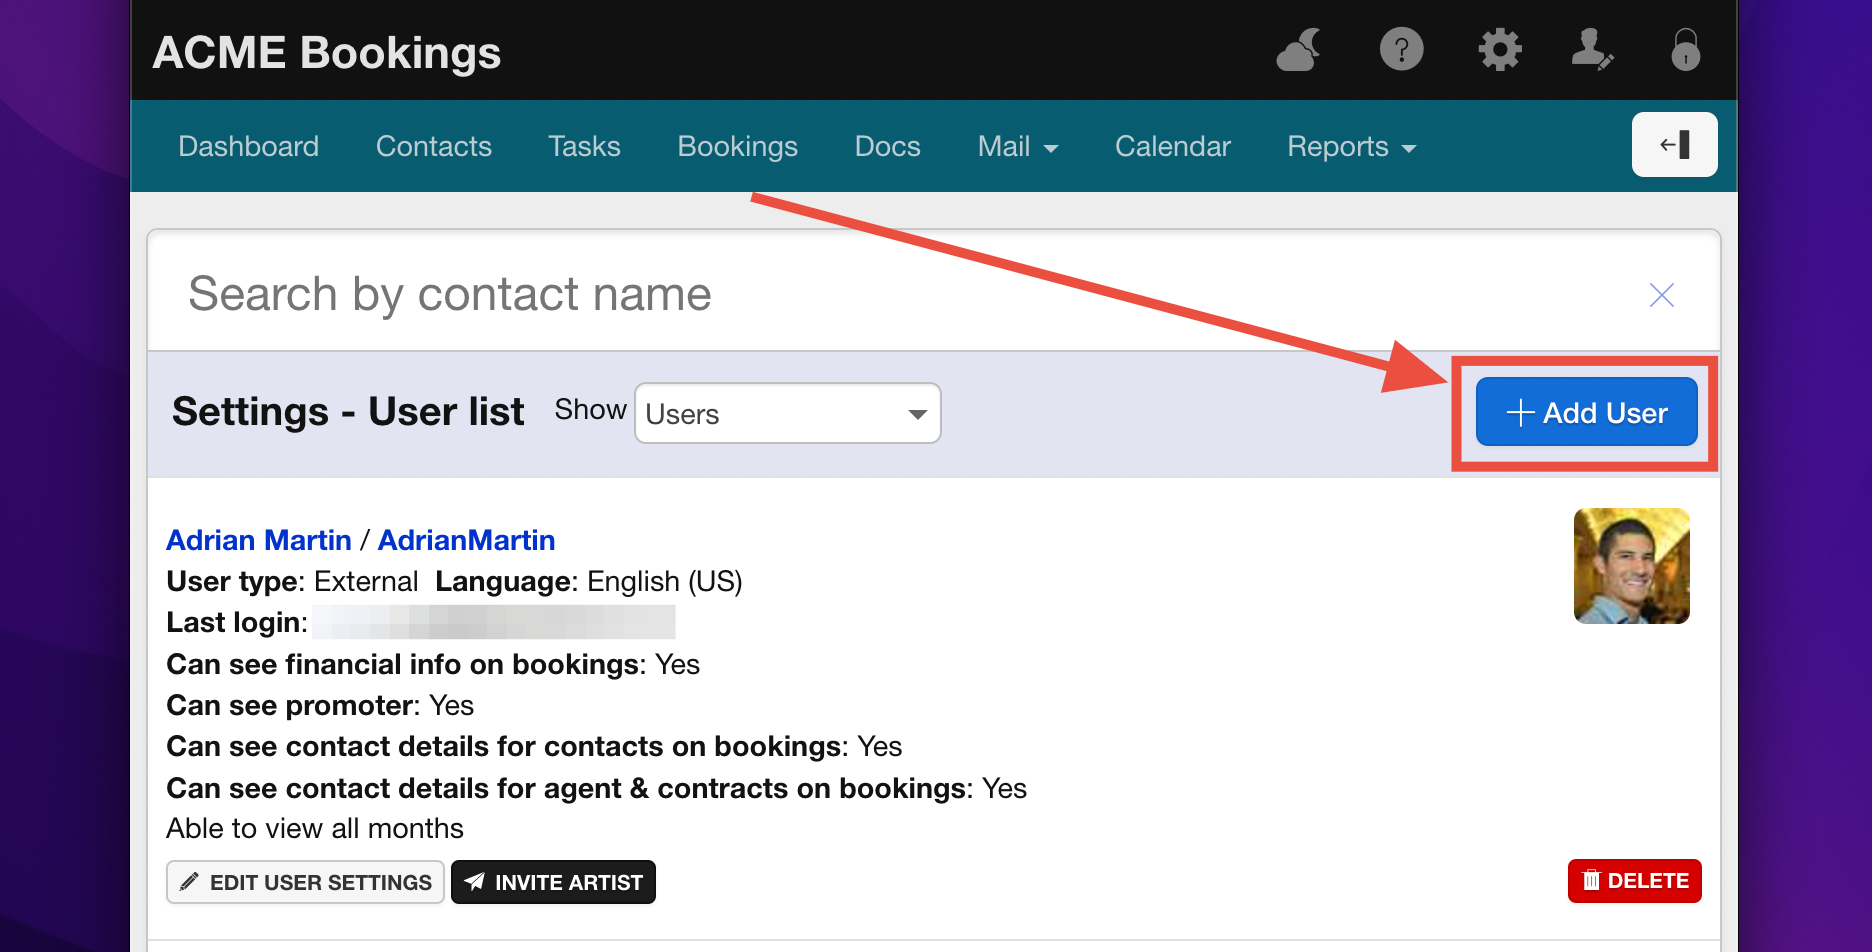
- Click on ‘Users’ Settings at the bottom of the sidebar menu and then click on the blue ‘Add User’ button in the top right corner of the screen.
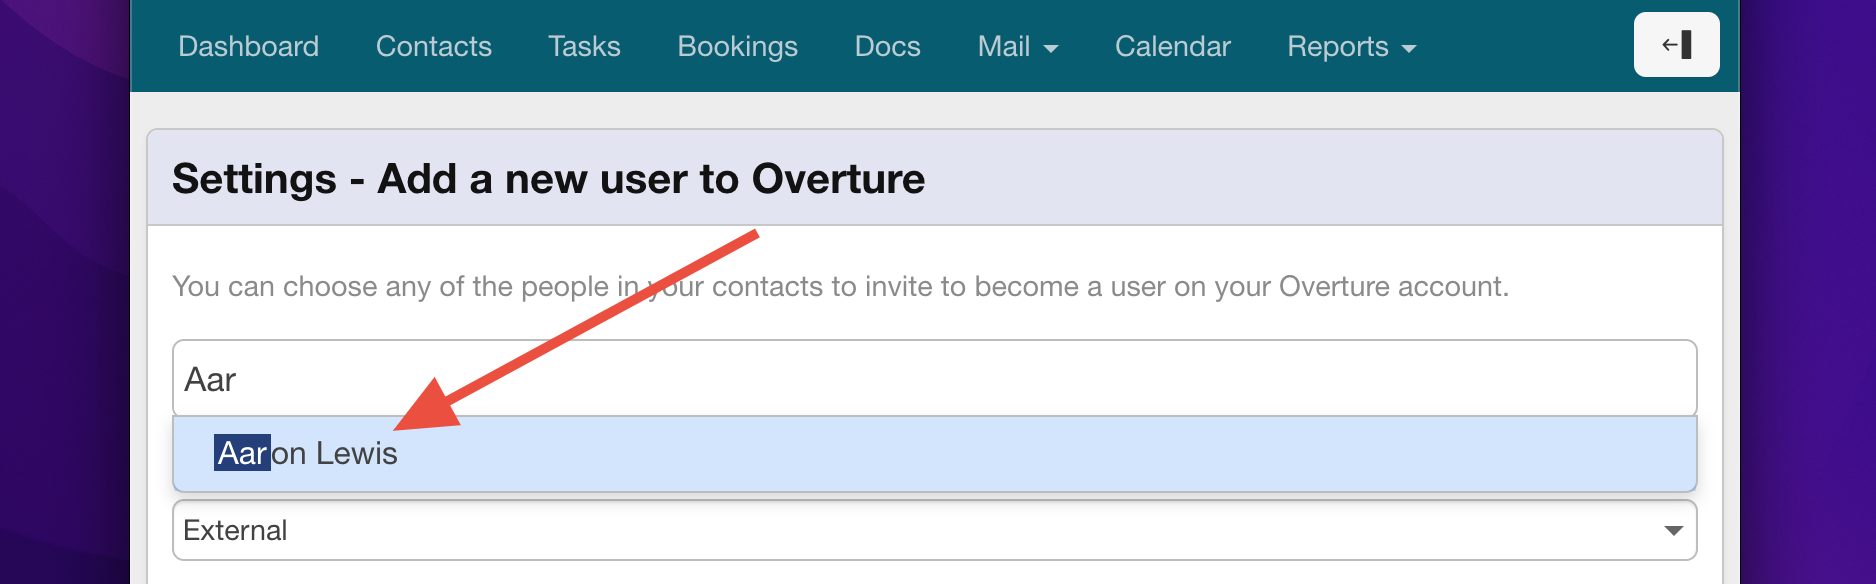
- In the first field, start typing the name of the person you want to give access to, and select their name when it appears in the dropdown list.
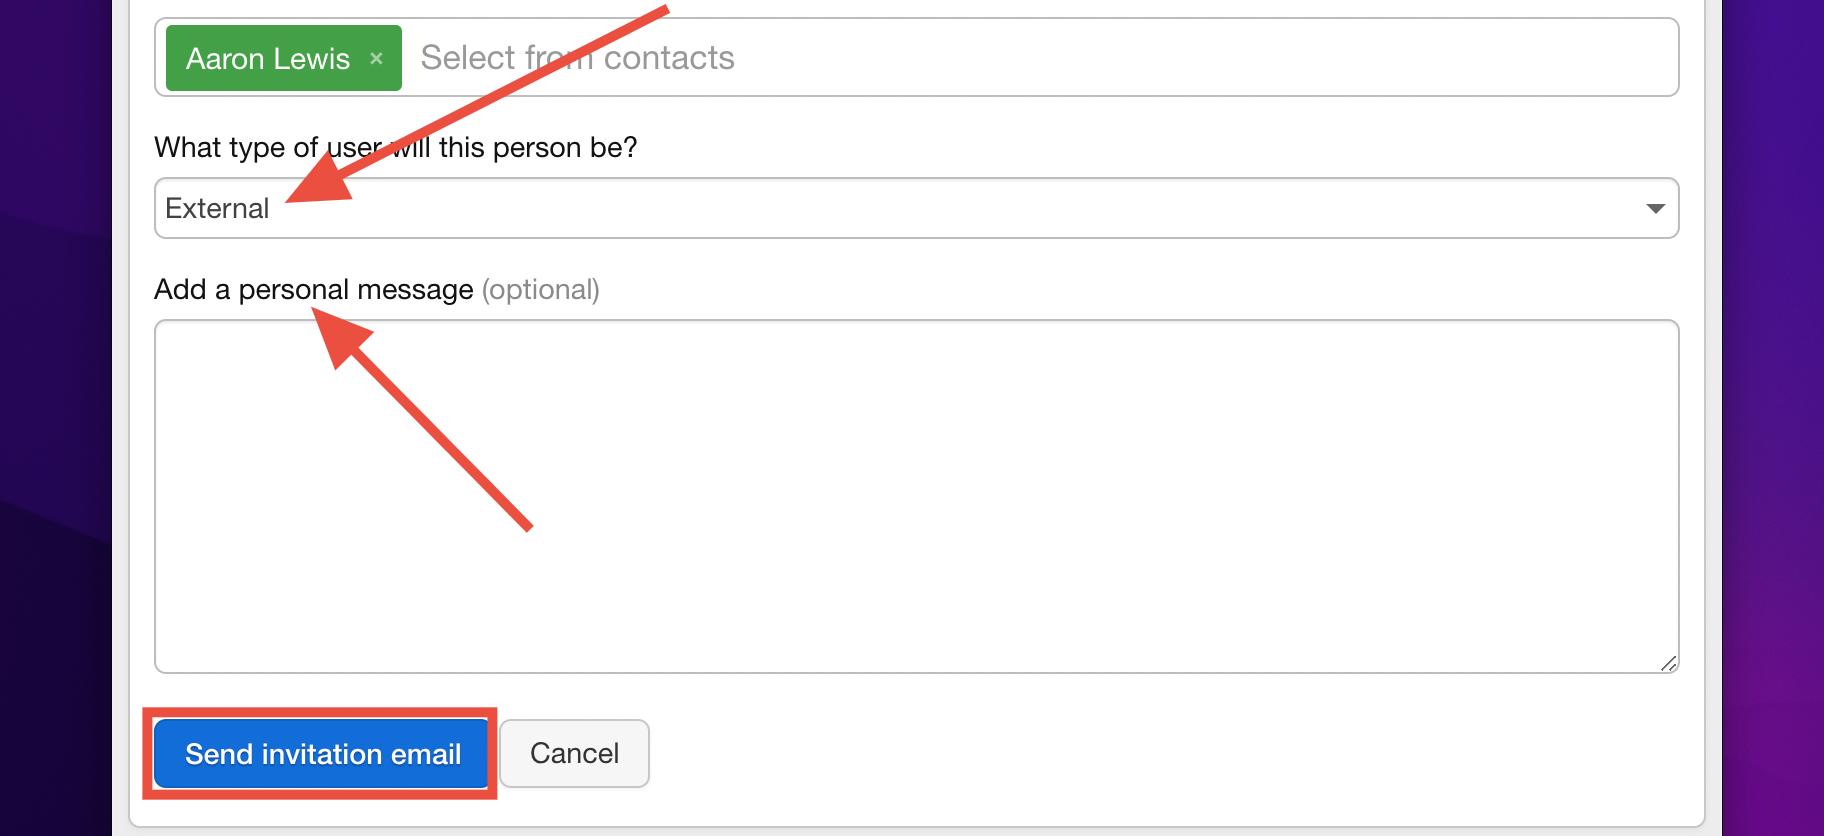
- In the next dropdown menu, select External. Be very careful here not to accidentally change this to ‘Admin’ or ‘Internal’.
- If you want, you can add a personalised message to the email that will be sent to the external user.
- Click on the ‘Send invitation email’ button to invite the external user to create an account.
Step 3: Set User Permissions
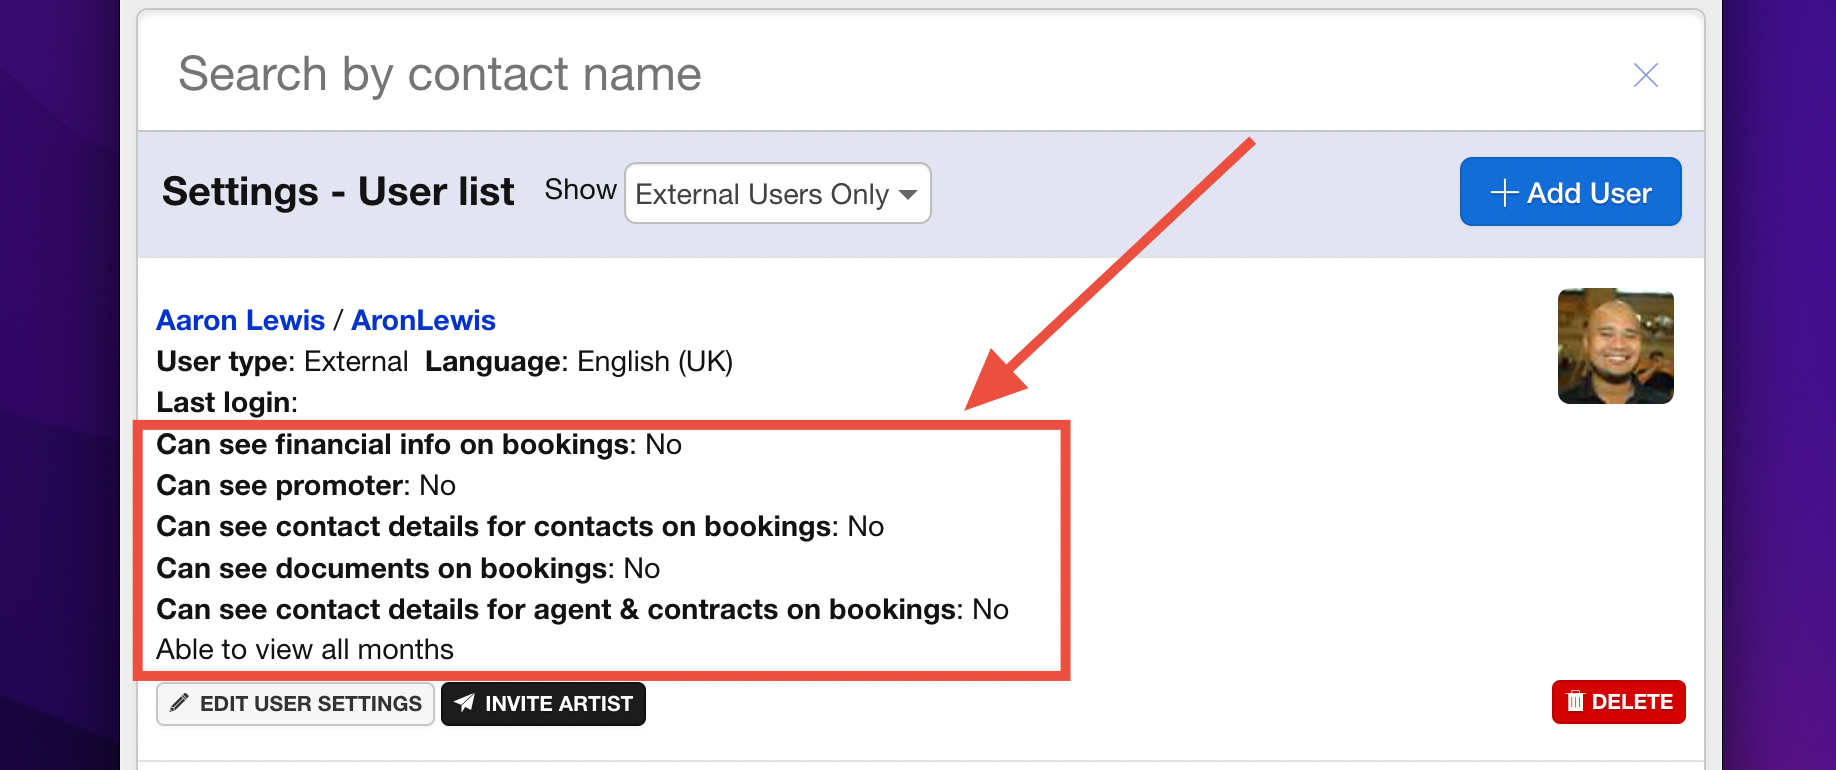
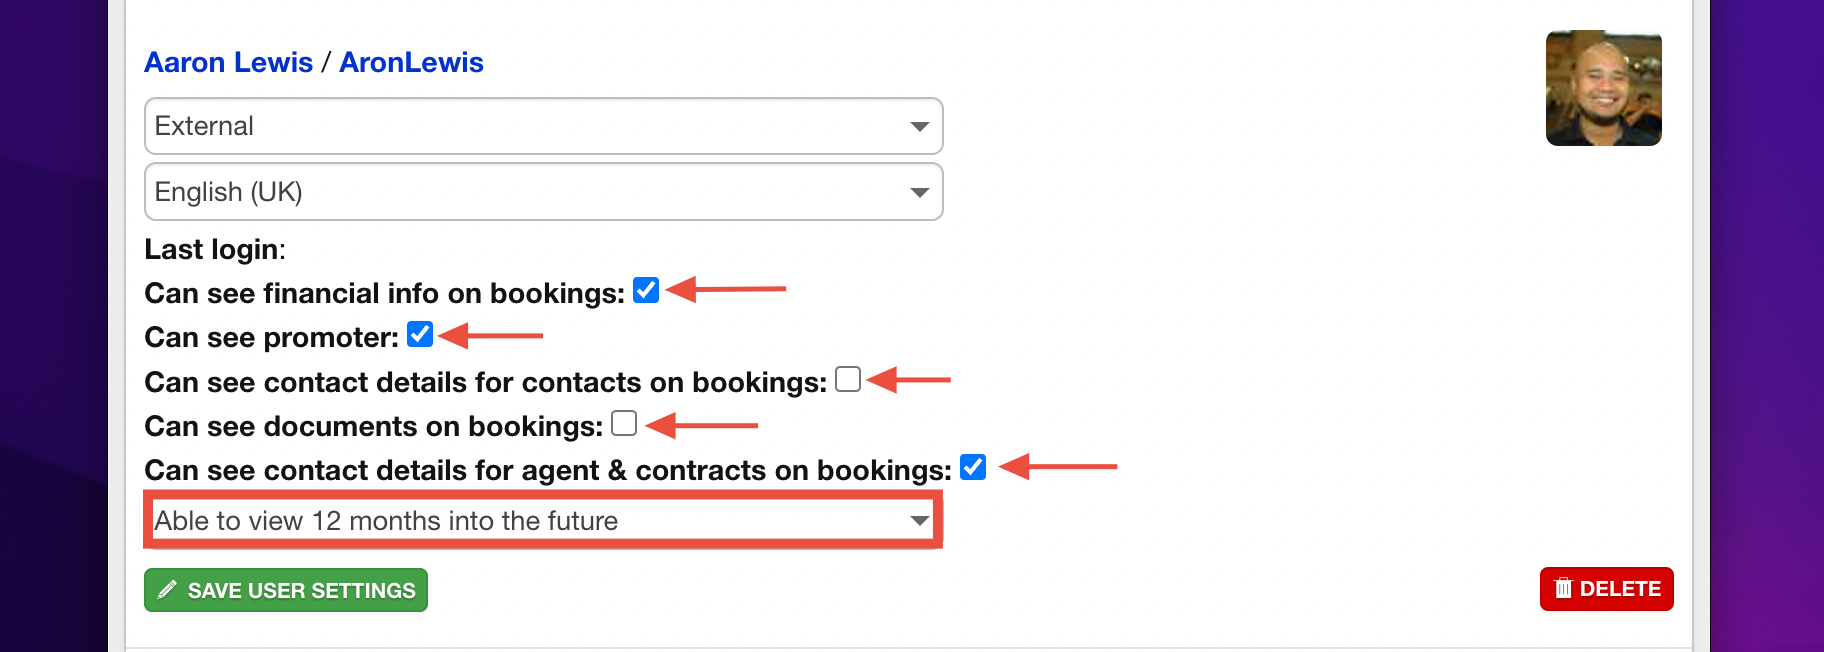
After the external user has created their account, they will appear in your list of users. From here, you can configure their access and permissions to ensure they only see the data relevant to them. By default, when a user first accesses their account all permissions will be inactive, they must be activated manually by an admin user. Available permissions include:
- Can see financial info on bookings: Grant or restrict visibility of financial details.
- Can see promoter: Allow or hide promoter details.
- Can see contact details for contacts on bookings: Control access to contact details associated with bookings.
- Can see documents on bookings: Permit or deny access to view booking-related documents. Please note, if you’re account does not have this setting and you wish to activate it, please contact support@curiousferret.com
- Can see contact details for agent & assistant on bookings: Specify if agent and assistant contact details are visible.
- Future visibility: Define how far into the future (e.g., 6/9/12/24 months) the external user can view data.
To configure these permissions:
- Go to Settings in the navigation menu.
- Click User Settings and locate the external user in the list.
- Select Edit User Settings and adjust the permissions as needed.
- Click Save to apply the updated permissions.
The external user will now have access to their tailored version of Overture. They can only view the data and bookings specified by the permissions you’ve set, ensuring a secure and collaborative experience.
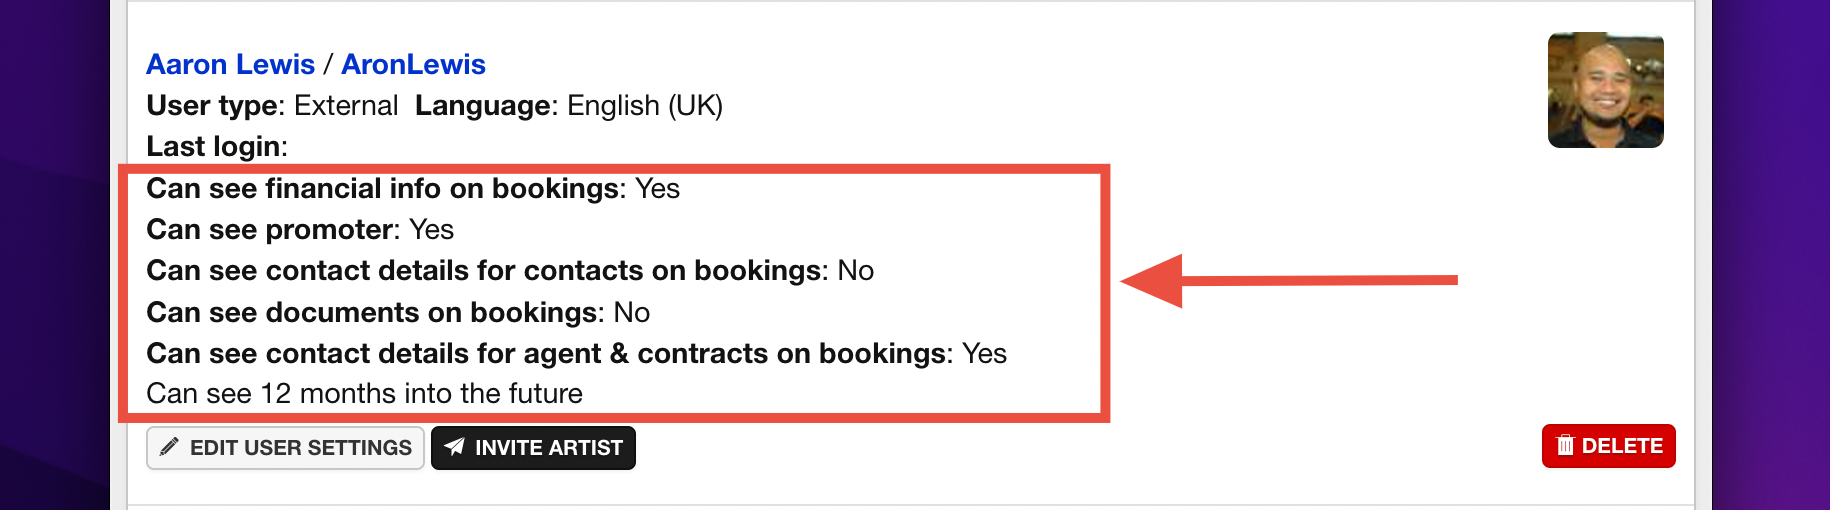
Congratulations! The external user now has access to their own version of Overture, with the permissions and data access levels you have set for them.
Please note: if the user cannot see any changes to their account, they may need to log out and back in to update the settings.