Many of the automated messages sent by Overture can be customised to your requirements or existing content that you may have for them. To customise the content of these messages and how they are sent, head over to your settings section and in the sidebar select the Messages option.
There are quite a few different types of messages that you can customise so take a minute to look through the list and locate the ones that are most important to you. They all follow the same basic principles but in some cases they have different options more relevant to the message being generated.

Firstly you can edit the conditions under which the email is sent. In the example of the first message, Event Confirmation, you can choose to generate the email when the booking status is matched and then who the email is sent from on your team. Using the checkboxes you can decide what content to include within the email.
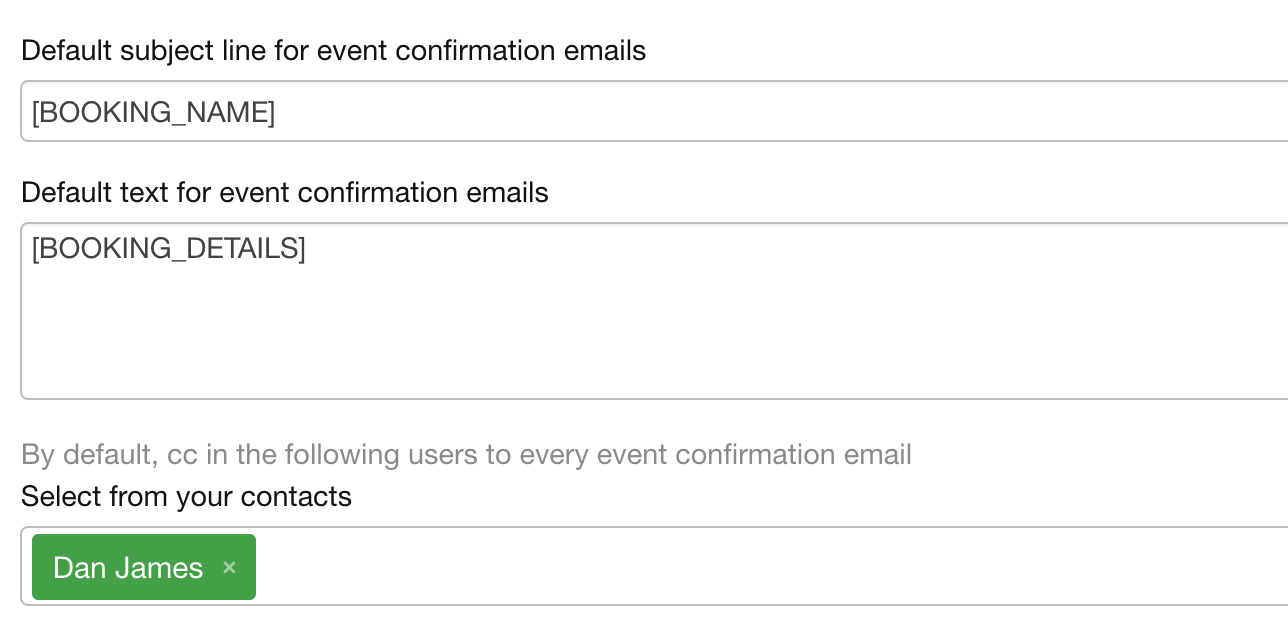
Next you can adjust the message subject line and the message content. It’s important to know when editing the content here you can use Overture’s tagging system to include information generated by Overture. Using tags such as [BOOKING_NAME] to represent the booking name for example. You can see some already set for you, feel free to change the content of these how you require. For more information on the tags available checkout this help article.
Finally you can add CC’s and BCC’s using Overture’s auto suggest search to select contacts who will receive copies of these emails. Bear in mind that this will apply to every email sent of this type.
IMPORTANT when you have completed your edits you must remember to scroll down to the bottom of this screen and click Save Settings otherwise all your hard work will be lost.