The Checklists feature in Overture is designed to help you keep your bookings on track, ensuring all required information is present and highlighting any potential issues—such as artist double-bookings or radius clause conflicts—before they become problems. It’s a great way to gain peace of mind and maintain high standards of data consistency across your team.
This article will walk you through how to set up Checklists and how they work within your workflow.
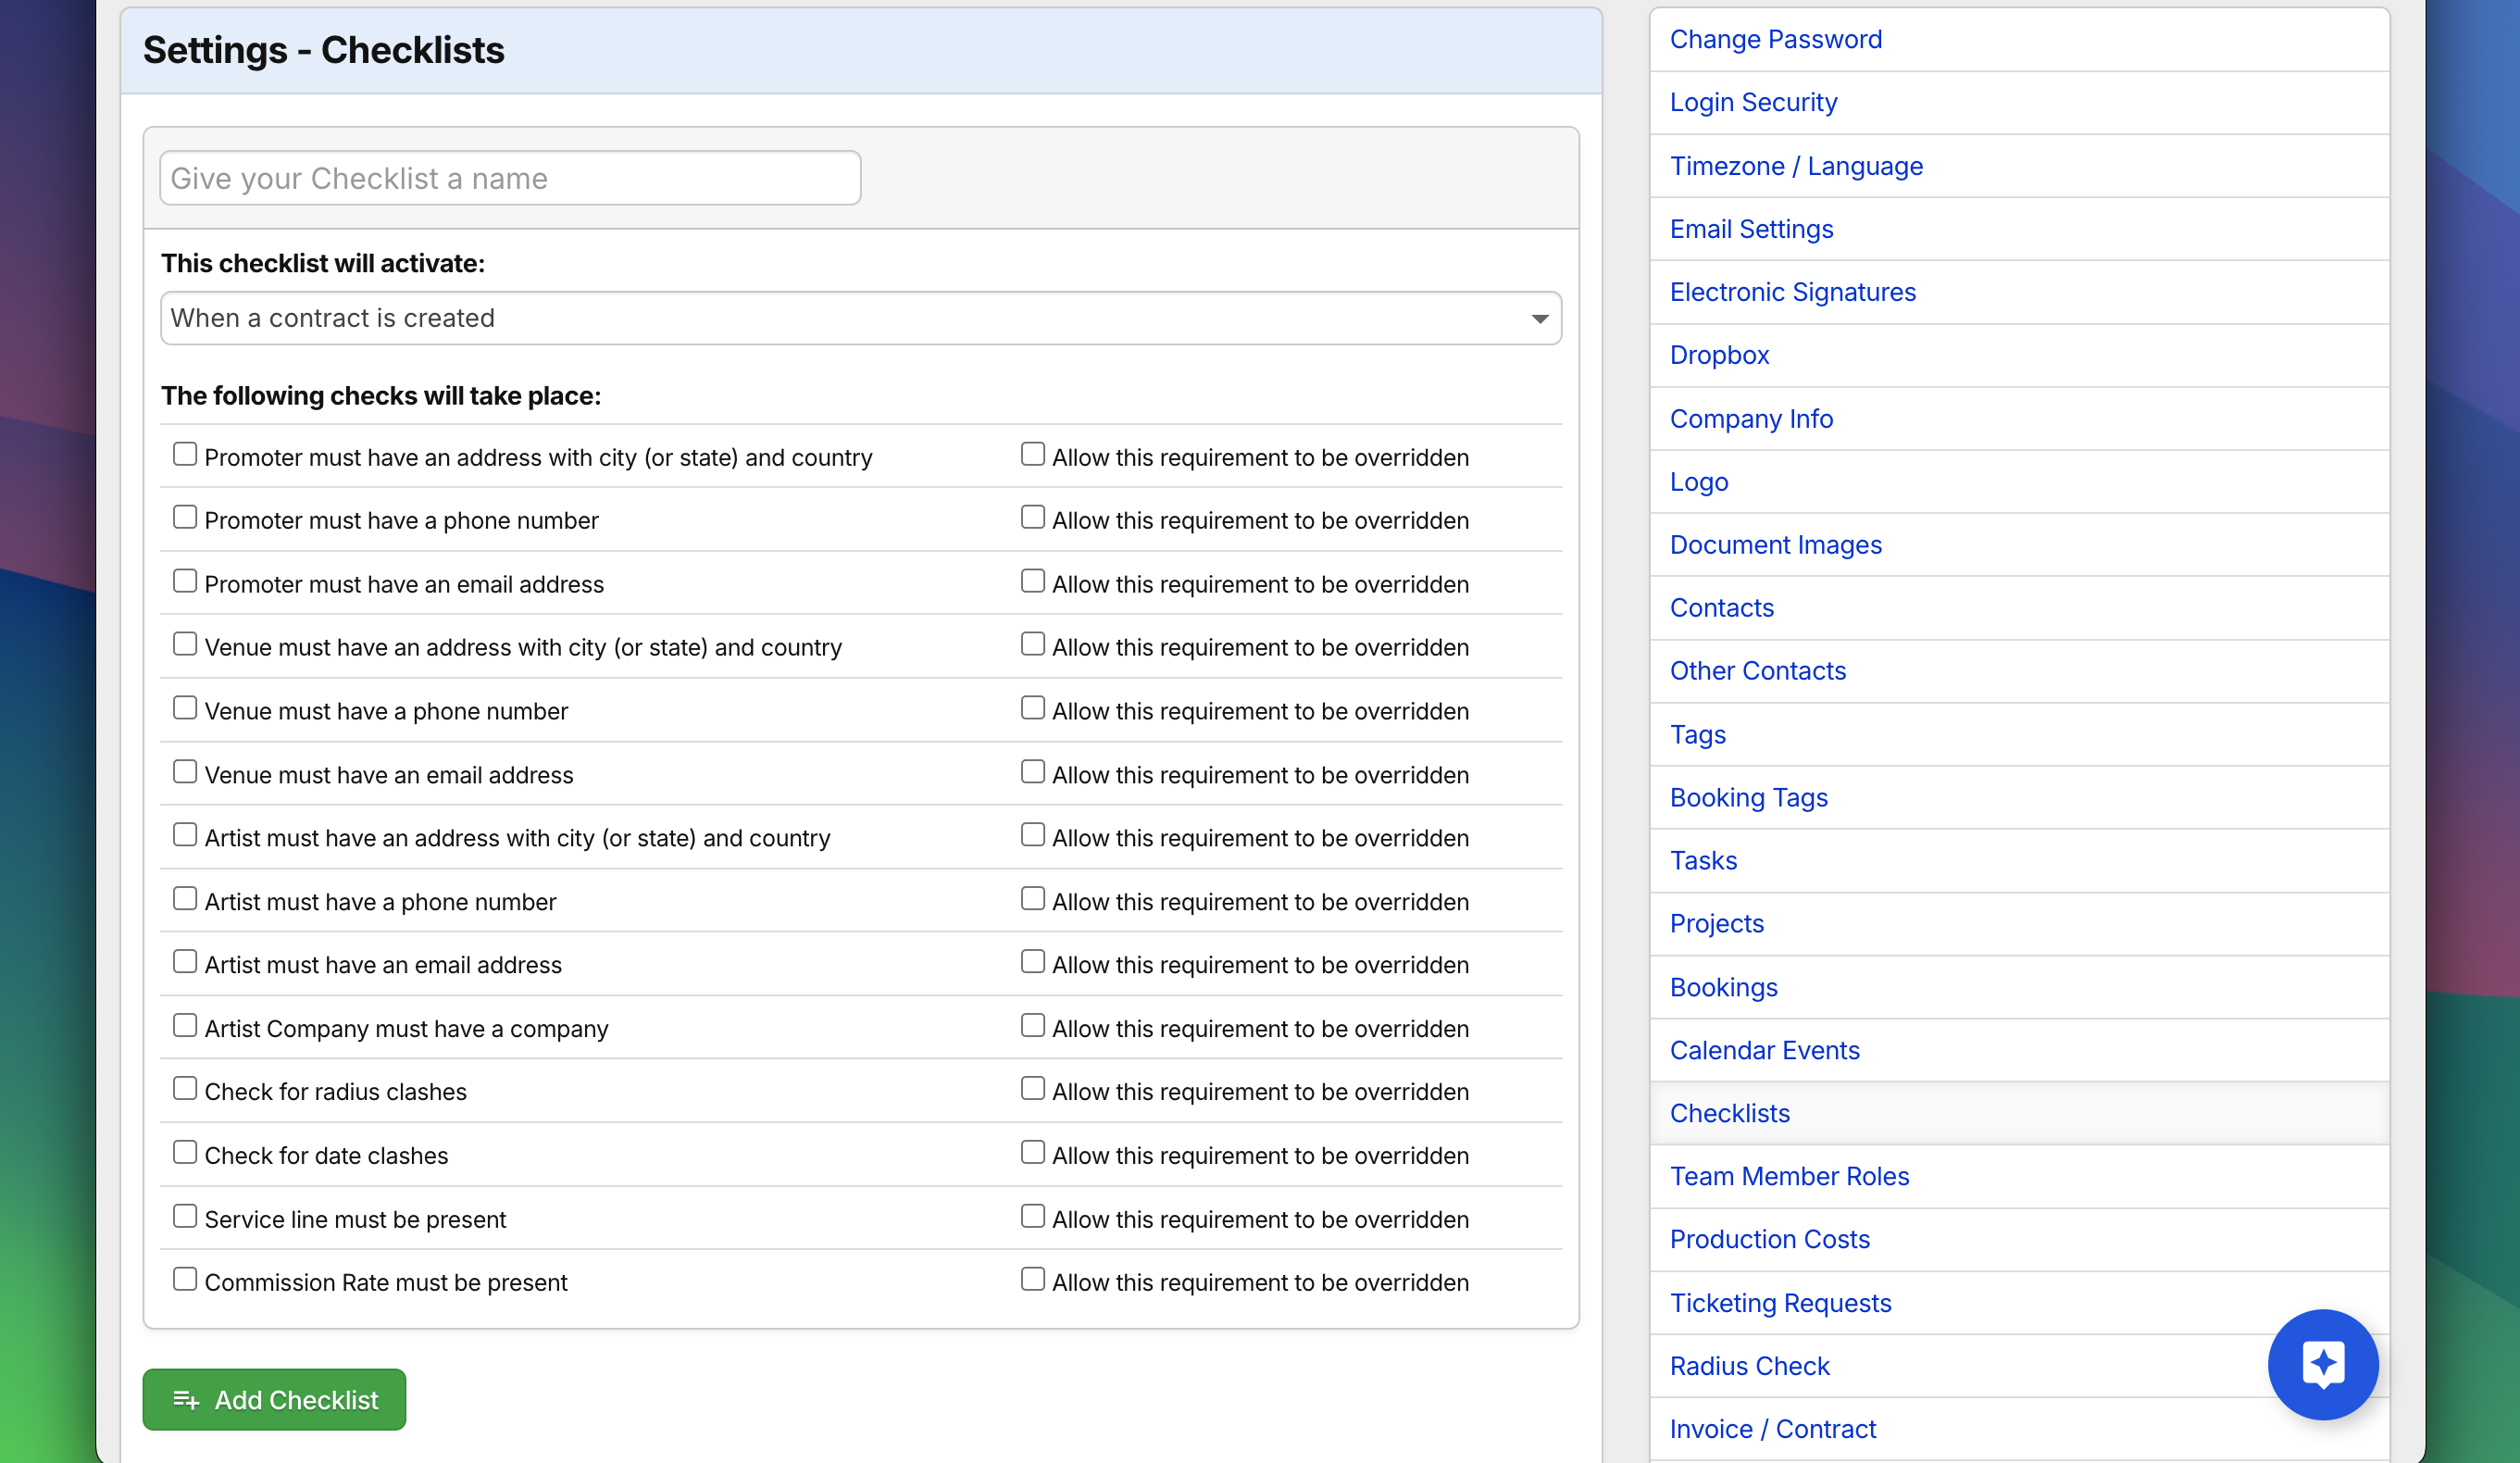
Setting Up a Checklist
To get started, head to your Overture Settings:
- Click the Settings icon in the top navigation bar.
- In the sidebar, click on Checklists.
- Click Add New Checklist to create your first checklist.
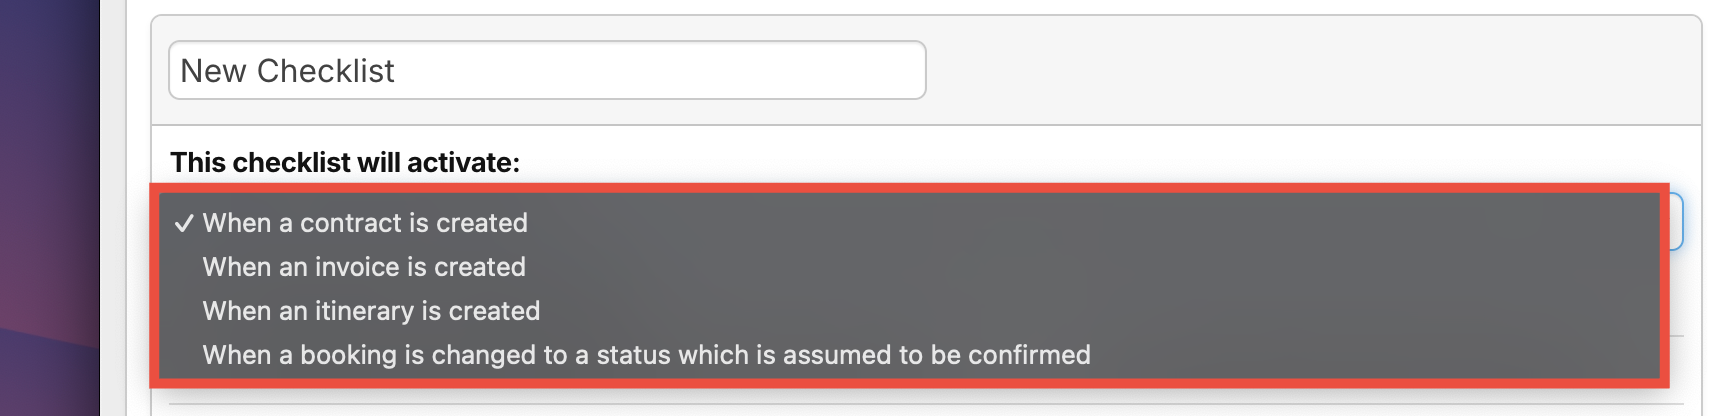
Choosing a Trigger
The first step in creating a checklist is selecting a trigger—this determines when the checklist will be activated.
From the dropdown menu, choose one of the following options:
- When a contract is created
- When an invoice is created
- When an itinerary is created
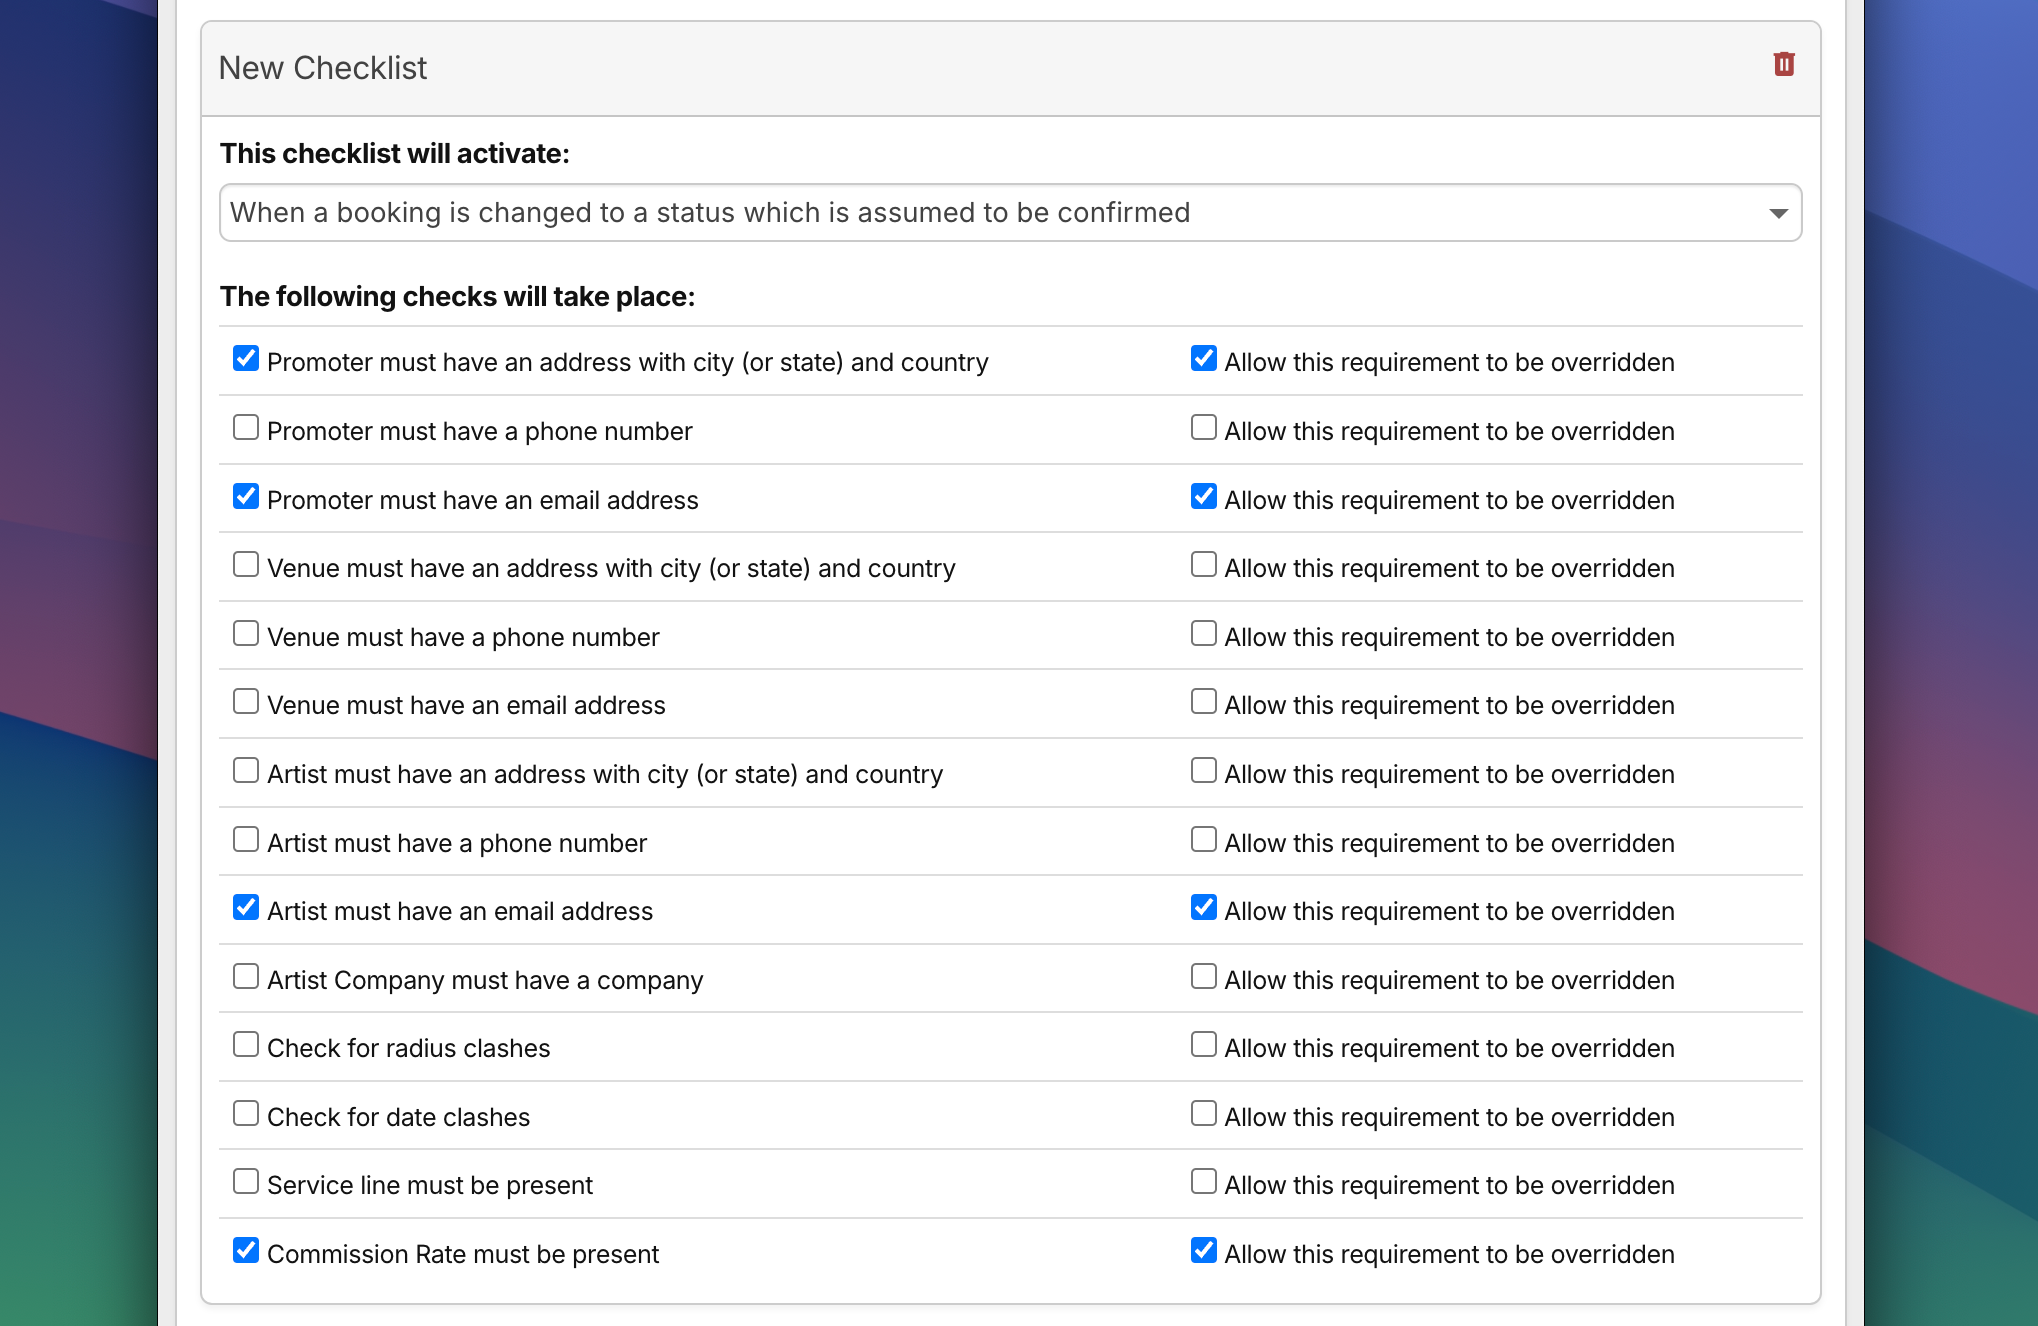
- When the booking status is changed to confirmed
A popular choice is to trigger the checklist when the booking is changed to a confirmed status, as this helps ensure everything is in place before confirming the booking.
Selecting Checklist Requirements
You’ll then see a list of available checks to include. These allow you to enforce the presence of important data or check for potential issues, such as:
- Clashing bookings for the same artist
- Radius clause conflicts
- Missing promoter details
- Missing venue information (e.g., address, country, phone number)
You can tick the boxes for the checks you want to enforce.
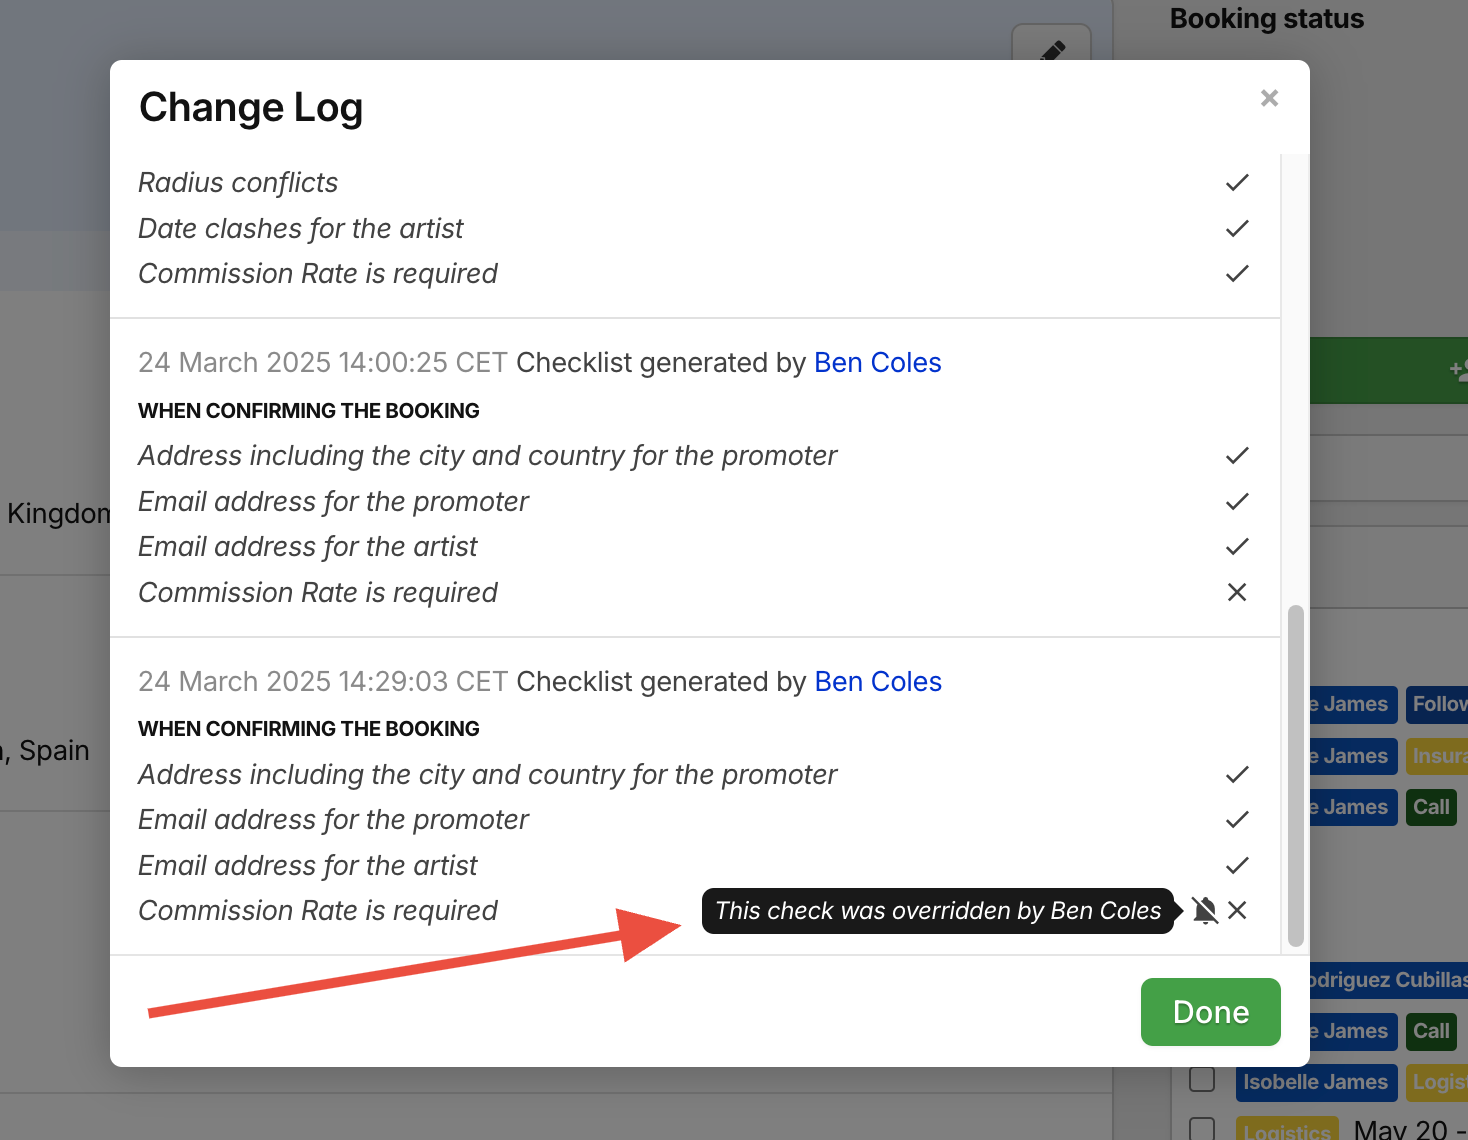
For certain checks, you can also allow the agent to override the warning. This means they’ll be alerted to the issue but still allowed to proceed if necessary. Overture will track who chose to override and retain that decision for future reference.
If you choose not to allow an override then the agent will not be able to continue until the missing item has been entered.
How Checklists Work in Practice
When you trigger a checklist (e.g., by attempting to change a booking to ‘Confirmed’), Overture will run the checks you’ve selected.
If any issues are found, a checklist popup will appear showing you what’s missing or flagged:
- Any missing fields will be listed.
- Conflicts (such as double bookings or radius issues) will be highlighted.
- Optional items (with override enabled) will give the agent a chance to continue anyway.
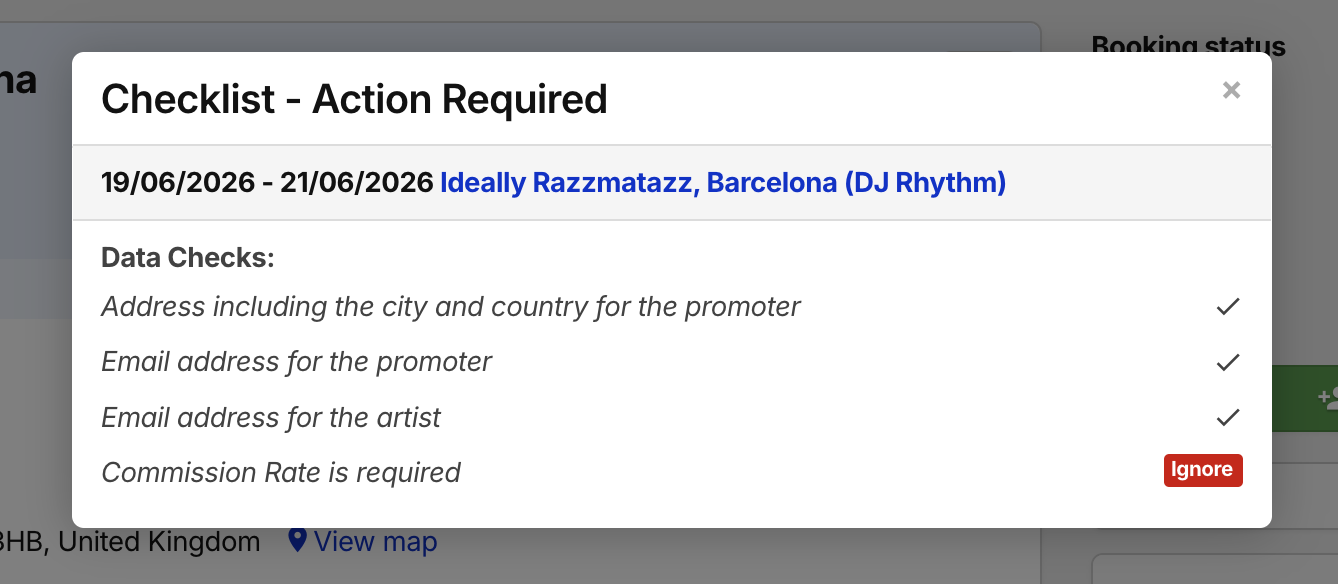
You can then update the booking with the required information and try again. If any override-eligible issues remain, you’ll have the option to proceed anyway, and Overture will log the override.

If I ignore this warning Overture will remember the agent that submitted the request for future reference:
Why Use Checklists?
- Helps prevent critical data from being overlooked.
- Flags potential scheduling conflicts.
- Enforces team-wide consistency.
- Provides a clear audit trail of override decisions.
Checklists are a smart, lightweight way to build quality control into your booking workflow without slowing your team down.
For more guidance or examples, visit the Overture Help Center or contact support.