Booking and Calendar Event statuses in Overture are essential tools to help you organise, categorise, and manage your bookings and events effectively. They not only allow you to visually differentiate items on your calendar through colour coding but also enable you to track different booking types and integrate your existing workflows seamlessly.
What Are Booking and Calendar Event Statuses?
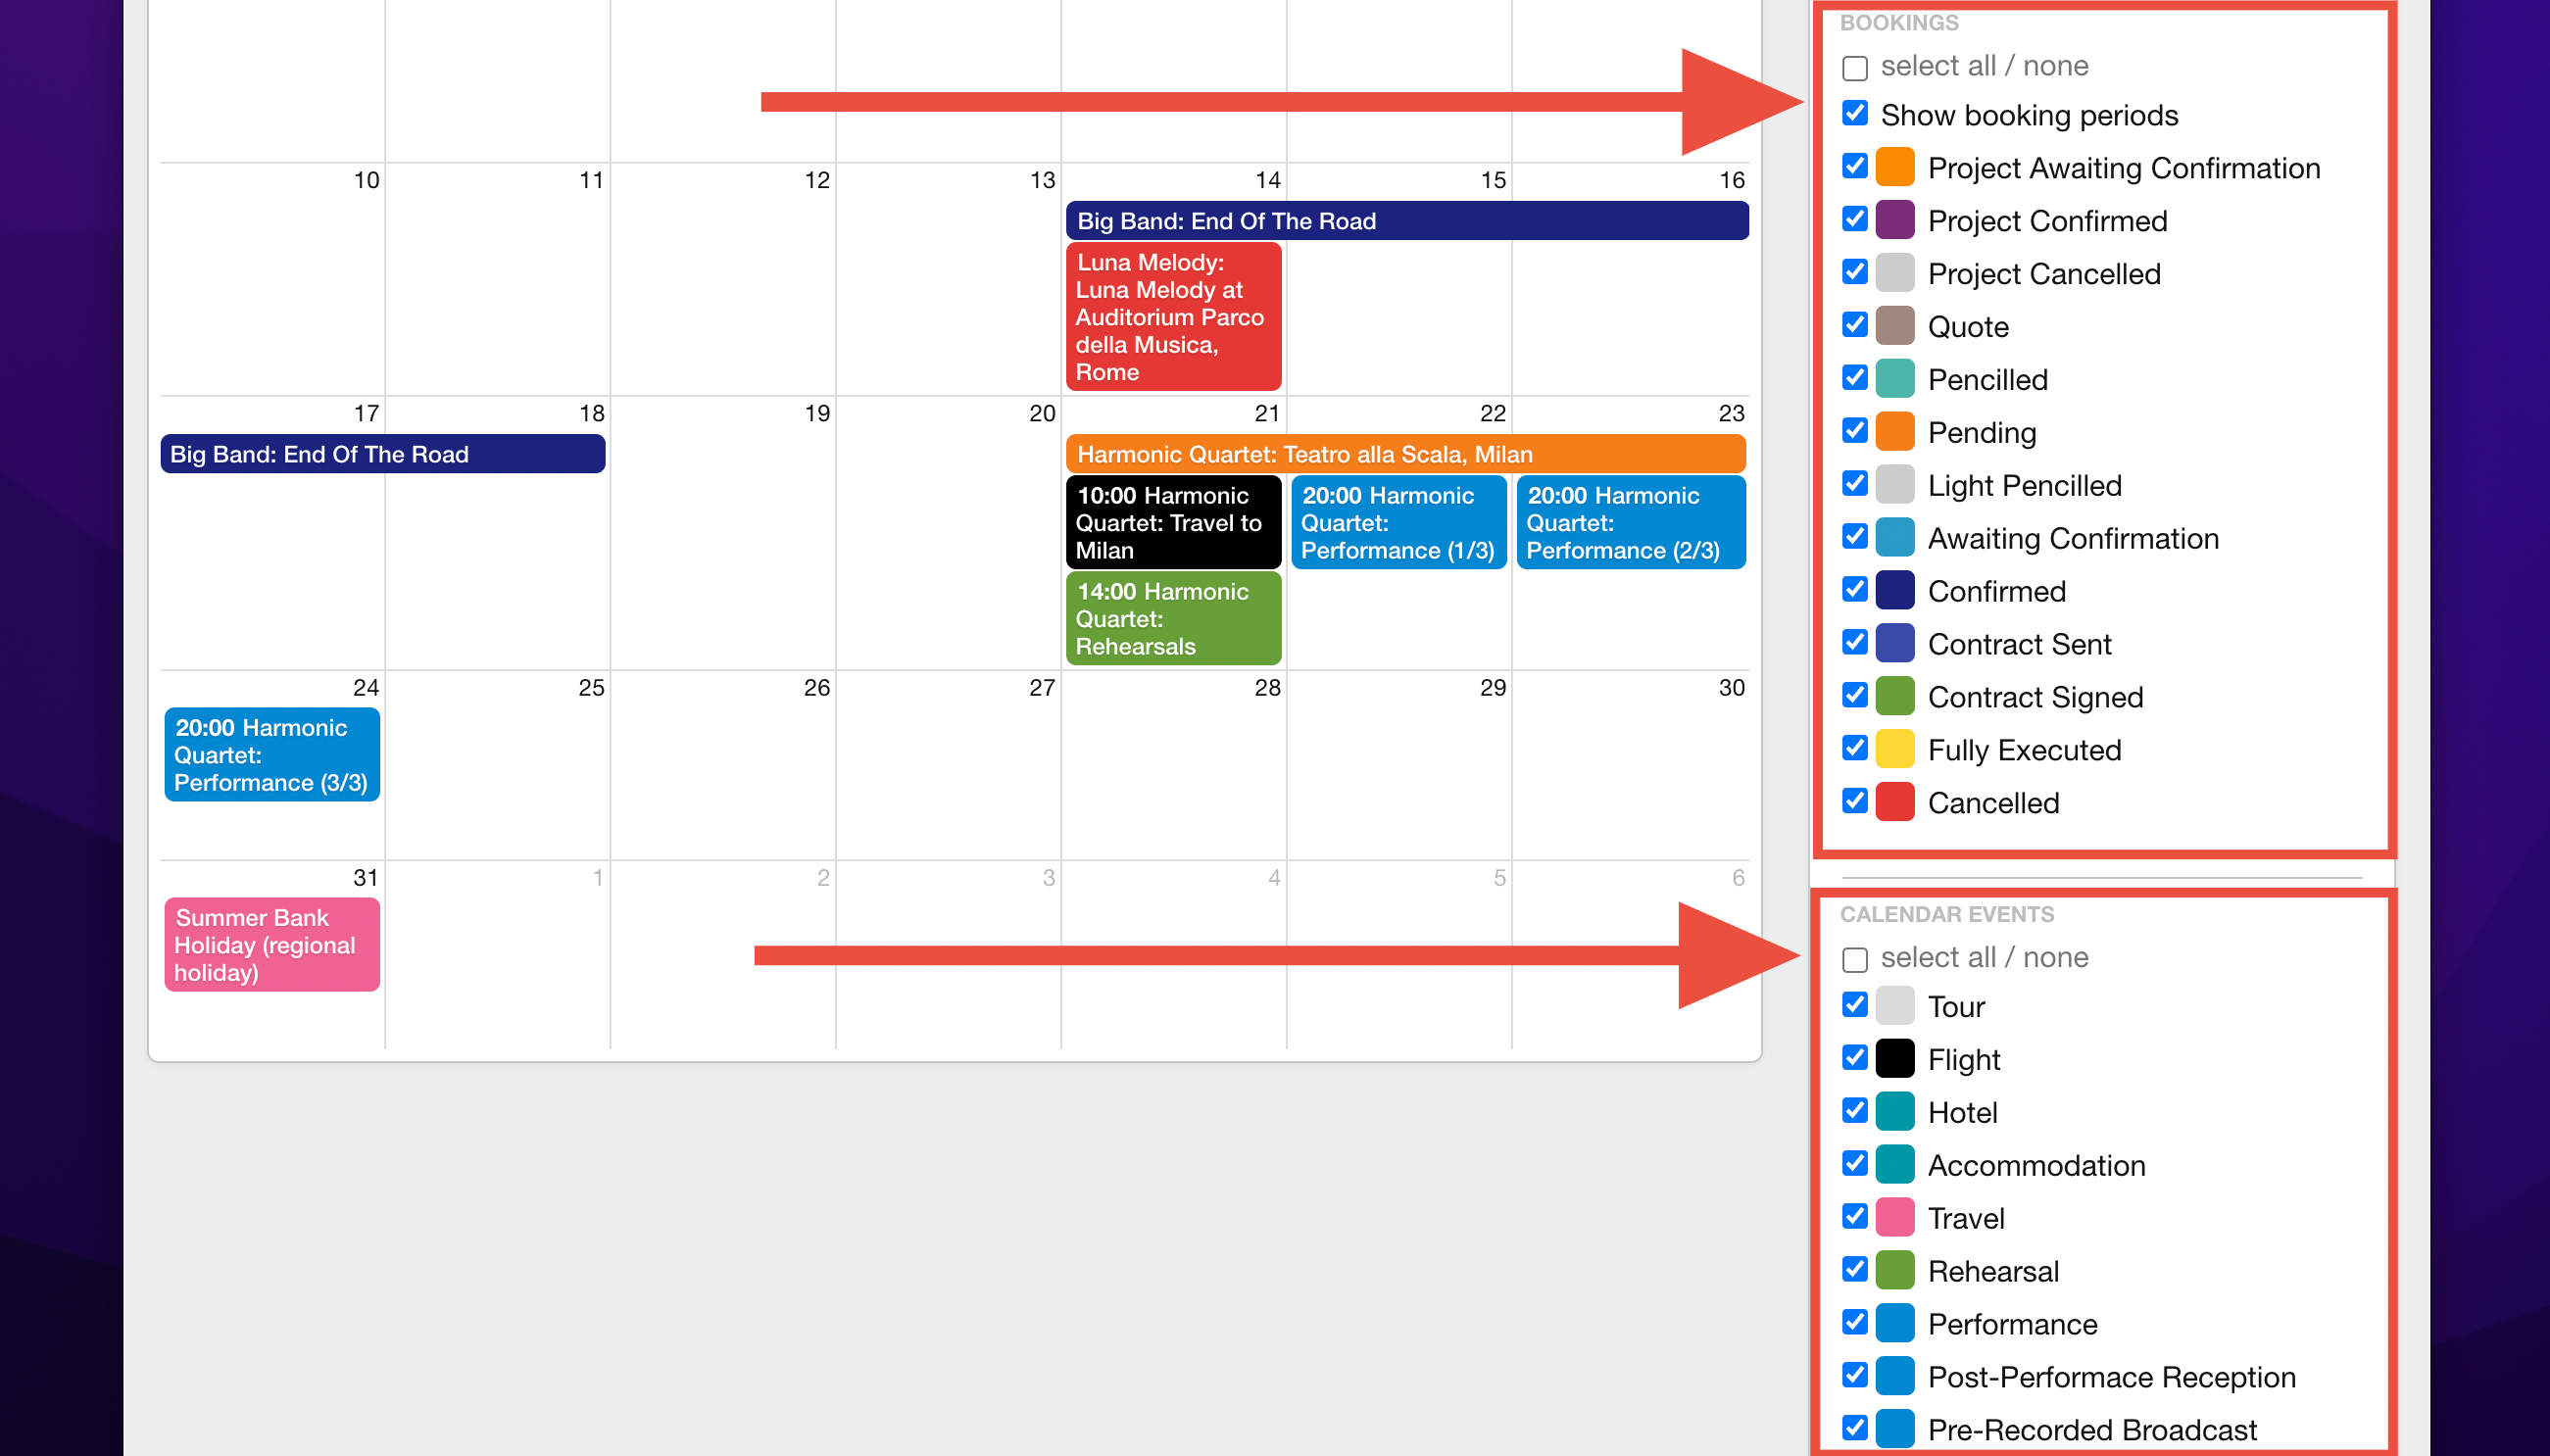
stakeholders are primarily used to colour code and organise bookings, making it easy to identify different types of bookings at a glance. By customising these statuses, you can also use them to manage various stages of your bookings or adapt your workflow.
Similarly, Calendar Event types are used to categorise calendar events, allowing you to label and filter them efficiently. This feature is especially useful when you want to organise your events by specific categories or create tailored views.
Setting Up Booking Statuses and Event Types
It’s highly recommended to set up your statuses when you first start using Overture. This will help streamline your processes from the very beginning. For more guidance on this, watch our ‘General Setup’ video here:
To set up Booking Statuses:
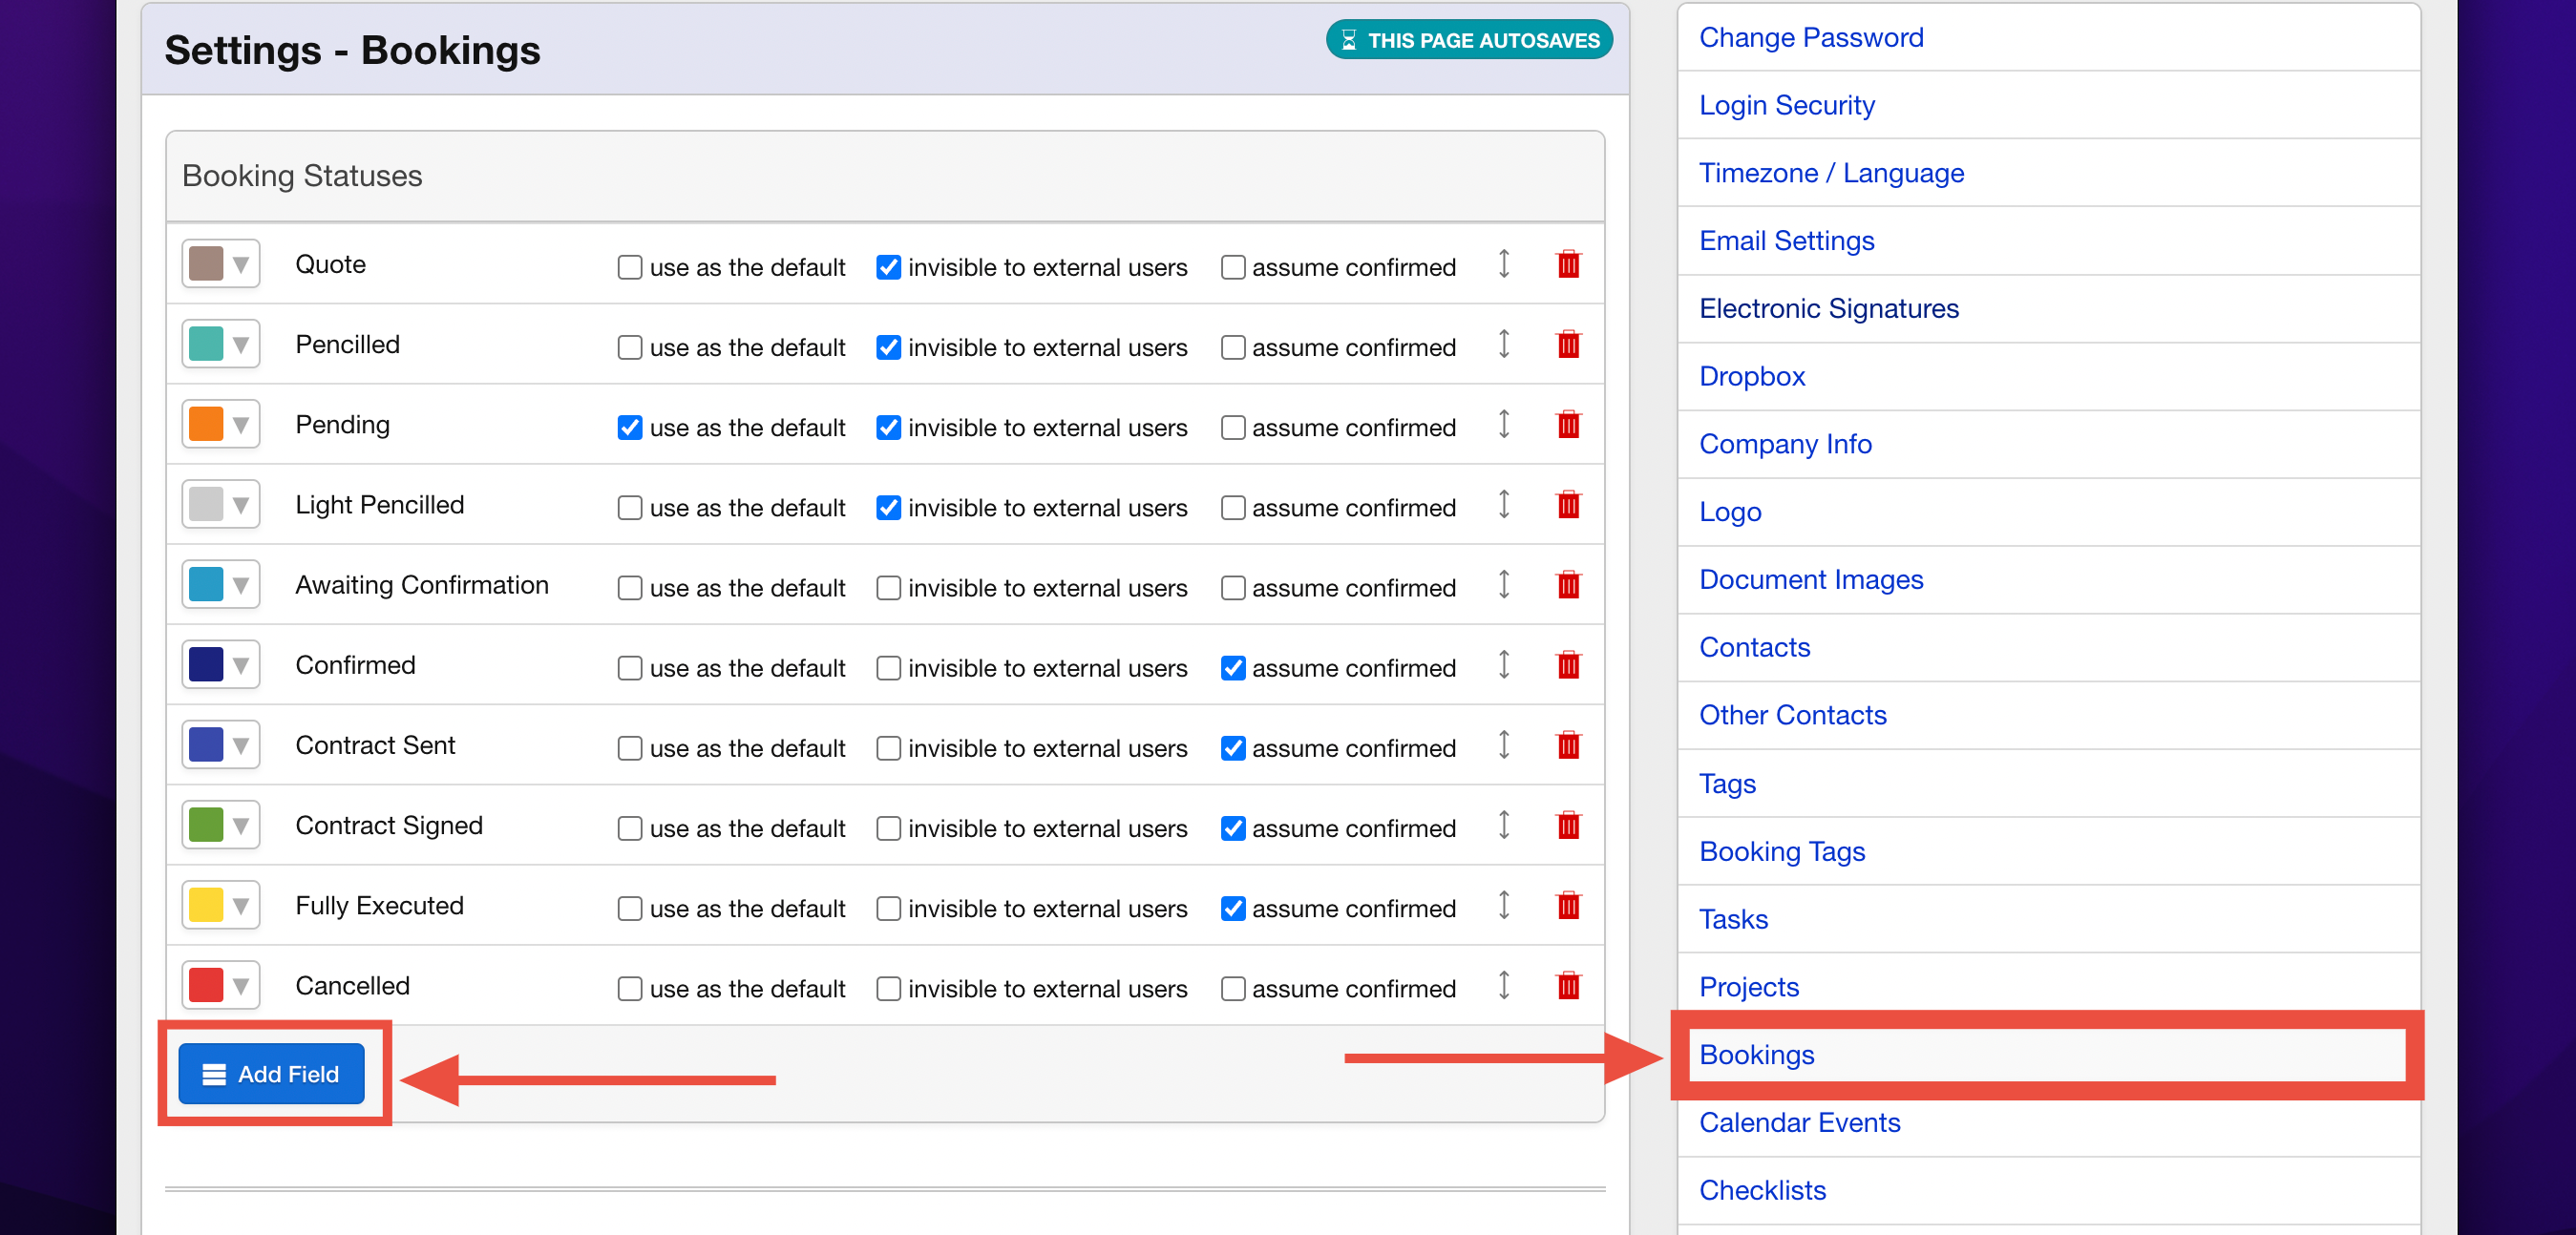
- Go to the Settings section and select Bookings from the sidebar.
- In the ‘Booking Statuses’ section, click the Add Field button:
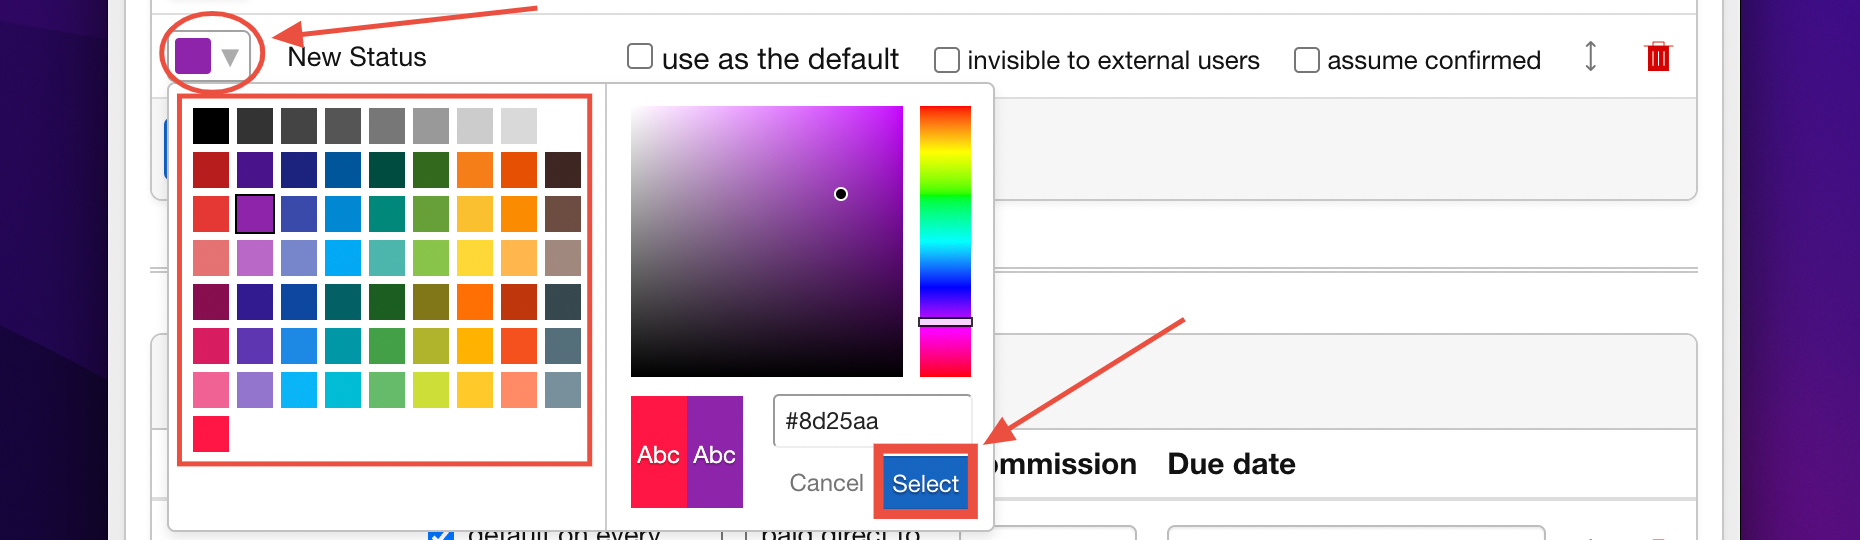
- Enter the desired text for your new booking status and press enter. The new status will then appear in the list.

Each status includes a coloured box next to its name. Click the dropdown in the box to select a colour from the colour palette for the new status. We recommend to choose a varied colour scheme to make your calendar visually distinct and easy to read.
Every booking status also includes three important options:
- Use as the default: Sets this status as the default booking status for all new bookings.
- Invisible to external users: Hides the booking status from external users until you’re ready for them to see it. For instance, this is helpful for unconfirmed bookings.
- Assume confirmed: By ticking this we are telling Overture that we consider this to be a confirmed booking. This is very important and will become helpful in other areas of the system for example in reports and generating default tasks.

To set up Calendar Event Statuses:
The process here is more or less identical to the above instructions for Bookings.
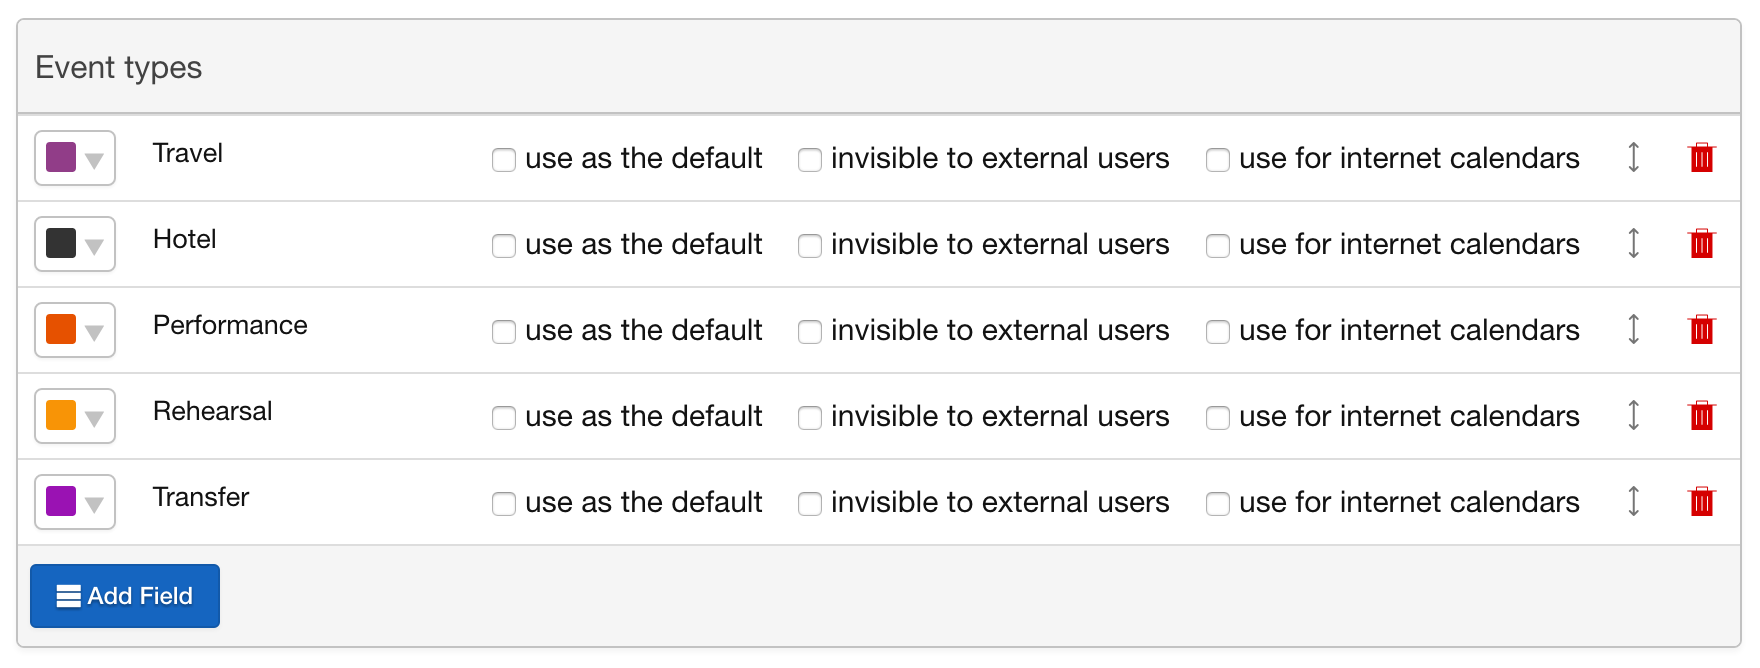
- In Settings, select Calendar Events from the sidebar.
- Follow the same process as booking statuses: click Add Field, enter the event type name, and press enter.
- Assign a colour and configure the options if needed.
Using Booking and Event Statuses
Once set up, you can assign statuses when adding a booking or event. Here’s where you can manage them:
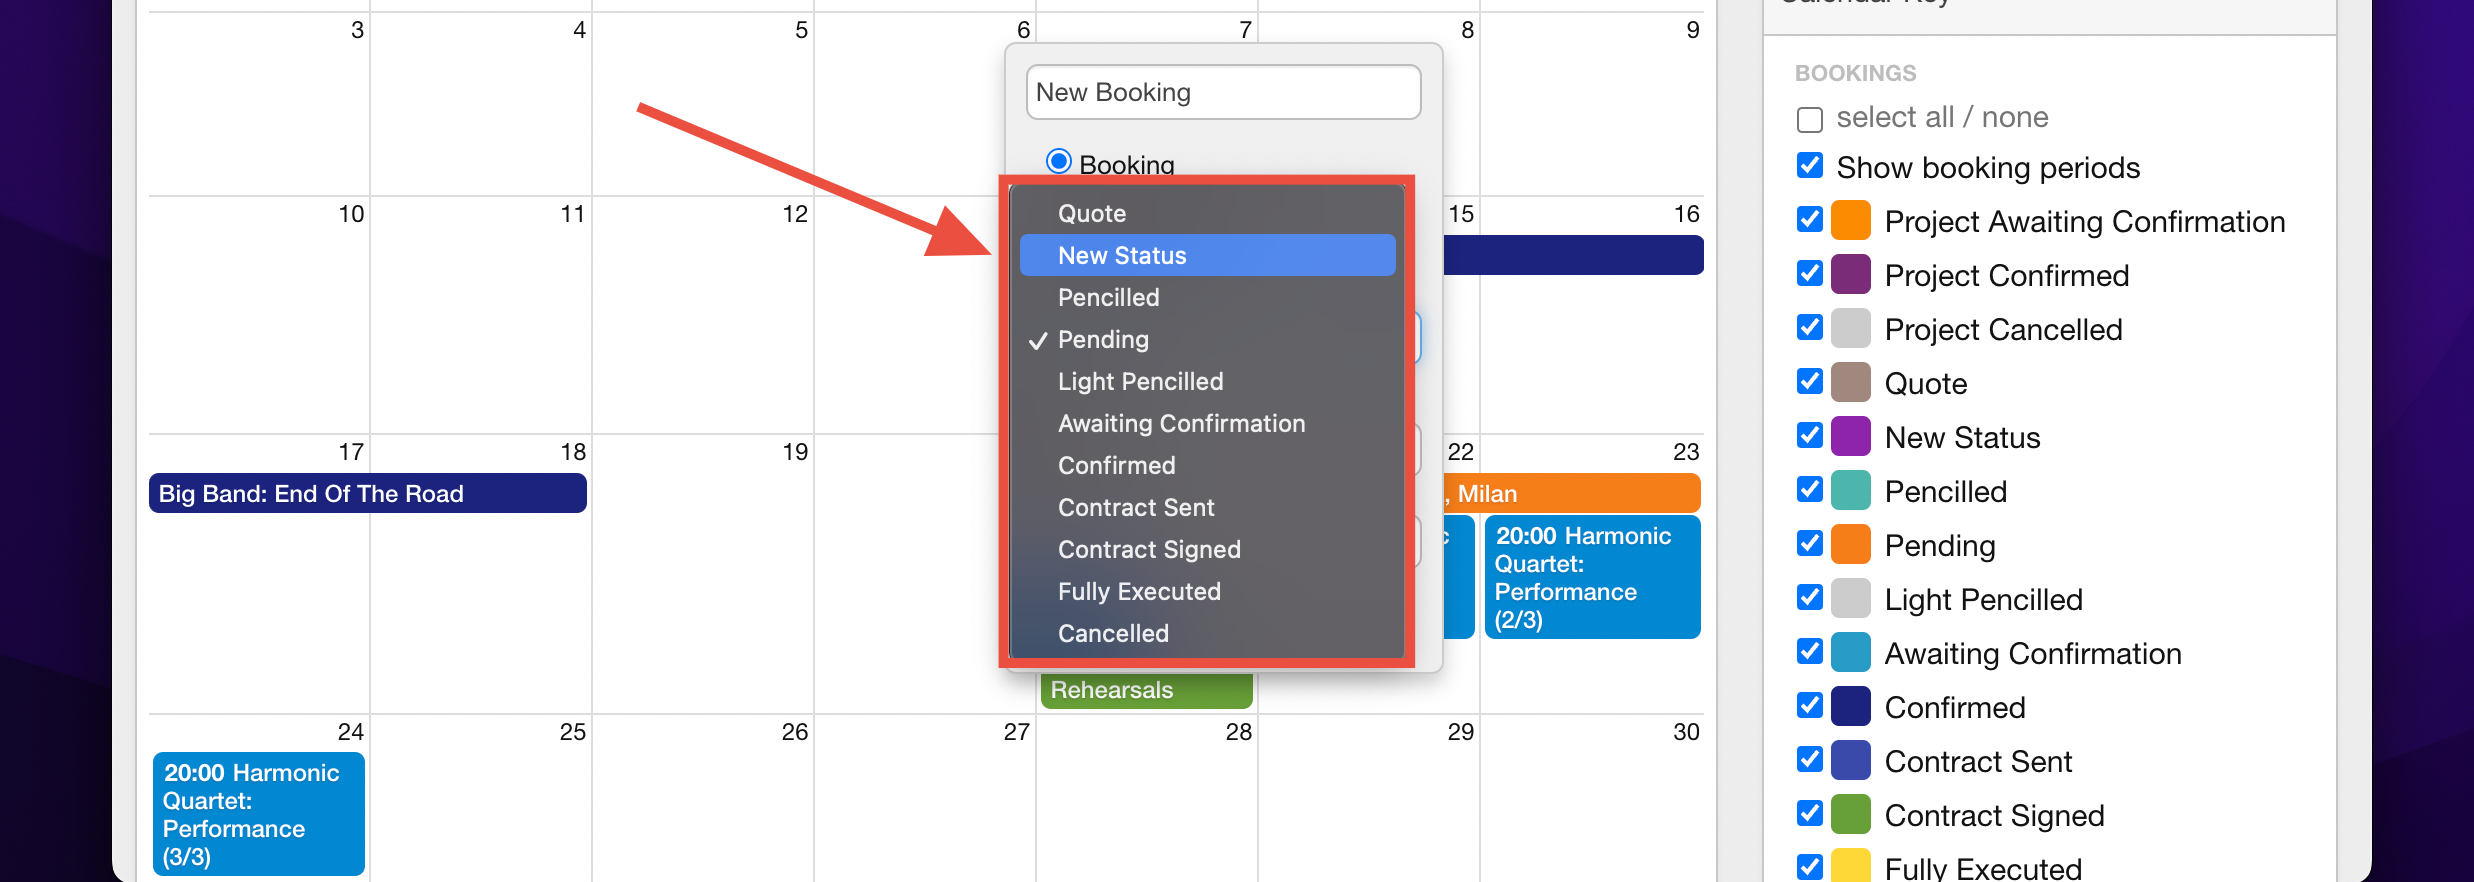
- Adding event on the calendar: Select the status directly from the dropdown when creating a new calendar entry.
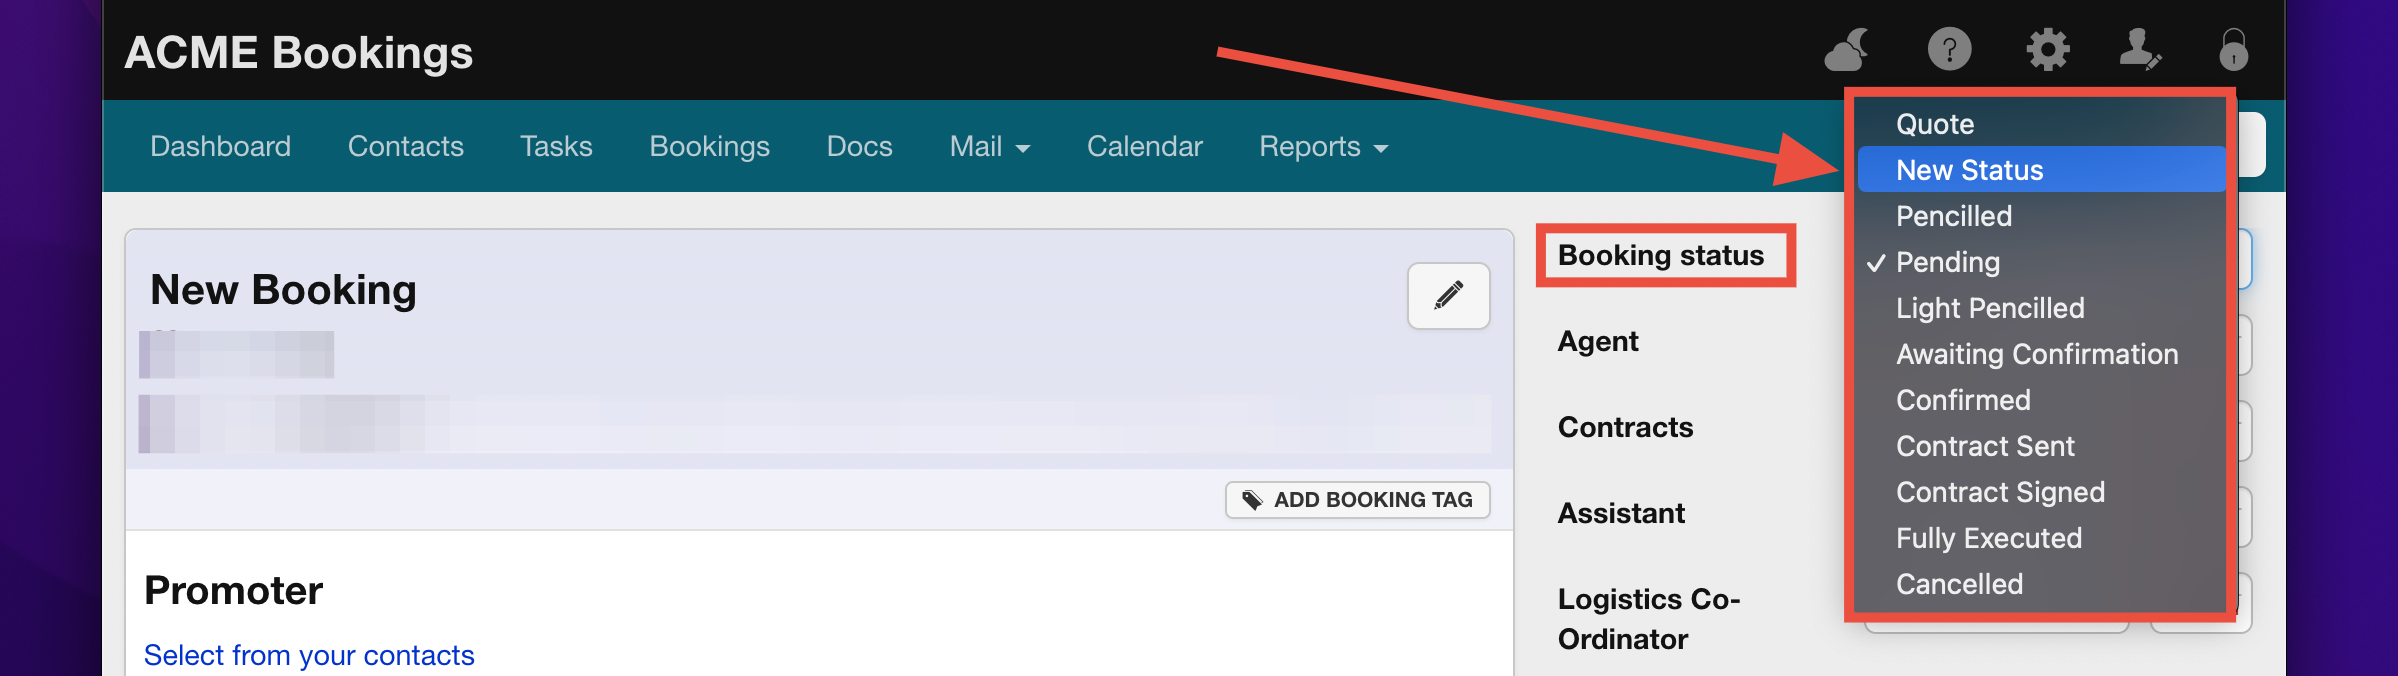
Booking Page: Adjust the status within the booking page.
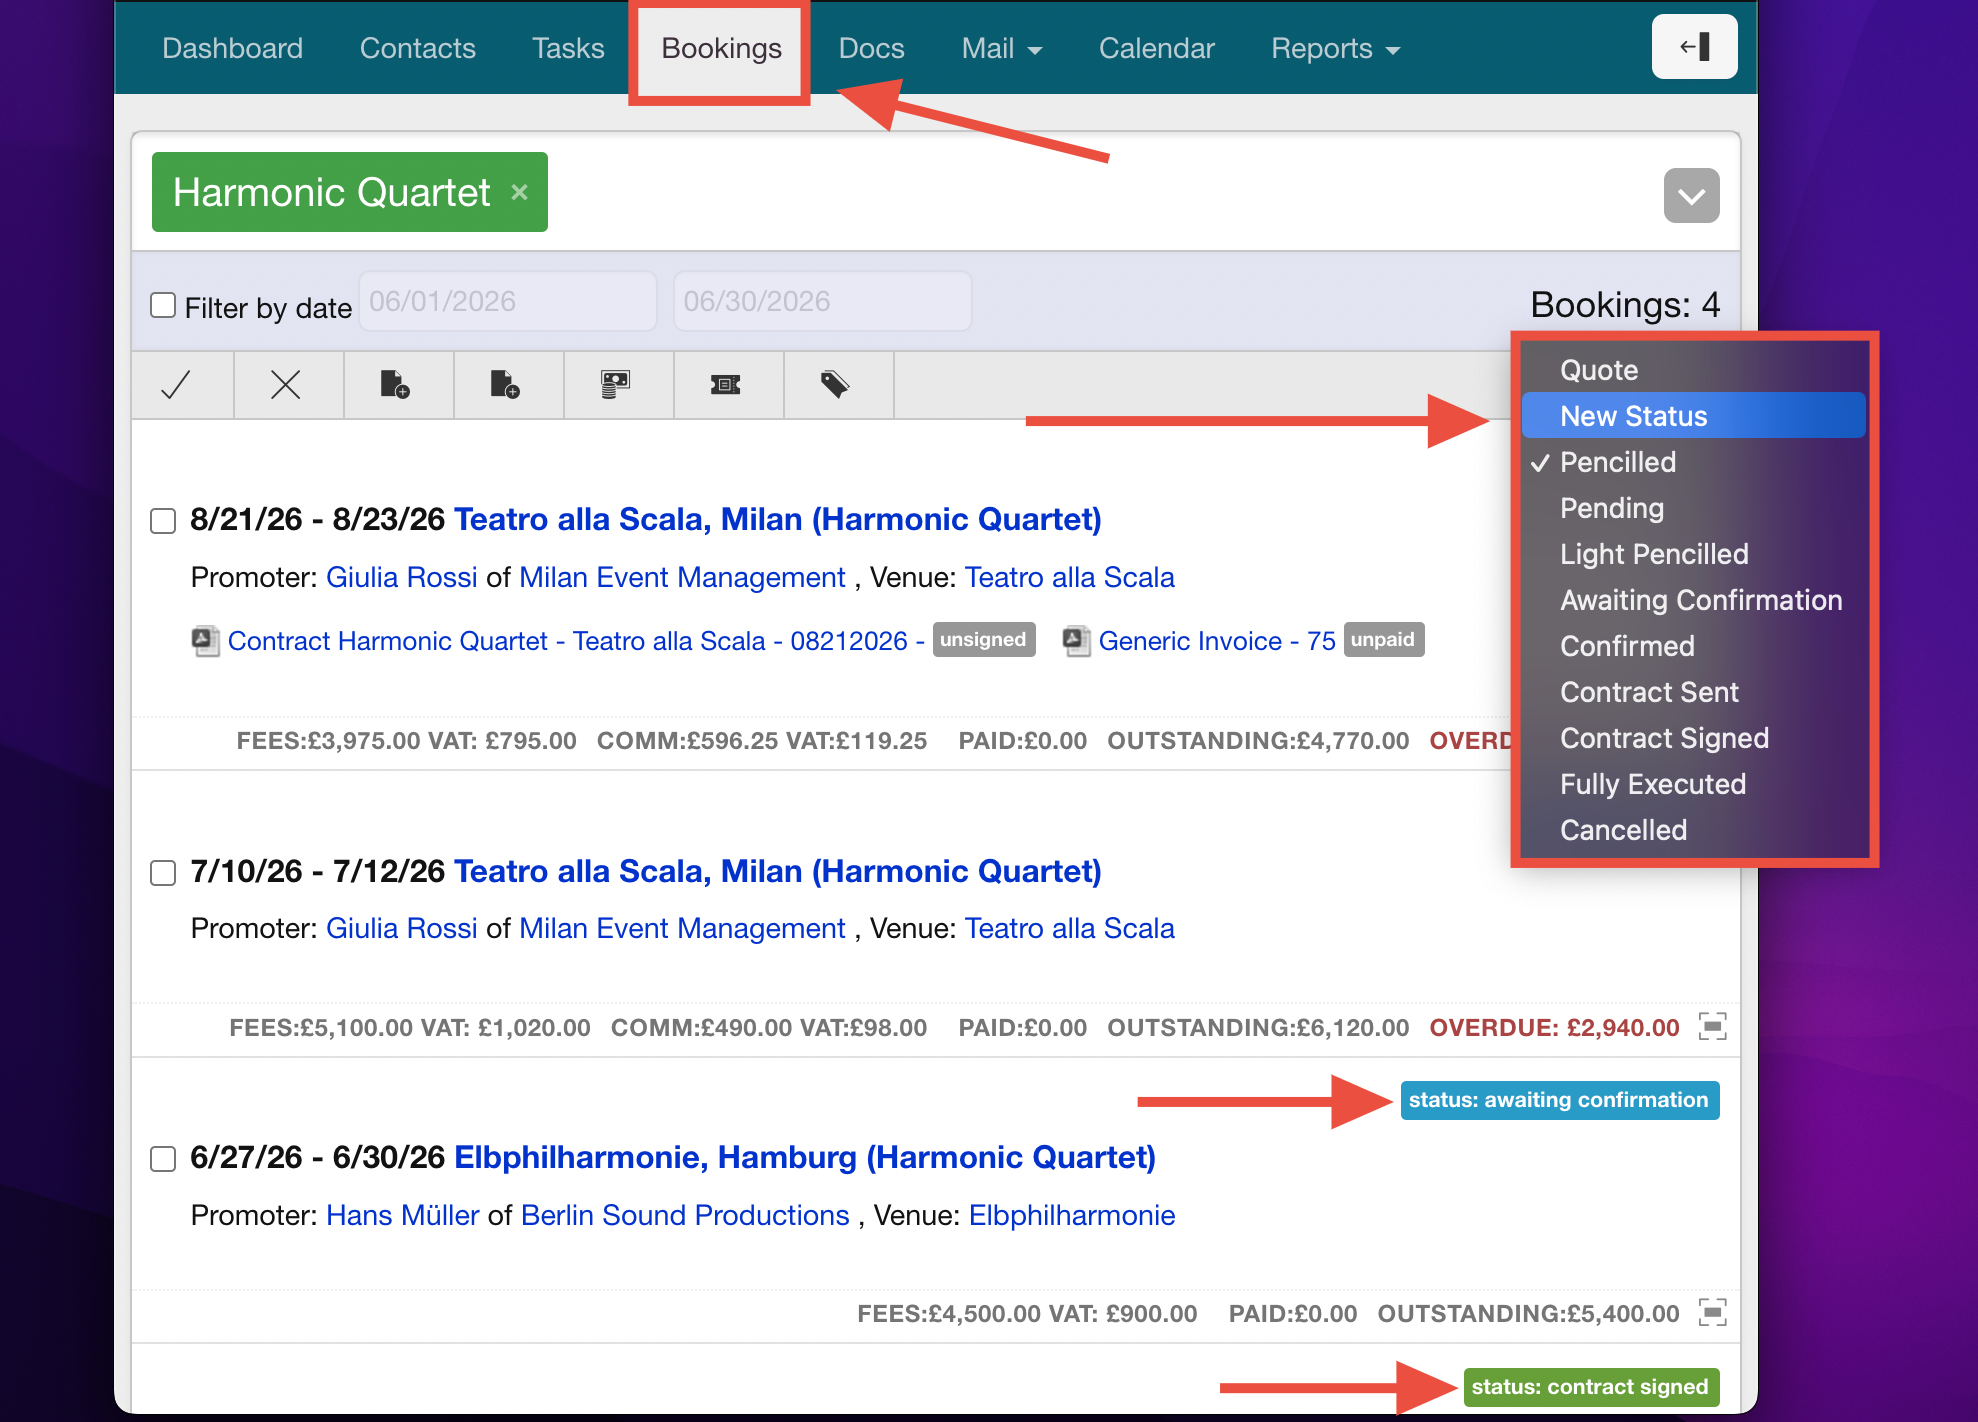
- The Bookings Tab: Click on the status from the Bookings tab but change the status.
By setting up and using booking statuses and event types effectively, you’ll enhance your ability to manage your calendar, keep clients and artists informed, and ensure that Overture aligns with your workflows seamlessly.