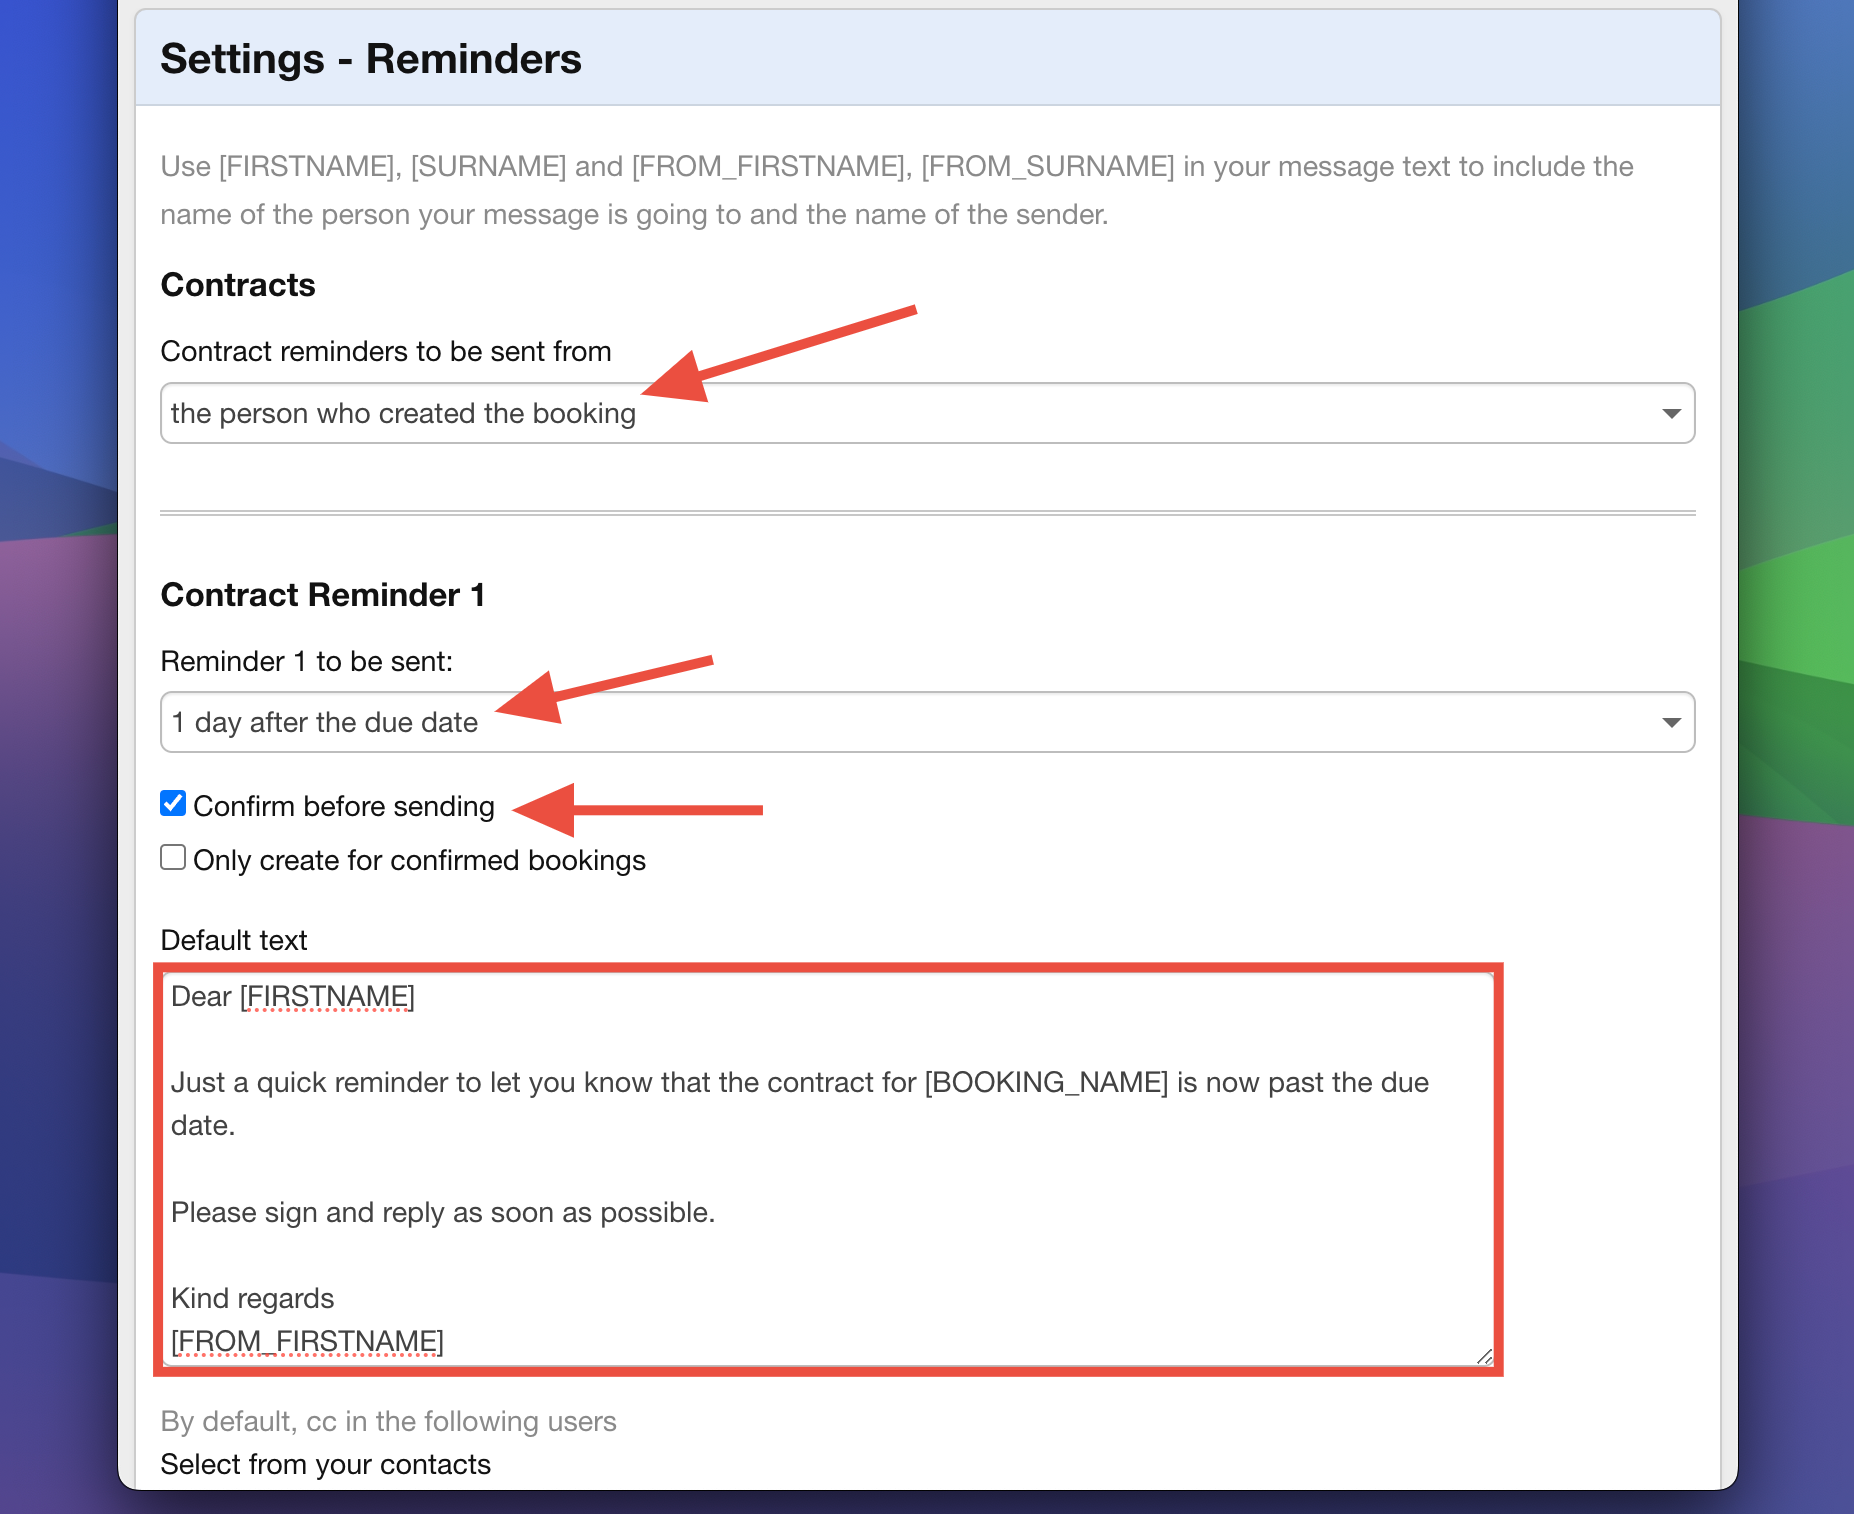
Automated reminders in Overture help you streamline workflows by sending timely email reminders for Contracts, Payments, Promoter Information Requests, and Contact Update Requests. You can fully customise these reminders, including the sender, their content, timing, and recipients to ensure nothing gets missed.

Setting Up Automated Reminders
Follow these steps to configure and customise automated reminders in Overture:
- Access the Settings Page
- Go to the Settings section in your Overture account.
- In the sidebar, select Reminders.
2. Locate the required Reminder type
- Scroll through the available options to find reminders for:
Contracts
Payments
Contact Update Requests
Promoter Information Requests
3.Configure Reminder Timing
- Choose who the reminder should be sent from, then
- Choose when the reminders should be sent. You can select options such as:
5 days before the due date
7 days after the due date
Remember you can add multiple reminders at staggered intervals to ensure important follow-ups are not missed. Each reminder type has 3 reminder settings.
4. Customise the Message Content
- Edit the Subject Line and Body of the reminder email.
- Use tags (placeholders) to dynamically insert booking or contact details into your email content. For example:
[BOOKING_NAME]: Inserts the booking name
[DUE_DATE]: Inserts the due date
For a full list of available placeholders, refer to this help article:
5. Set the Sender and Recipients
- Choose who the message is sent from using the dropdown list.
- Add CC and BCC recipients if other team members need to be notified.
6. Choose to Confirm Before Sending
- If you prefer to review reminders before they are sent, check the “Confirm Before Sending” box.
- This will place reminders in the Outbox, where you can manually review and send them.
7. Save Your Settings
- Scroll to the bottom of the page and click Save Settings to ensure your changes are applied.
Payment Reminders: Invoice-Based vs. Service Line Triggers
When setting up Payment reminders in the Reminders section, you’ll notice an additional dropdown menu with two options to control how payment reminders are triggered:

- “Reminders will be triggered for each invoice”
- With this option, reminders are sent only for invoices that have been generated. This is useful if you want reminders to align specifically with invoiced amounts rather than individual service lines.
2. “Reminders will be triggered for each service line on the booking, regardless of whether it has an invoice or not”
- This option sends reminders for every service line on a booking. Use this when you want to ensure all services (e.g., fees, expenses) are accounted for, even if an invoice hasn’t been created.
Tip: Select the option that best suits your workflow. If your process relies heavily on invoices, the second option is likely the better choice. However, for bookings where services are tracked individually, the first option ensures nothing gets missed.
Remember to save your settings after making any changes to avoid losing your updates!
