Welcome to Overture! This guide will walk you through the process of adding a new booking to your account. The Calendar is the best place to start, as it provides a visual representation of all your bookings and allows for easy management.
Accessing the Calendar
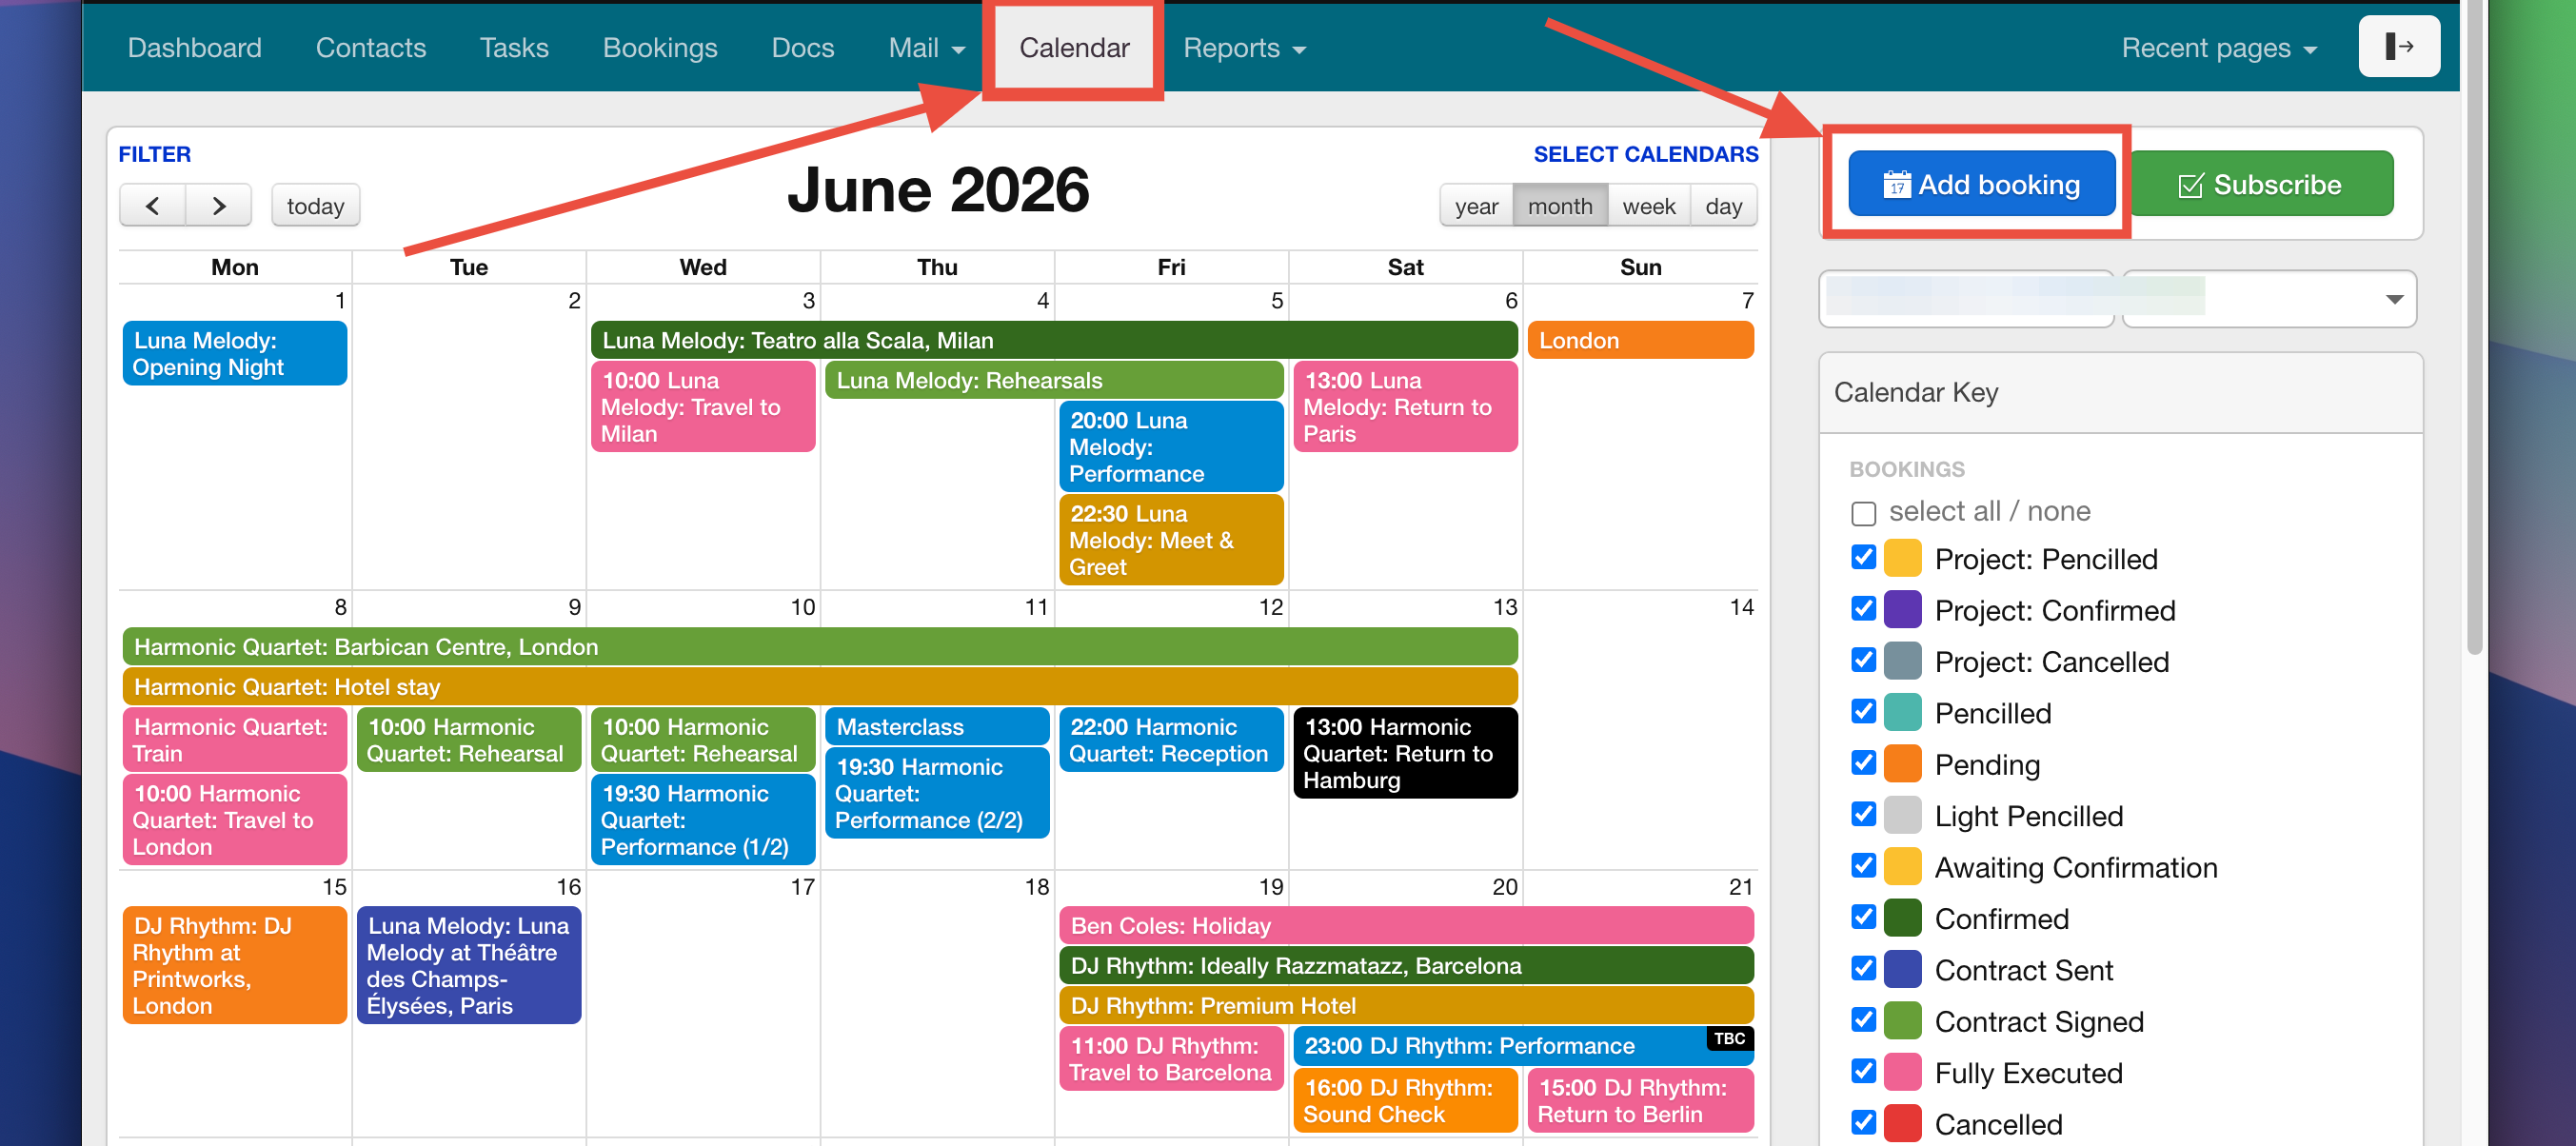
Navigate to the Calendar tab in the top menu. Here, you’ll see a sidebar with the different booking statuses which you should have set up by now (See ‘Getting Started 1’ for more info) . The Add booking button allows you to create a new booking, but the easiest way is to add it directly to the calendar.
Selecting an Artist and Adding a Booking
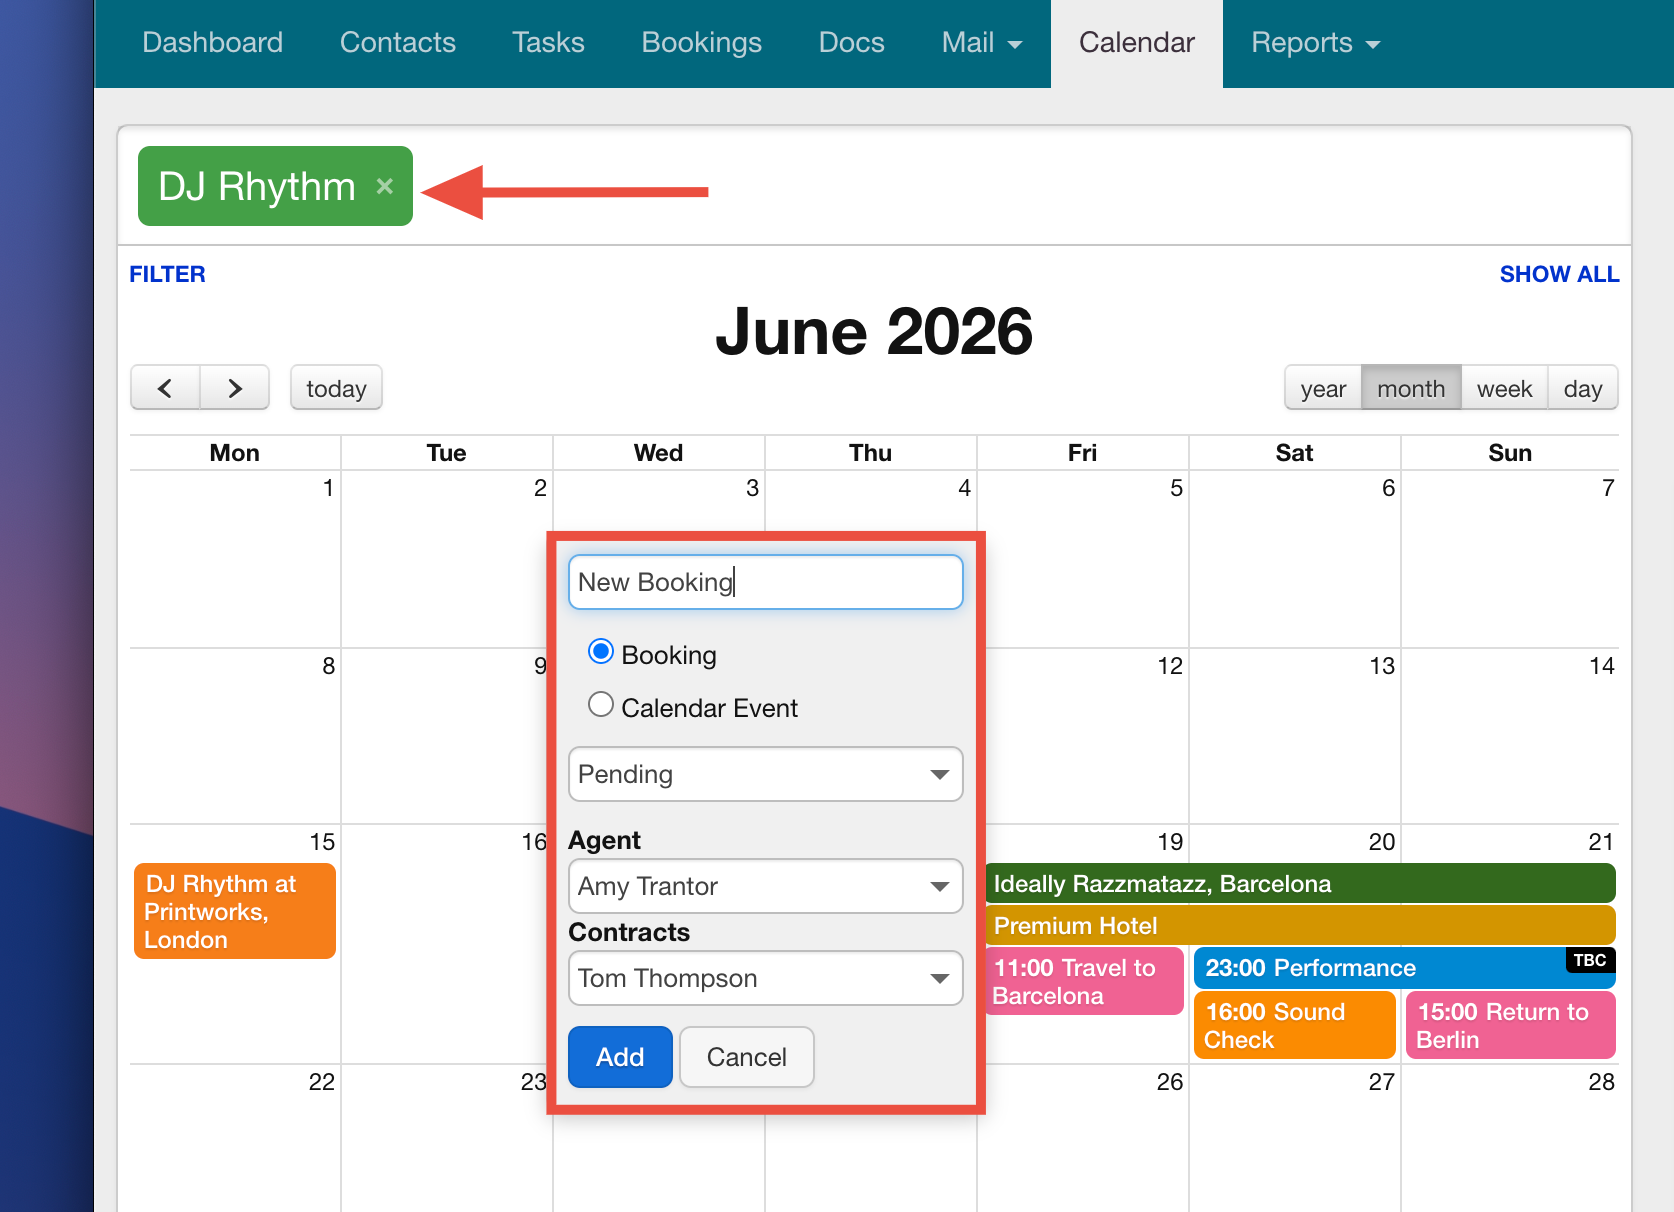
Before adding a booking, ensure the correct artist’s calendar is displayed by searching for their name in the search bar (to open the search bar click ‘SELECT CALENDARS’). Once you’ve added an artist to the search bar, their existing bookings (if any) will appear.
To add a booking:
– Click on the date you need or click and drag to highlight multiple days.
– A booking form will appear where you can enter key details.
– Set the booking type and status (e.g., Pencilled, Confirmed).
– Assign yourself or another team member as the agent handling this booking.
– Click Add to finalise.
Once saved, the booking will appear on the calendar in the colour assigned to its status.
Managing Booking Information
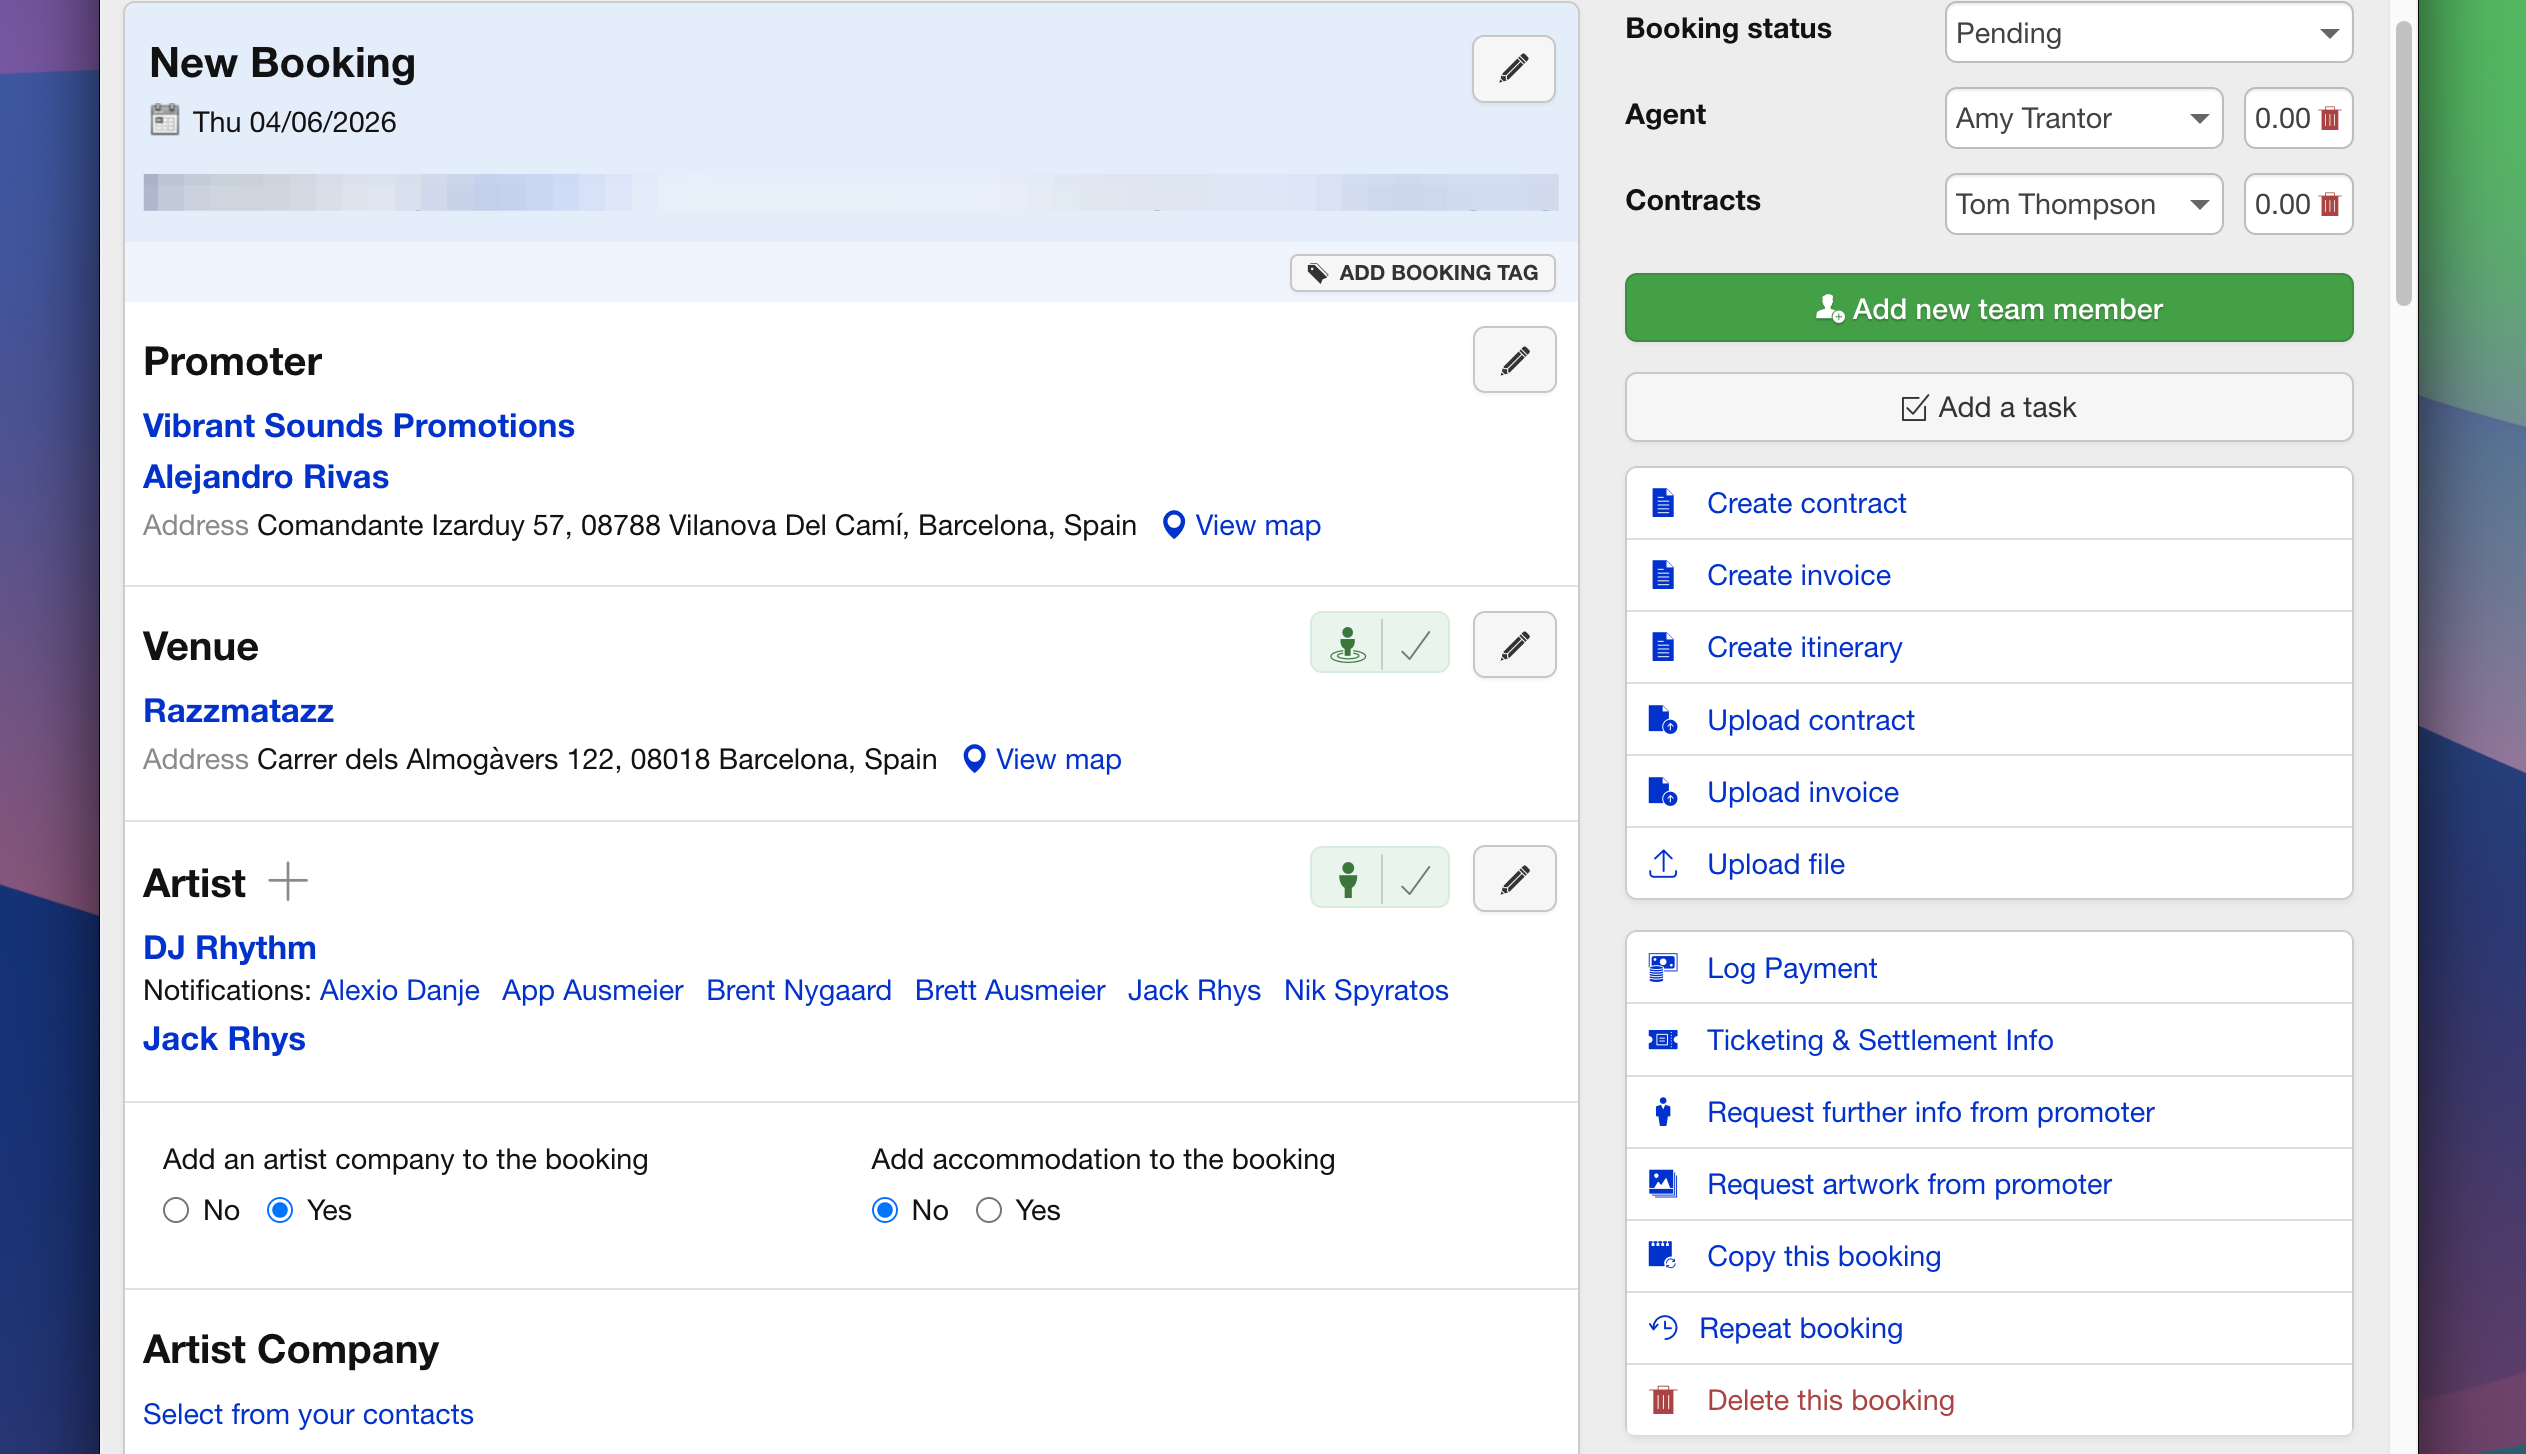
Each booking has a dedicated Booking Page where all relevant details are stored. You can access this page by clicking on a booking in the calendar.
The main section on the Booking Page provides access to:
– General Booking Details
– Financials
– Documents and Notes
– Notifications
While it may seem like a lot of options at first, don’t worry—we’ll go through each one in future guides.
Adding Booking Details
Start by entering the Promoter details:
– Search for the company name and select a contact.
– Alternatively, enter the contact name first, and their associated company will populate automatically.
– Click Save Section after making changes.
The artist field is pre-filled since the booking was added via the artist’s calendar.
Overture also shows who will receive notifications about this booking. To customise, click Edit Notifications and select/deselect recipients.
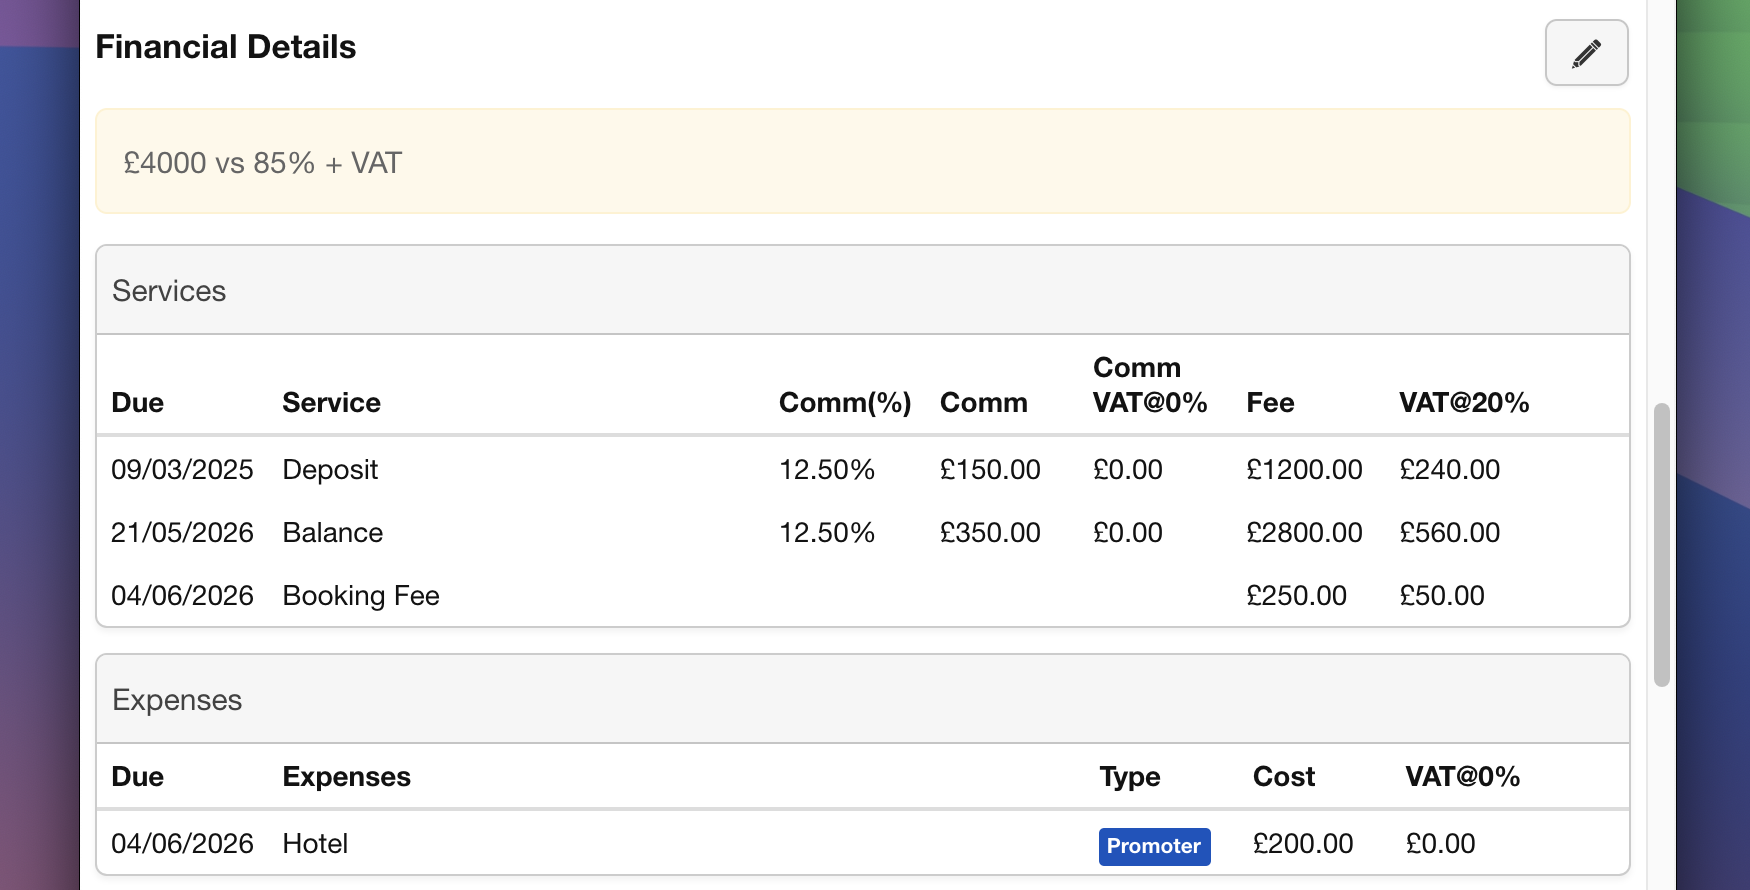
Entering Financial Details
The Financials section allows you to set up deal terms. This is where you define payment structures, commissions, and expenses.
For example, you can:
– Add a deposit and balance with a set commission percentage.
– Apply sales tax or VAT to fees or commissions.
– Add expenses, such as travel costs, and assign who will cover them (artist, promoter, etc.).
Once saved, the financial table will automatically total the amounts for easy tracking.
To change the ‘deal type’ please see this full guide on how to change the structure of the deal:
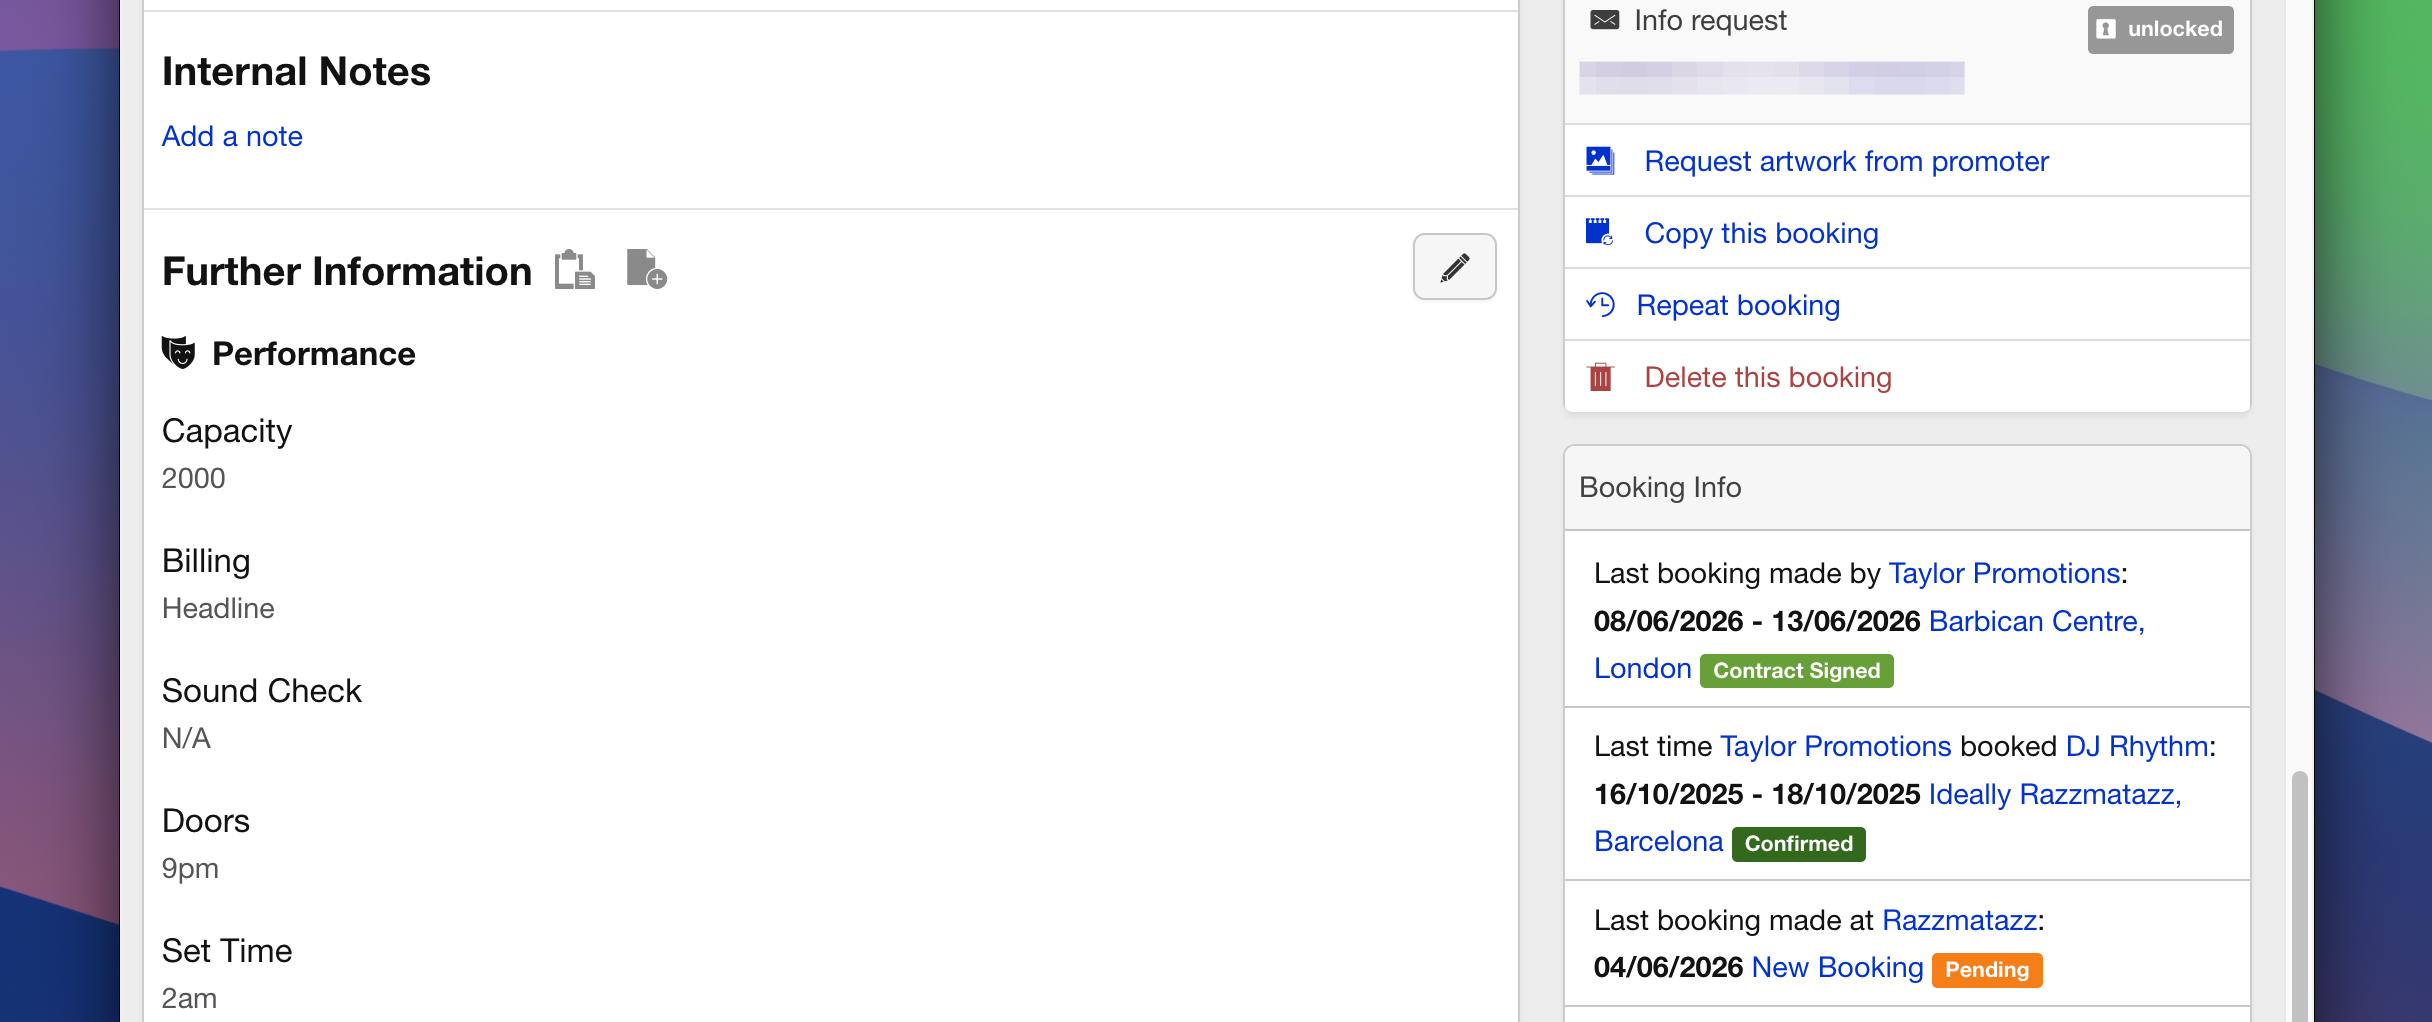
Additional Booking Information
Further down the booking page, you’ll find:
– Internal Notes: For team communication.
– Further Information Fields: Customisable fields for additional details.
These sections can be filled in as needed to keep all booking-related information in one place.
Next Steps…
That’s it for adding a basic booking! You can now:
– View and manage bookings directly from the calendar.
– Update booking details as information becomes available.
– Generate contracts and invoices from the booking page.
For more advanced features, check out our guides on contracts, invoices, and task management. Happy booking!