Contracts are a vital part of the booking process, formalising agreements between artists, promoters, and agencies. Overture allows you to generate contracts efficiently, ensuring accuracy and consistency across all bookings. This guide will walk you through the process of creating, customising, and managing contracts.
Where to Create a Contract
Contracts in Overture are created directly from the Booking Page. Each booking contains all relevant details, allowing you to pull in information automatically when generating a contract.
To create a contract:
1. Navigate to the Booking Page for the relevant booking.
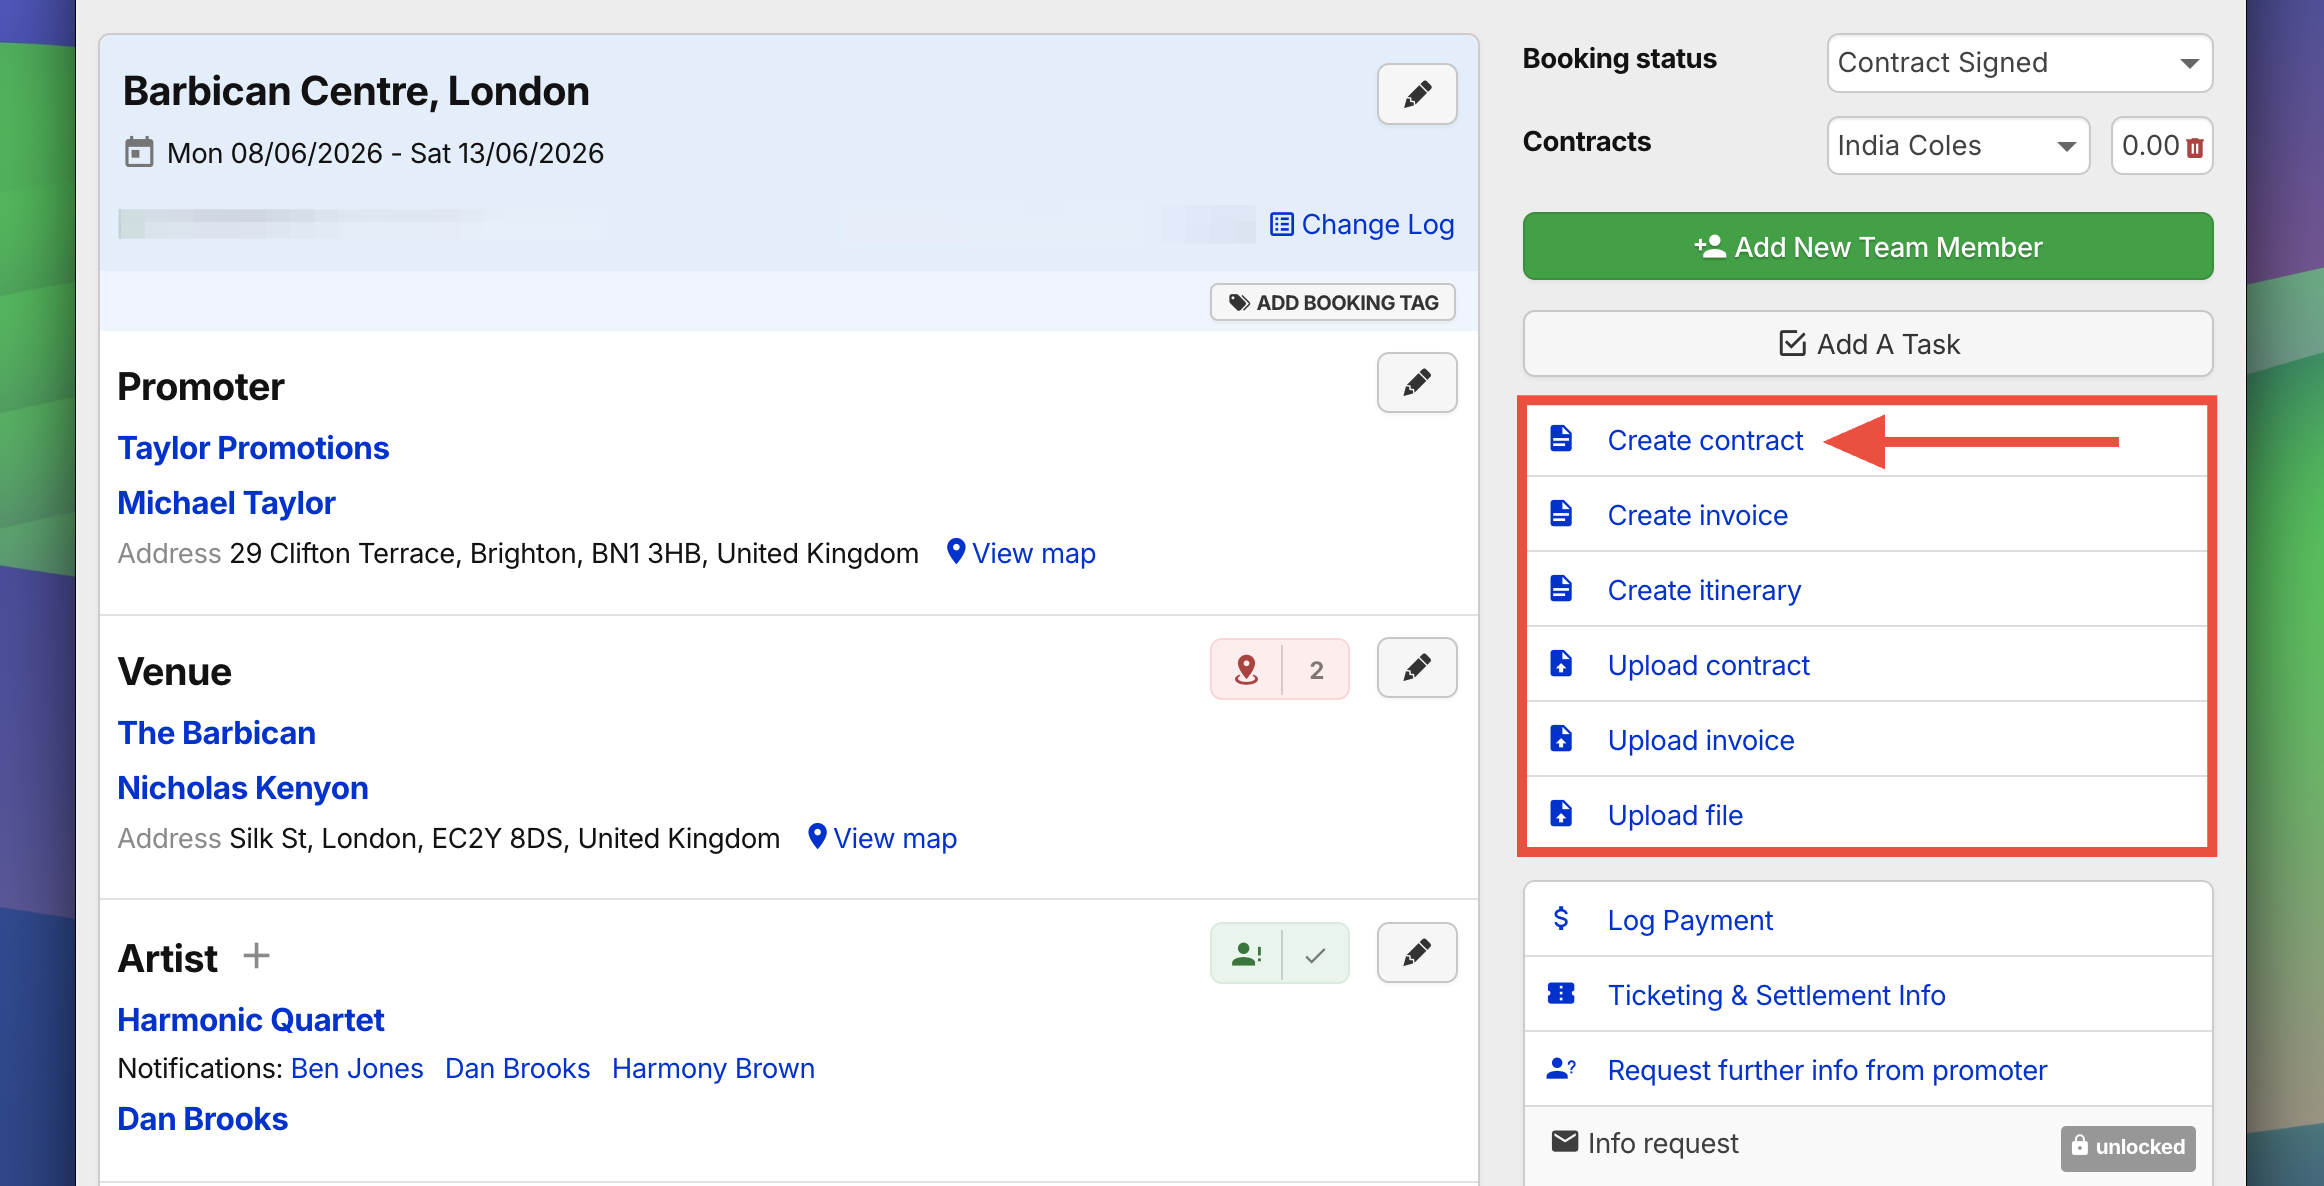
2. Locate the Documents section to the right of the page.
3. Click Create contract to begin generating a new contract.
Selecting a Contract Template
Overture allows you to use predefined contract templates or customise contracts as needed.
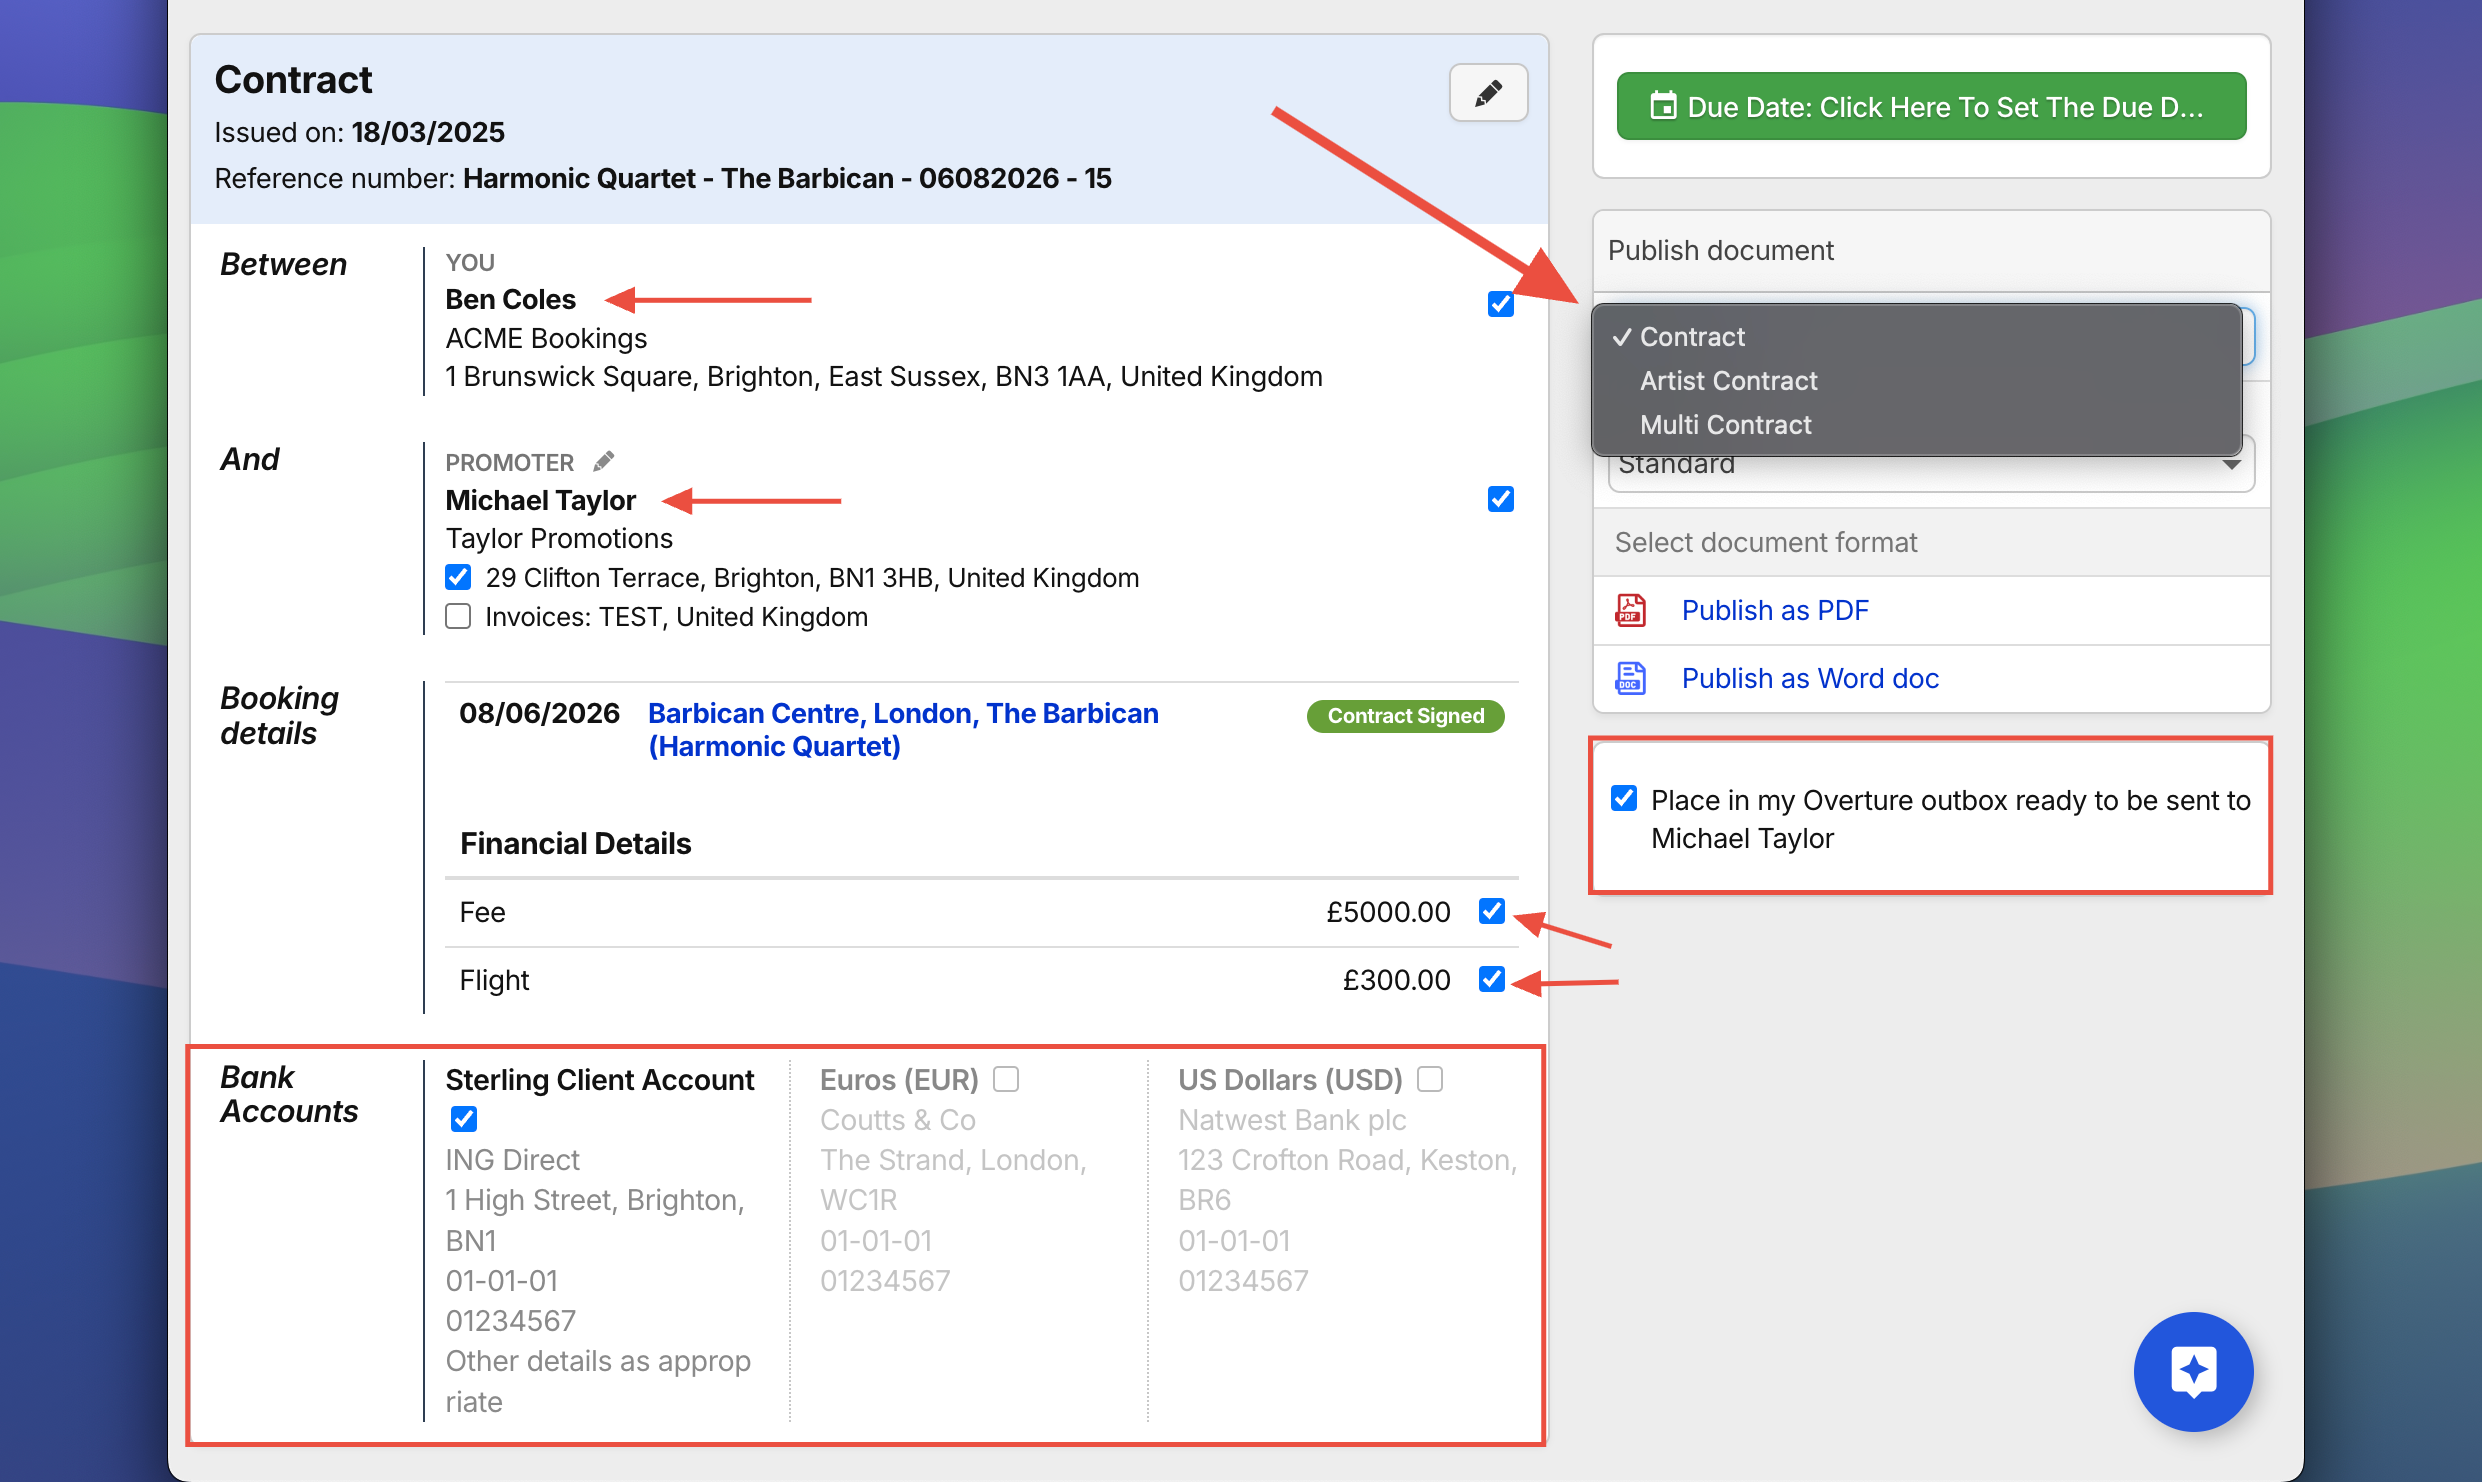
First, choose who the contract is between, there are three options:
- Agency > Promoter
- Agency > Artist / Artist Company
- Promoter > Artist / Artist Company

Customising the Contract
Before finalising the contract, review and adjust key details:
– Booking Details: Ensure that artist, promoter, venue, and date details are correct.
– Financial Terms: Verify that the agreed fee, payment structure, and commission details are accurate. Add/remove necessary service lines.
– Select template: If you have more than one contract version, choose from the dropdown.
– Place in my Overture outbox: to create an email in the Overture outbox to be sent to the other parties of the contract.
– Bank Accounts: Select the correct bank account if it isn’t selected by default.
Publishing the Contract
Once the contract is ready, it needs to be published before sending or downloading.
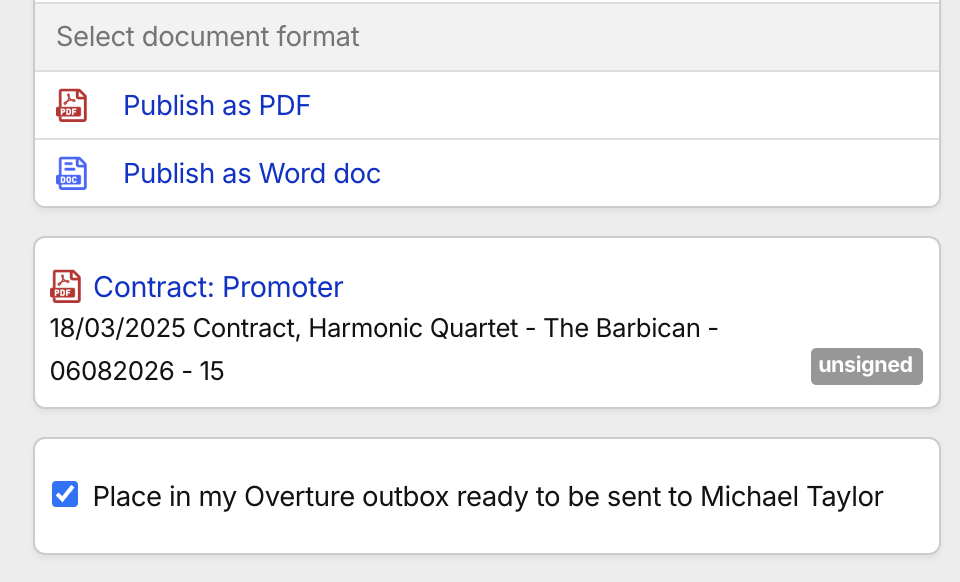
- Click Publish Contract to generate a finalized version.
- The contract will be available as a PDF or Word document for further use.
- If the ‘Place in my Overture outbox…’ option is ticked, the contract will be saved in the Outbox, ready to send.
- If not, wait for the contract to be generated, then click on it to view and download it manually.
Tracking Contract Status
Keeping track of contracts ensures that agreements are finalized before an event takes place.
- Contracts in Overture have a status indicator (Unsigned, Signed).
- Use the Unsigned Contracts Report to easily identify outstanding contracts. View the guide here:
- Set up Reminder Emails to automatically follow up on unsigned contracts. Learn how to set up reminders here:
Editing or Reissuing a Contract
If adjustments need to be made after a contract has been created, rather than creating more versions of the contract you can edit and re-publish the current version with any changes/updates.
– Return to the Booking Page and locate the contract.
– Click the ‘Pencil/edit’ icon to return to the publish page.
– Publish in your preferred format.

Next Steps…
Now that you know how to create and manage contracts in Overture, you can:
– Start generating contracts for upcoming bookings.
– Use templates to speed up contract creation.
– Track contract status and ensure agreements are finalized before events.
For more details, visit the Overture Help Center or contact support.