You can use the Overture Campaign monitor integration to setup email campaigns.
IMPORTANT
To get started you will need to contact support since the integration works through a central Overture Campaign Monitor account and we will need to include your domain in that account.
support@curiousferret.com
Once we have set the account up you will receive and email with an invitation to sign up.
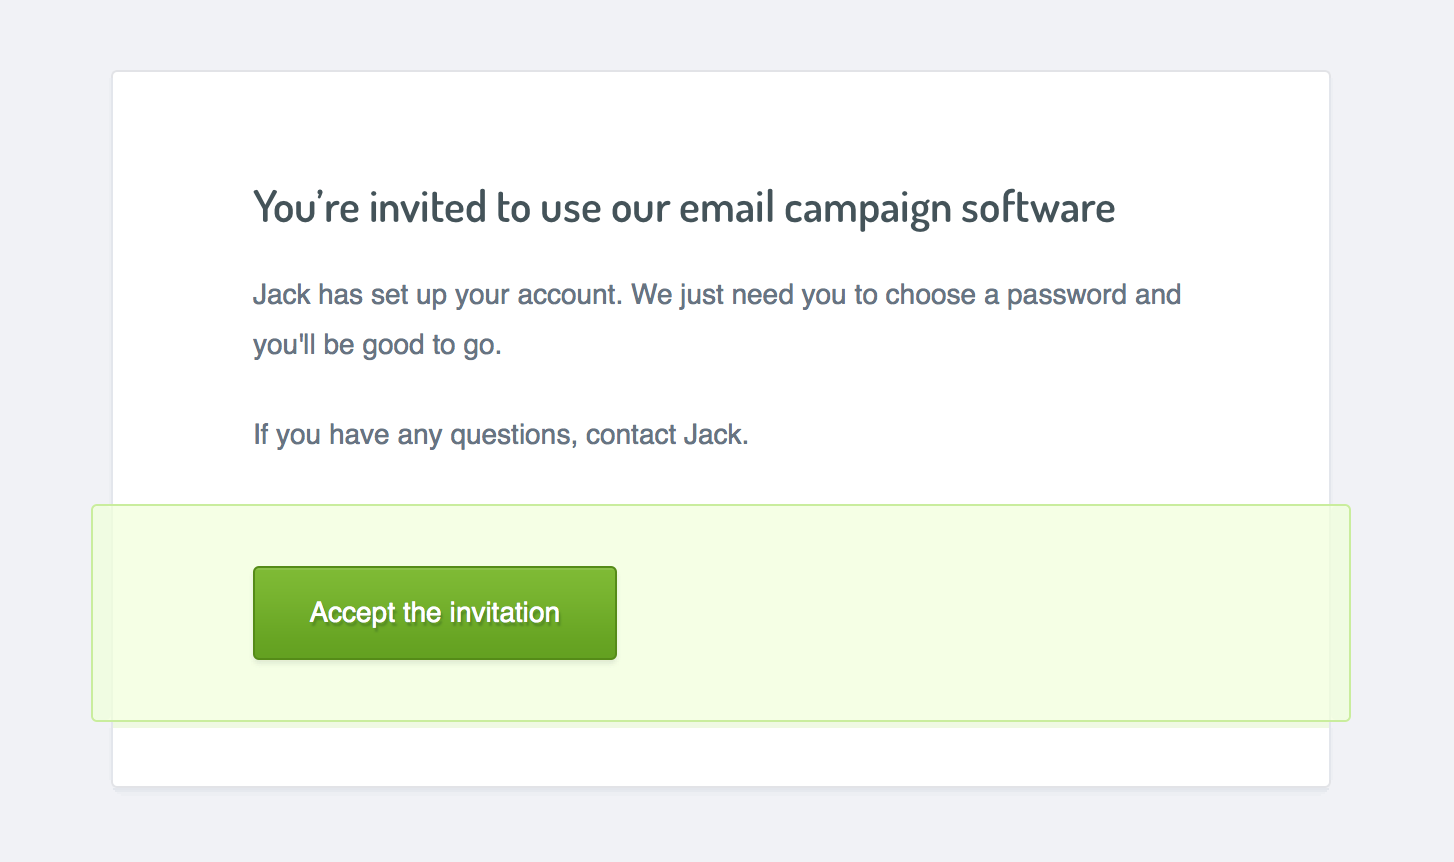
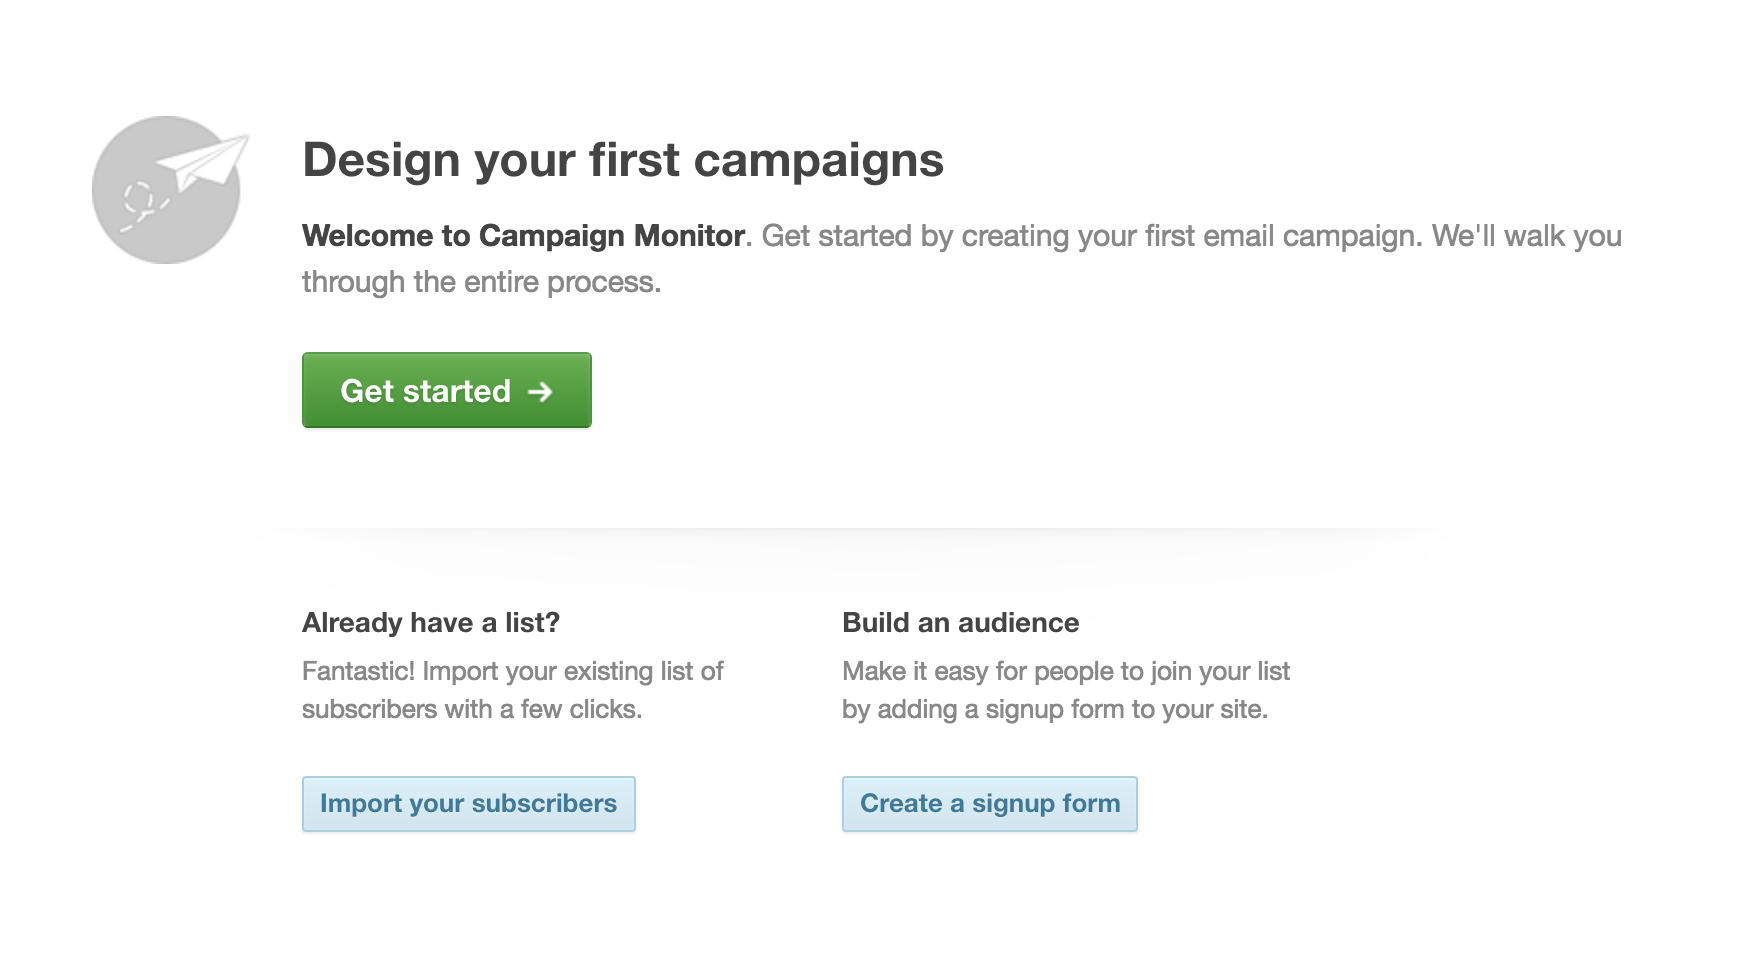
Simply click Accept The Invitation in the email to head over to the campaign monitor site where your name and email address will already be present you will just need to create a new password for your account. This will then log you in ready to create your first email.
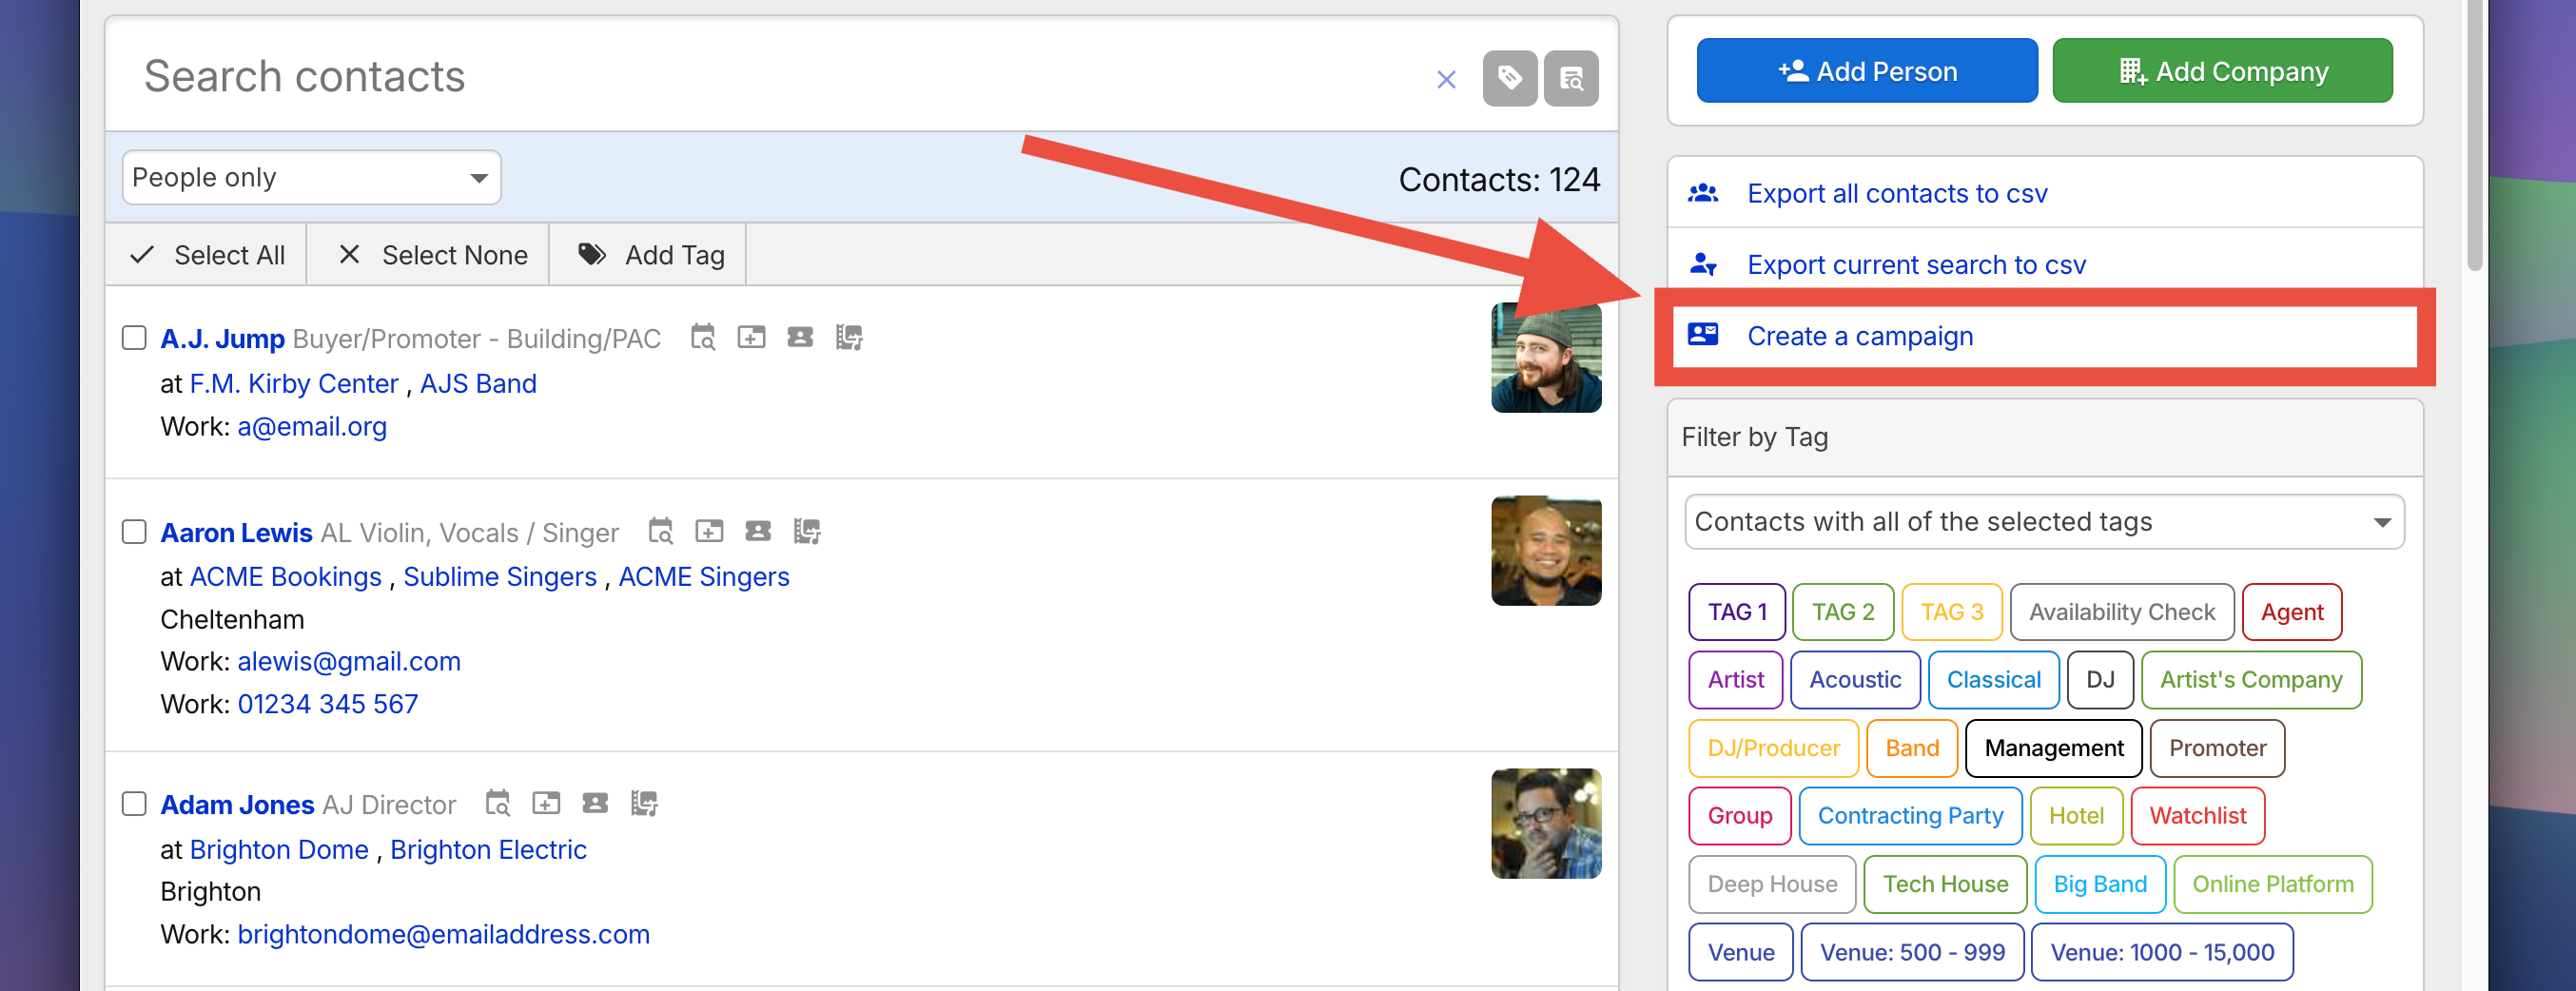
Before you go any further you will need to import your contacts into Campaign Monitor from Overture by adding the to what Campaign Monitor call a segment.
Head back to your Overture account and click on the Contacts Tab. In the sidebar select Create a Campaign.
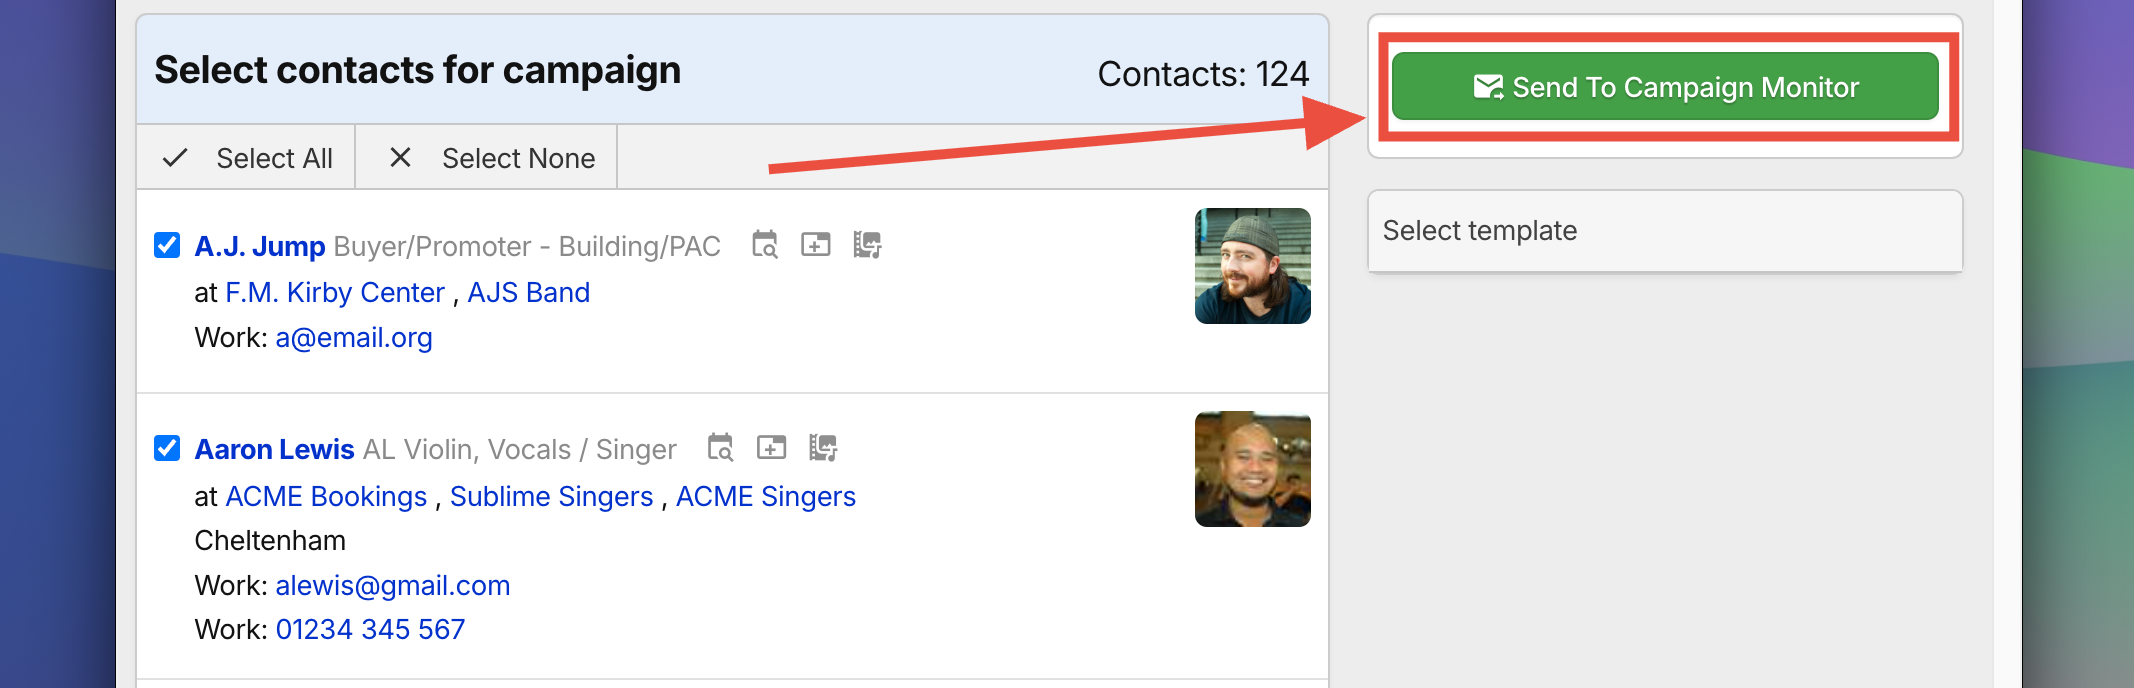
Make sure in this next screen that the required contacts that you wish to create a segment from are selected, then click ‘Send To Campaign Monitor’
The segment should represent the contacts that you would like on the mailing list, for example you may want to send a series of emails to only your Promoters.
The options presenter in the next screen are presented below. You can either add this selection of contacts to an existing segment, or you can create a new one. In this example, we are creating a new one:
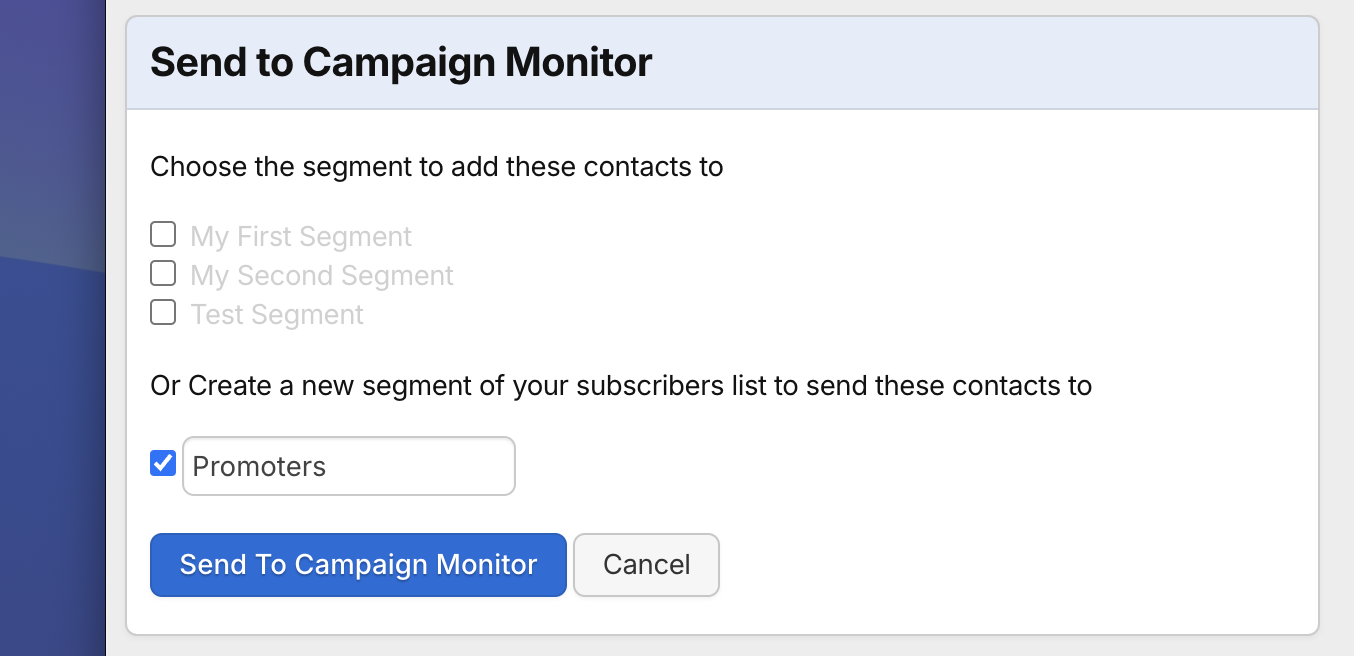
To complete the process click the send to campaign monitor button. This will start the process of transferring the contacts. This process will usually take around 15 minutes to complete so you wont see the new contacts appear in Campaign Monitor straight away.
Next create your email within Campaign Monitor the best place to find out more about this is the Campaign Monitor help centre which can be found here https://help.campaignmonitor.com/support
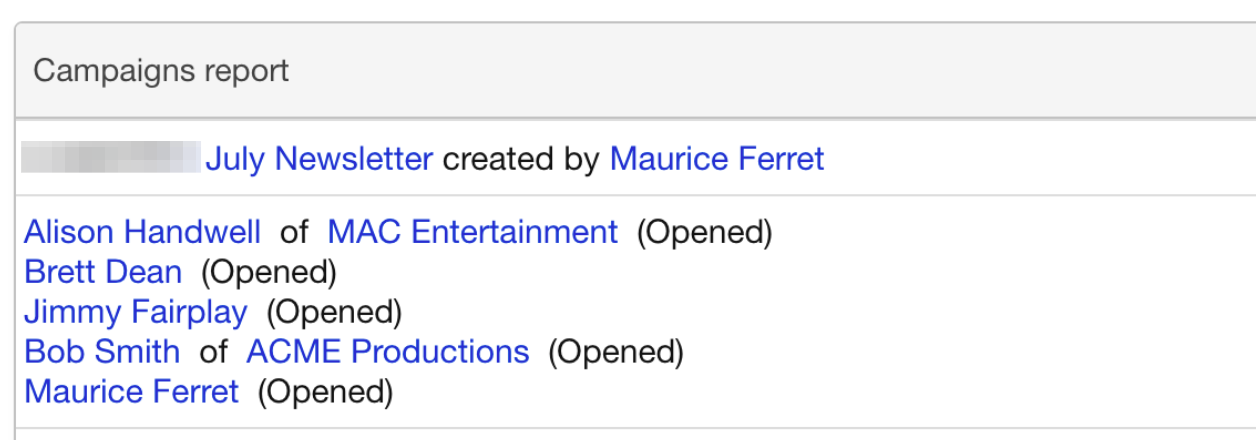
Once your emails have been sent you can head over to the reports section in Overture where you can see the Campaigns option in the reports menu. On the campaigns report page you can filter by contact name and date range to list all the reports sent during that period click the title to open them up and see the report information including if they have been ‘opened’ or not.